1. Introduction
This manual provides detailed instructions for the safe and effective use, setup, maintenance, and troubleshooting of the MOTOOS 22 Ton Air Hydraulic Floor Jack. This heavy-duty air hydraulic jack is designed for lifting trucks, trailers, buses, and other large vehicles in industrial and automotive service environments. Please read this manual thoroughly before operation to ensure proper use and to prevent injury or damage.

Image 1.1: MOTOOS 22 Ton Air Hydraulic Floor Jack
2. Safety Information
WARNING: Failure to follow these safety instructions may result in serious injury or property damage.
- Always wear appropriate personal protective equipment, including safety glasses and gloves.
- Never exceed the rated capacity of 22 tons.
- Use this jack only on a hard, level surface.
- Ensure the vehicle is properly chocked and cannot roll before lifting.
- Once the load is lifted, immediately support it with appropriate jack stands before performing any work. Never rely solely on the hydraulic jack for support.
- Keep hands and feet clear of the jack and the load during lifting and lowering operations.
- Do not modify the jack or use it for purposes other than its intended design.
- Maintain a minimum air pressure of 90 psi and a maximum of 145 psi for optimal performance and safety.
- Inspect the jack for damage or leaks before each use. Do not use if damaged.
3. Package Contents
Carefully unpack all components and verify that all items are present and undamaged. If any parts are missing or damaged, contact customer support immediately.
- Main Air Hydraulic Floor Jack Unit
- Handle Assembly (multi-piece)
- Air Hose with Quick Connect Fitting
- Saddle Extensions (various sizes: 20mm, 25mm, 60mm, 100mm)
- Handle Lock Lever

Image 3.1: Included Components
4. Specifications
| Feature | Specification |
|---|---|
| Material | Q235 Steel |
| Load Capacity | 22 Tons |
| Minimum Saddle Height (without adaptor) | 9 inches |
| Maximum Saddle Height | 17-11/16 inches |
| Stroke | 4-1/2 inches |
| Handle Length | 47 inches |
| Wheel Diameter | 8 inches |
| Air Pressure Range | 90 - 145 psi |
| Air Inlet Fitting | 2.1" diameter, 4-3/4" length |
| Air Hose | 3/8" x 48" long with crimped hose fittings |
| Product Dimensions (L x W x H) | 25.59 x 14.17 x 9.25 inches |
| Item Weight | 64.6 pounds |

Image 4.1: Detailed Product Specifications
5. Setup
- Assemble the Handle: Connect the sections of the handle assembly. Secure them firmly according to the manufacturer's instructions. Ensure the handle lock lever is correctly installed.
- Attach Air Hose: Connect the air hose to the jack's air inlet fitting. Ensure a secure connection to prevent air leaks.
- Install Saddle Extension: Select the appropriate saddle extension (20mm, 25mm, 60mm, or 100mm) based on the required lifting height and attach it to the jack's saddle.
- Connect to Air Supply: Connect the quick-connect fitting on the air hose to a compressed air supply capable of providing 90-145 psi.

Image 5.1: Handle Assembly

Image 5.2: Air Control Valve

Image 5.3: Saddle Adapters
6. Operating Instructions
6.1 Lifting a Vehicle
- Prepare the Vehicle: Park the vehicle on a firm, level surface. Engage the parking brake and chock the wheels that will remain on the ground.
- Position the Jack: Roll the jack under the vehicle, positioning the saddle directly under the designated lifting point as specified by the vehicle manufacturer. The long handle allows for easier positioning under vehicles with long overhangs.
- Connect Air Supply: Ensure the air hose is securely connected to the jack and the air compressor is providing the recommended pressure (90-145 psi).
- Initiate Lift: To lift the vehicle, activate the air control lever on the handle. The jack will begin to raise the load. Monitor the lifting process carefully.
- Secure the Load: Once the desired height is reached, immediately place appropriately rated jack stands under the vehicle's frame or axle at the manufacturer's recommended support points.
- Lower Jack Slightly: Slowly lower the jack until the vehicle rests securely on the jack stands. The jack should remain in contact with the vehicle's lifting point, but not bear the full load.

Image 6.1: Lifting Range

Image 6.2: Long Handle for Easy Positioning
6.2 Lowering a Vehicle
- Raise Slightly: Lift the vehicle slightly off the jack stands using the jack.
- Remove Jack Stands: Carefully remove the jack stands from under the vehicle.
- Lower the Jack: Slowly turn the release knob on top of the handle counter-clockwise to lower the jack. Control the descent rate to ensure a smooth and safe lowering process.
- Remove Jack: Once the vehicle is fully on the ground, remove the jack.
7. Maintenance
Regular maintenance is essential for the longevity and safe operation of your MOTOOS Air Hydraulic Floor Jack.
- Daily Inspection: Before each use, inspect the jack for any signs of damage, wear, or leaks. Check the air hose for cracks or fraying.
- Hydraulic Fluid: Periodically check the hydraulic fluid level. If low, replenish with a high-quality hydraulic jack oil. Refer to the jack's specific instructions for fluid type and filling procedure.
- Lubrication: Lubricate moving parts, such as wheels and pivot points, with general-purpose grease as needed.
- Cleaning: Keep the jack clean from dirt, grease, and oil. A clean jack is easier to inspect for potential issues.
- Storage: Store the jack in a clean, dry place when not in use. Lower the ram completely before storage.
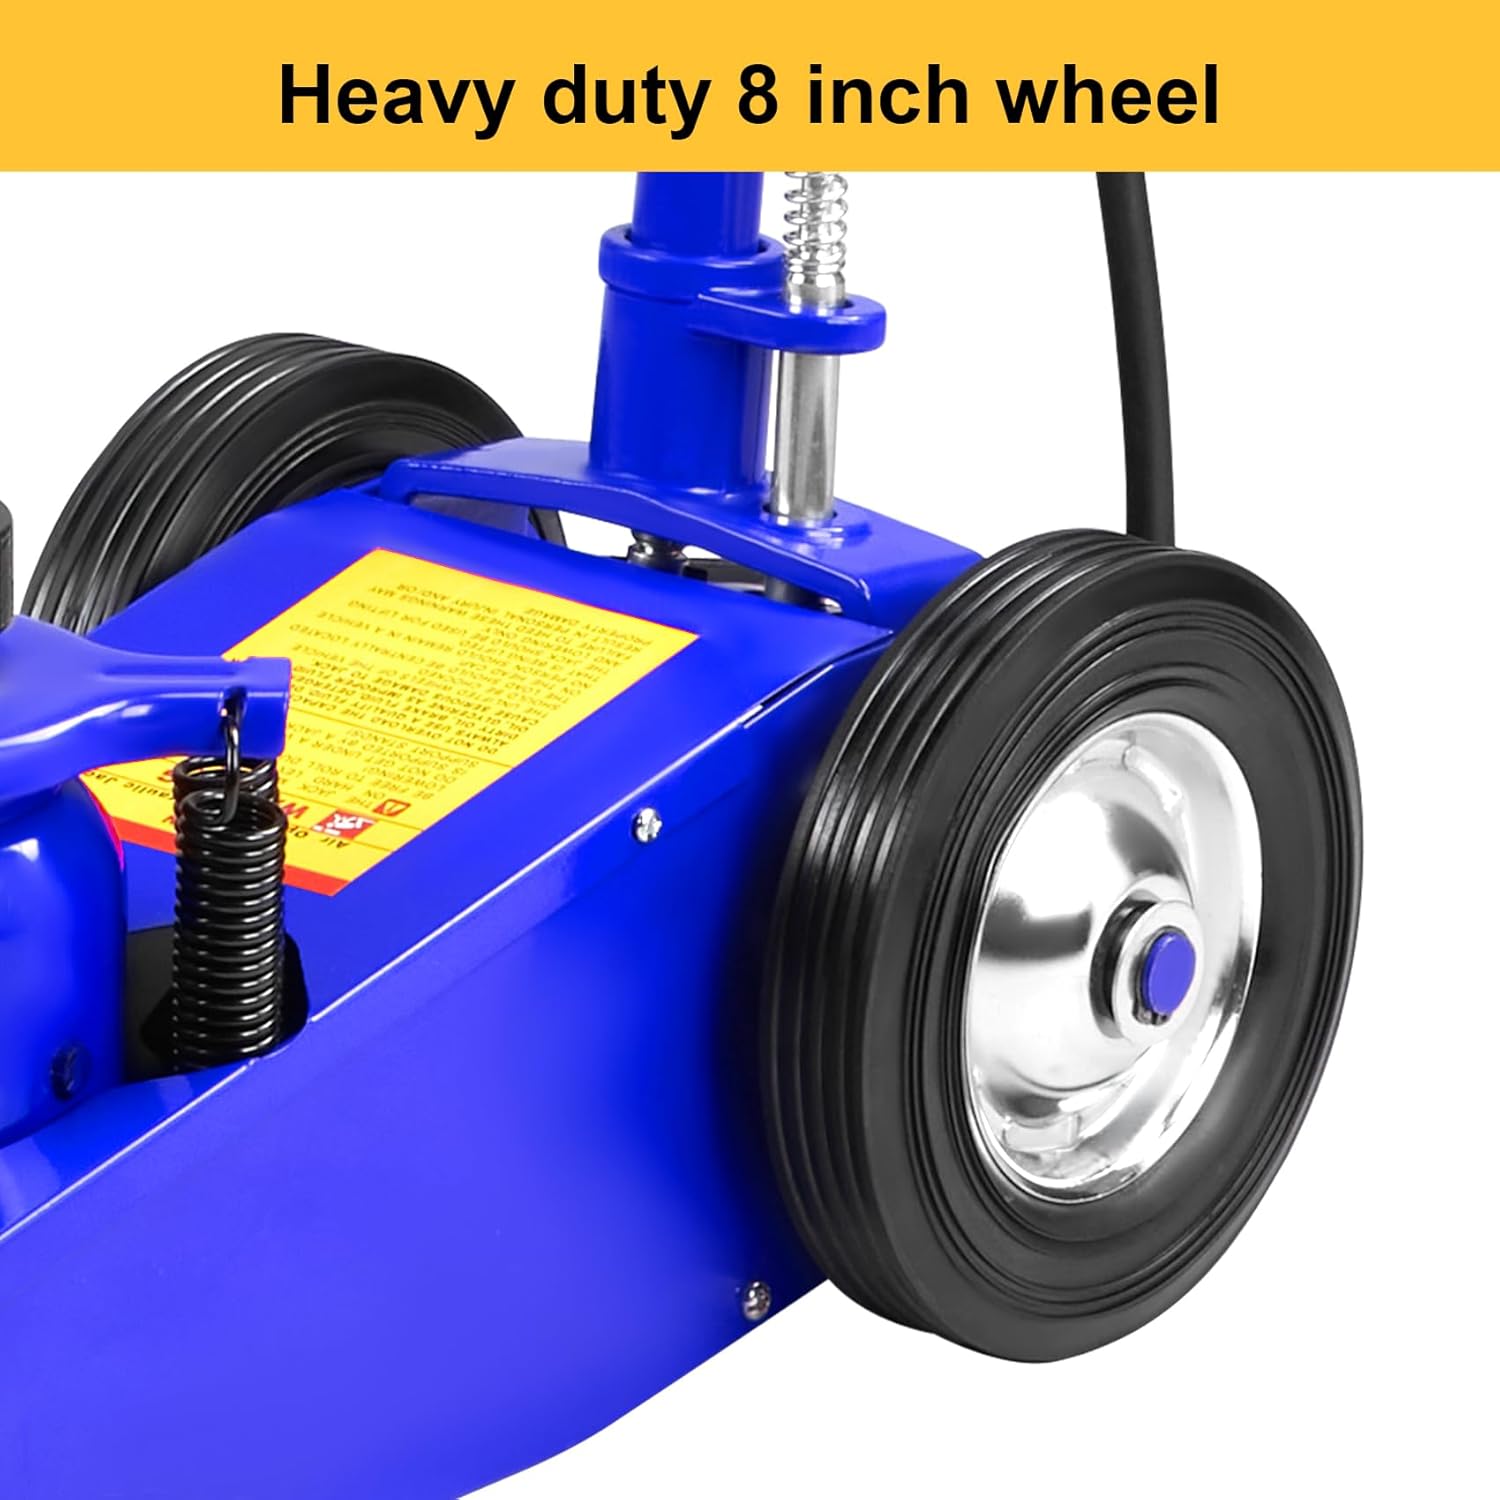
Image 7.1: Heavy-Duty Wheels

Image 7.2: Safety Valves
8. Troubleshooting
If you encounter issues with your MOTOOS Air Hydraulic Floor Jack, refer to the following common problems and solutions:
| Problem | Possible Cause | Solution |
|---|---|---|
| Jack will not lift | Insufficient air pressure Low hydraulic fluid level Release valve open Air in hydraulic system | Ensure air supply is 90-145 psi Check and refill hydraulic fluid Close release valve completely Bleed air from the system (refer to specific bleeding instructions if available) |
| Jack lifts slowly or erratically | Low hydraulic fluid level Air in hydraulic system Partial obstruction in air line | Check and refill hydraulic fluid Bleed air from the system Inspect air hose and fittings for blockages |
| Jack lowers under load | Release valve not fully closed Internal hydraulic leak Overload | Ensure release valve is fully closed Contact qualified service personnel Do not exceed 22-ton capacity |
| Air leaks | Loose fittings Damaged air hose or seals | Tighten all air fittings Inspect and replace damaged components |
9. Warranty and Support
For warranty information or technical support regarding your MOTOOS 22 Ton Air Hydraulic Floor Jack, please refer to the documentation included with your purchase or contact MOTOOS customer service directly. Keep your purchase receipt for warranty claims.
Manufacturer: Roadstar
Brand: MOTOOS