deleyCON MK-W-2
deleyCON Universal TV Wall Bracket Instruction Manual
Model: MK-W-2 | Brand: deleyCON
1. Introduction
This instruction manual provides detailed guidance for the safe and proper installation, operation, and maintenance of your deleyCON Universal TV Wall Bracket. Please read this manual thoroughly before beginning installation and keep it for future reference. This bracket is designed to securely mount flat-panel televisions (LCD, LED, OLED) ranging from 32 to 65 inches, with a maximum weight capacity of 75 kg (165 lbs) and VESA compatibility up to 400x400mm. It features a tilt function for optimal viewing angles.

Figure 1.1: deleyCON Universal TV Wall Bracket (Model MK-W-2).
2. Safety Information
WARNING: Failure to read and follow these instructions can result in serious personal injury, property damage, or voiding of your warranty. If you do not understand these instructions, or have doubts about the safety of the installation, please contact a qualified installer.
- Ensure the wall structure can safely support the combined weight of the bracket and the television. A minimum of three times the combined weight is recommended.
- Do not exceed the maximum weight capacity of 75 kg (165 lbs).
- This product is intended for indoor use only.
- Use only the provided mounting hardware. If your installation requires different hardware, consult a professional.
- Always use a stud finder to locate wall studs for secure mounting. If mounting to concrete or brick, use appropriate anchors (not always included).
- Install the bracket away from heat sources, direct sunlight, and areas with high humidity.
- Keep children and pets away during installation.
- Two people are recommended for installation to ensure safety.
- Check all connections and fasteners periodically to ensure they remain secure.
3. Package Contents
Please verify that all components are present and undamaged before beginning installation. If any parts are missing or damaged, do not proceed with installation and contact customer support.

Figure 3.1: Overview of all included components.
The package typically includes:
- Wall Plate (1x)
- TV Mounting Brackets (2x)
- Assorted Screws (M4, M5, M6, M8) for TV attachment
- Washers and Spacers
- Wall Anchors and Lag Bolts for concrete/brick (check your specific package)
- Spirit Level (1x)
- Cable Ties (3x)
- Instruction Manual (this document)
4. Specifications
| Feature | Specification |
|---|---|
| Model Number | MK-W-2 |
| Screen Size Compatibility | 32" - 65" (81 - 165 cm) |
| Maximum Load Capacity | 75 kg (165 lbs) |
| VESA Compatibility | Up to 400x400mm |
| Tilt Angle | +5° to -10° |
| Wall Distance | 56 mm (2.20 inches) |
| Product Dimensions | Approx. 6.3 x 2.76 x 18.9 inches (bracket only) |
| Item Weight | Approx. 4.4 pounds (2 kg) |

Figure 4.1: VESA Compatibility and TV Size/Weight Limits.

Figure 4.2: Tilt Range and Wall Distance.
5. Setup and Installation
Follow these steps carefully for a secure installation. It is highly recommended to have two people for this process.
- Step 1: Attach TV Brackets to TV
Carefully place your TV face down on a soft, clean surface. Identify the VESA mounting holes on the back of your TV. Select the appropriate screws (M4, M5, M6, or M8) and spacers (if needed) that fit your TV's mounting holes. Attach the two vertical TV mounting brackets to the back of your TV using the selected screws. Ensure the brackets are centered and securely fastened.

Figure 5.1: Installation Overview (Step 1 shown on the left).
- Step 2: Mount Wall Plate to Wall
Determine the desired height for your TV. Use a stud finder to locate two adjacent wooden studs in your wall. Mark the drilling locations for the wall plate. Use the included spirit level to ensure the marks are perfectly horizontal. Drill pilot holes at the marked locations. If mounting to concrete or brick, use a masonry drill bit and insert the appropriate wall anchors before securing the wall plate with lag bolts. Secure the wall plate firmly to the wall using the provided lag bolts. Ensure it is level and stable.
- Step 3: Hang TV onto Wall Plate
With assistance, carefully lift the TV (with the attached brackets) and align the hooks on the TV brackets with the top edge of the wall plate. Gently lower the TV until the brackets engage with the wall plate. Ensure both brackets are securely seated. There are usually safety screws or pull-straps at the bottom of the TV brackets to lock the TV in place. Secure these to prevent accidental dislodgement.
6. Operating the Tilt Function
This wall bracket allows you to tilt your TV for optimal viewing angles and to reduce glare. The tilt range is from +5 degrees (upward tilt) to -10 degrees (downward tilt).
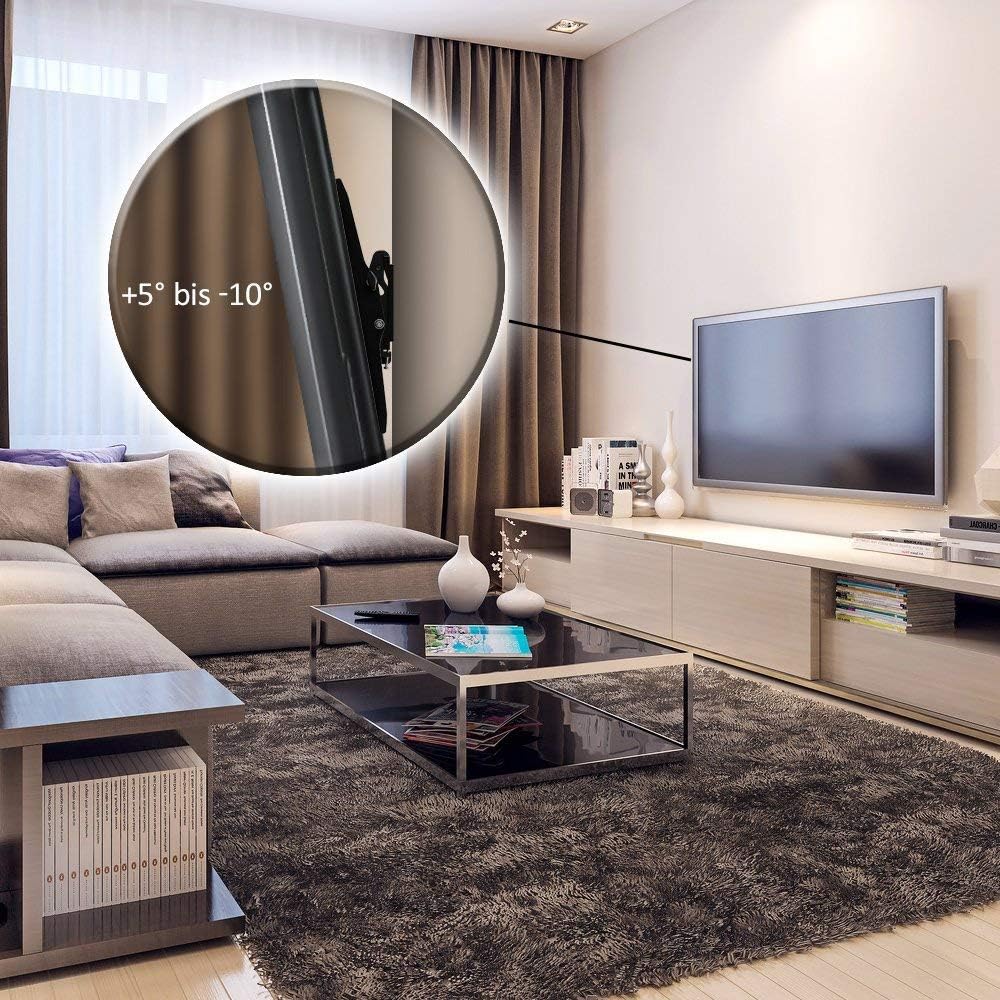
Figure 6.1: TV mounted with tilt function in a living room setting.
To adjust the tilt:
- Gently push or pull the bottom or top edge of your TV to achieve the desired tilt angle.
- The bracket is designed for smooth, friction-based adjustment. No tools are typically required for tilt adjustment once installed.
- Avoid forcing the TV beyond its specified tilt range.
7. Maintenance
Regular maintenance ensures the longevity and safety of your TV wall bracket.
- Cleaning: Use a soft, dry cloth to wipe down the bracket. Avoid abrasive cleaners or solvents that could damage the finish.
- Fastener Check: Periodically (e.g., every 6-12 months), check all screws and bolts securing the TV to the brackets and the wall plate to the wall. Tighten any that may have loosened over time. Do not overtighten.
- Damage Inspection: Inspect the bracket for any signs of wear, corrosion, or damage. If any damage is observed, discontinue use and contact customer support.
8. Troubleshooting
If you encounter issues during or after installation, refer to the following common problems and solutions:
| Problem | Possible Cause | Solution |
|---|---|---|
| TV is not level after installation. | Wall plate was not installed level. | Carefully remove the TV, then adjust the wall plate. Use a spirit level during re-installation. |
| Screws for TV attachment do not fit. | Incorrect screw size selected; TV requires different thread. | Refer to your TV's manual for correct VESA screw specifications. If not included, purchase appropriate screws. |
| Bracket feels unstable on the wall. | Insufficient wall support; screws not properly secured in studs/anchors. | Immediately remove TV. Re-evaluate wall structure and ensure lag bolts are securely fastened into studs or appropriate anchors. Consult a professional if unsure. |
| TV cannot be tilted. | Tilt mechanism is too tight or obstructed. | Check for any obstructions. The tilt mechanism is friction-based; ensure no screws are overtightened on the tilt joints. |
9. Warranty and Support
deleyCON products are manufactured with high-quality materials and are thoroughly tested. While specific warranty details are not provided in this manual, deleyCON typically offers a limited warranty against defects in materials and workmanship. Please retain your proof of purchase for warranty claims.
For technical support, missing parts, or warranty inquiries, please contact deleyCON customer service through their official website or the retailer where you purchased the product. Refer to the product packaging or deleyCON's official website for contact information.
Manufacturer: deleyCON
Global Trade Identification Number (GTIN/UPC): 4250580119166

Figure 9.1: Product packaging with specifications and model information.
Ask a question about this manual
Ask about setup, troubleshooting, compatibility, parts, safety, or missing instructions. Manuals+ will review the question and use this page’s manual context to help answer it.