1. Introduction
This manual provides comprehensive instructions for the safe and effective use of the OSG Carbide End Mill, specifically the 2.50mm diameter with a 5.00mm cut length. This tool is designed for precision milling applications in various materials. Adherence to these guidelines will ensure optimal performance, tool longevity, and operator safety.
2. Product Overview
The OSG Carbide End Mill is a high-performance cutting tool engineered for general purpose roughing and finishing operations. It features a square end style and is constructed from durable carbide material, ensuring high rigidity and wear resistance.
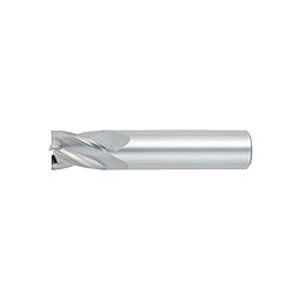
Figure 1: OSG Carbide End Mill (2.50mm Diameter). This image displays the overall form of the end mill, highlighting its flutes and shank, which are critical for material removal and machine mounting.
Key Features:
- Material: Carbide for superior hardness and heat resistance.
- End Mill Style: Square End for general purpose milling, suitable for slotting, profiling, and plunging.
- Number of Flutes: 4 flutes, providing good chip evacuation and finish in various materials.
- Finish: Bright (Uncoated), suitable for a wide range of applications.
- Cutting Direction: Right Hand, standard for most milling operations.
- Helix Angle: 30 Degrees, balancing strength and chip evacuation.
3. Specifications
Detailed technical specifications for the OSG Carbide End Mill (List Number 414):
| Specification | Value |
|---|---|
| Milling Diameter | 2.50mm |
| Length of Cut | 5.00mm |
| Overall Length | 39.00mm |
| Shank Diameter | 3.00mm |
| Number of Flutes | 4 |
| Material | Carbide |
| Finish | Bright (Uncoated) |
| Helix Angle | 30 Degrees |
| Cutting Type | Center Cutting, Roughing/Finishing |
| Cutting Direction | Right Hand |
| Primary Material Application | Alloy Steel, Aluminum, Carbon Steel, Cast Iron, Hardened Steel, Steel |
4. Setup and Installation
Proper installation is critical for tool performance and safety. Follow these steps:
- Inspection: Before installation, inspect the end mill for any signs of damage, chips, or wear. Do not use damaged tools.
- Cleanliness: Ensure the machine spindle, tool holder, and the end mill shank are clean and free of debris, oil, or coolant residue.
- Tool Holder Selection: Use a high-quality, precision tool holder (e.g., collet chuck, hydraulic chuck, shrink-fit holder) that matches the 3.00mm shank diameter.
- Clamping: Insert the end mill into the tool holder to the recommended depth (typically as deep as possible without interfering with the cutting flutes). Tighten the clamping mechanism securely according to the tool holder manufacturer's specifications. Insufficient clamping can lead to tool pull-out or vibration.
- Runout Check: After installation, verify tool runout using a dial indicator. Minimize runout to extend tool life and improve surface finish.
5. Operating Instructions
Optimal cutting parameters vary based on material, machine rigidity, and desired finish. The following are general guidelines:
General Guidelines:
- Material Compatibility: This end mill is suitable for Alloy Steel, Aluminum, Carbon Steel, Cast Iron, Hardened Steel, and general Steel. Adjust parameters based on material hardness.
- Cutting Speed (SFM/m/min): Refer to machining handbooks or manufacturer's recommendations for specific materials. Start with conservative speeds and gradually increase.
- Feed Rate (IPM/mm/min): Adjust feed rate to achieve desired chip load per tooth. Too low a feed rate can cause rubbing and premature wear; too high can lead to tool breakage.
- Depth of Cut (ADOC/RDOC): For roughing, utilize a larger depth of cut. For finishing, reduce the depth of cut to improve surface finish and maintain dimensional accuracy.
- Coolant/Lubrication: Use appropriate cutting fluid for the material being machined. Coolant helps dissipate heat, lubricate the cut, and aid in chip evacuation.
- Chip Evacuation: Ensure efficient chip evacuation to prevent chip recutting, which can damage the tool and workpiece.
Application Notes:
- Roughing: Use higher feed rates and depths of cut to remove material quickly.
- Finishing: Reduce feed rates and depths of cut for a smoother surface finish and tighter tolerances.
- Plunging: As a center-cutting end mill, it can be used for plunging operations.
6. Maintenance
Regular maintenance ensures the longevity and consistent performance of your end mill.
- Cleaning: After each use, clean the end mill to remove chips, coolant residue, and any buildup. Use a soft brush and appropriate cleaning agents.
- Inspection: Periodically inspect the cutting edges for wear, chipping, or signs of damage. A worn tool will lead to poor surface finish, increased cutting forces, and potential breakage.
- Storage: Store end mills in a protective case or holder to prevent damage to the cutting edges. Keep them in a dry environment to prevent corrosion.
- Regrinding: Carbide end mills can often be reground by professional tool sharpening services to restore cutting performance. Consult with a specialist for feasibility.
7. Troubleshooting
Common issues and potential solutions during milling operations:
| Problem | Possible Cause | Solution |
|---|---|---|
| Poor Surface Finish | Excessive feed rate, worn tool, high runout, insufficient coolant. | Reduce feed rate, replace/regrind tool, check runout, optimize coolant delivery. |
| Excessive Tool Wear | High cutting speed, insufficient coolant, abrasive material, excessive chip load. | Reduce cutting speed, increase coolant flow, adjust feed rate, consider tool coating. |
| Tool Breakage | Excessive feed rate/depth of cut, vibration, chip packing, improper clamping. | Reduce cutting parameters, check machine rigidity, improve chip evacuation, ensure secure clamping. |
| Vibration/Chatter | Long tool overhang, insufficient machine rigidity, incorrect cutting parameters. | Minimize tool overhang, check machine and fixture rigidity, adjust speed/feed. |
8. Safety Information
WARNING: Failure to follow these safety instructions may result in serious injury or property damage.
- Always wear appropriate Personal Protective Equipment (PPE), including safety glasses or a face shield, gloves, and hearing protection.
- Ensure the workpiece is securely clamped before beginning any machining operation.
- Never touch the rotating tool or spindle.
- Keep hands and clothing clear of moving machine parts.
- Do not exceed recommended cutting parameters for the tool and material.
- Ensure adequate ventilation when machining, especially with certain materials or coolants.
- Dispose of worn or broken tools safely. Carbide can be sharp and brittle.
- Refer to your machine tool's instruction manual for additional safety guidelines.
9. Warranty and Support
For specific warranty information or technical support regarding your OSG Carbide End Mill, please refer to the official OSG website or contact your authorized OSG distributor. Product specifications and performance data are subject to change without notice.
OSG Official Website: www.osgtool.com