
Introduction
This manual provides detailed instructions for the safe and effective use, maintenance, and troubleshooting of your Valianto W77-S Siphon Feed Spray Gun. Please read this manual thoroughly before operating the spray gun to ensure optimal performance and safety.
Important Safety Information
WARNING: Failure to follow these safety instructions may result in serious injury or property damage.
- Always wear appropriate safety gear, including gloves and eye protection, when using this spray gun.
- Keep the spray gun away from heat sources and never point it at people or animals.
- Always follow the manufacturer's guidelines for proper cleaning and maintenance.
- Dispose of any used paint or chemicals according to local regulations.
- Never operate the spray gun if you are tired or under the influence of drugs or alcohol.
- Always keep the spray gun in a safe place when not in use.
- Ensure adequate ventilation when spraying to avoid inhalation of fumes.
- Always disconnect the air supply before cleaning, adjusting, or performing maintenance on the spray gun.
Product Components
Familiarize yourself with the parts of your Valianto W77-S Siphon Feed Spray Gun:

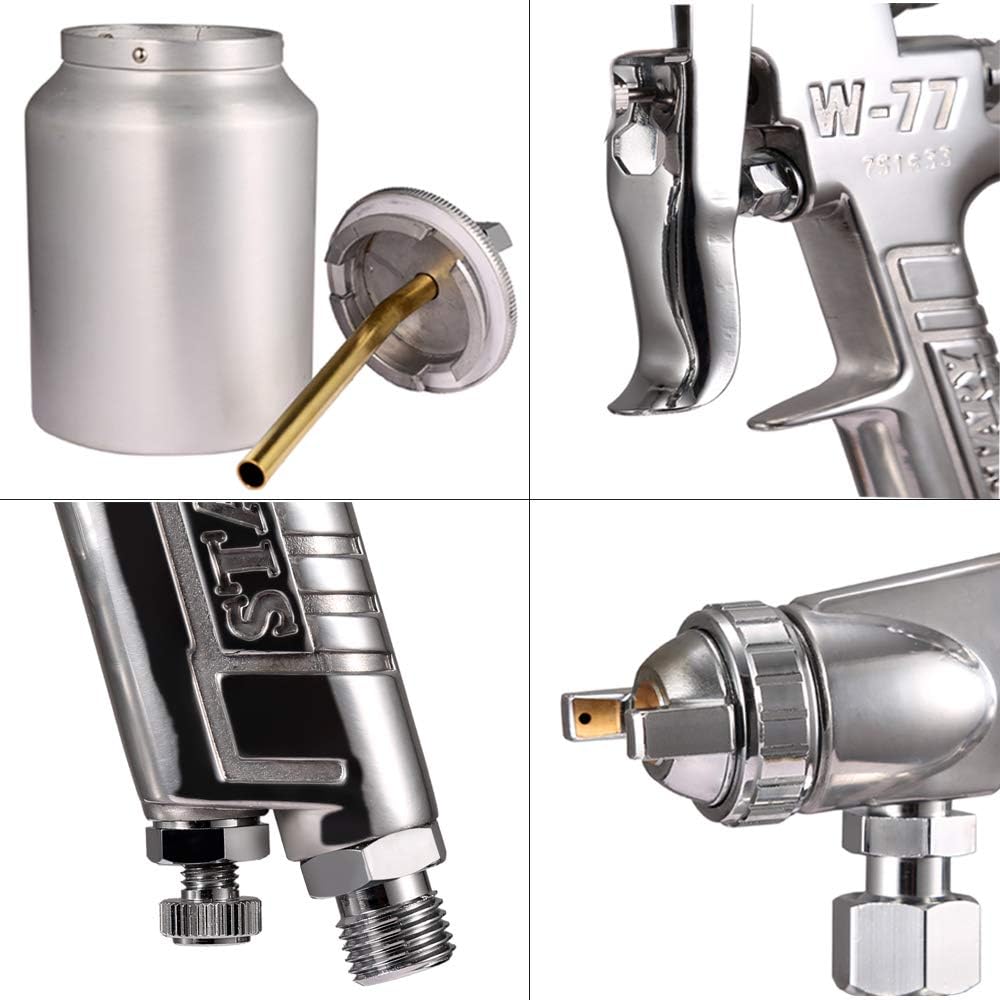
Setup and Assembly
- Unpack Components: Carefully remove all items from the packaging. Verify that all included components are present: spray gun, 1000cc anti-drip canister, wrench, cleaning brush, and quick connector.
- Attach Canister: Securely attach the 1000cc anti-drip canister to the bottom of the spray gun. Ensure a tight seal to prevent leaks.
- Connect Air Supply: Use the quick connector to attach your air compressor hose to the 1/4 inch air inlet on the spray gun. Ensure the air supply is off before connecting.
- Select Nozzle: Choose the appropriate nozzle size for your paint material and desired finish. The spray gun supports nozzle sizes from 1.5mm to 3.5mm. Small nozzles are suitable for topcoats, while larger nozzles are better for primers.

Figure 3: Close-up of the 3.5mm nozzle, illustrating the fine atomization capability. - Fill Canister: Fill the 1000cc anti-drip canister with your prepared paint material. Do not overfill.
Operating Instructions
- Set Air Pressure: Connect the air supply and set the operating pressure to 50-70 PSI (3.5-4.9 kg/cm²). This range is recommended for optimal spraying conditions.
- Adjust Spray Pattern (Spraying Scope Valve):

Figure 4: Adjusting the spraying scope valve (top) and spraying fluid valve (bottom). Locate the spraying scope valve (top knob on the gun body). Relaxing this knob will increase the spray range, while tightening it will reduce the spray range. Adjust to achieve the desired fan pattern.
- Adjust Fluid Volume (Spraying Fluid Valve):
Locate the spraying fluid valve (bottom knob on the gun body). Relaxing this knob will increase the paint flow, and tightening it will reduce the paint flow. Adjust to control the amount of paint sprayed, helping to reduce consumption and prevent overspraying.
- Utilize Two-Speed Switch:

Figure 5: The two-speed switch allows for dust blowing (Position 1) and paint spraying (Position 2). - Position 1 (Exhaust): This setting allows the gun to blow air, which can be used to clear dust from the product surface before painting.
- Position 2 (Paint Out): This setting engages the paint spraying function.
- Spraying Technique: Maintain a consistent distance from the surface and move the gun at a steady pace. Overlap each pass by approximately 50% for even coverage.
Maintenance and Cleaning
Proper cleaning and maintenance are essential for the longevity and performance of your spray gun.
- Disconnect Air Supply: Always disconnect the air hose from the spray gun before cleaning or performing any maintenance.
- Empty Canister: Empty any remaining paint from the 1000cc canister. Dispose of paint according to local regulations.
- Flush Gun: Fill the canister with an appropriate cleaning solvent (e.g., paint thinner for oil-based paints, water for water-based paints). Spray the solvent through the gun until it runs clear.
- Clean Nozzle and Air Cap: Remove the air cap and nozzle. Use the provided cleaning brush and solvent to thoroughly clean all paint residue from these parts. Pay close attention to the small holes in the air cap and nozzle.
- Clean Canister: Wash the 1000cc canister and siphon tube with solvent and the cleaning brush.
- Lubricate: After cleaning and drying, apply a small amount of gun lubricant (if included or recommended) to moving parts and threads to prevent corrosion and ensure smooth operation.
- Storage: Store the clean and dry spray gun in a safe, dry place away from extreme temperatures.
Troubleshooting
Refer to the table below for common issues and their solutions.
| Problem | Possible Cause | Solution |
|---|---|---|
| No paint flow or inconsistent spray | Clogged nozzle or air cap; insufficient air pressure; paint too thick; siphon tube blocked. | Clean nozzle and air cap thoroughly; check air pressure (50-70 PSI); thin paint as per manufacturer's instructions; clear siphon tube. |
| Excessive overspray | Air pressure too high; fluid volume too high; gun too far from surface. | Reduce air pressure; decrease fluid volume via spraying fluid valve; move gun closer to surface. |
| Uneven spray pattern | Dirty or damaged air cap/nozzle; incorrect spray scope valve setting. | Clean or replace air cap/nozzle; adjust spraying scope valve for desired pattern. |
| Paint leaks from nozzle | Loose nozzle or air cap; worn needle packing. | Tighten nozzle and air cap; replace needle packing if worn. |
Specifications
Technical specifications for the Valianto W77-S Siphon Feed Spray Gun:

- Model: W77-S
- Feed Mode: Siphon Feed
- Cup Capacity: 1000cc (Anti-Drip Canister)
- Nozzle Diameter: Multi-selection (1.5mm / 2mm / 2.5mm / 3mm / 3.5mm)
- Working Pressure: 50-70 PSI (3.5-4.9 kg/cm²)
- Air Consumption: 90-130 L/min
- Paint Inlet Size: 3/8 inches
- Air Inlet Size: 1/4 inches
- Material: Stainless Steel (Gun Body)
- Item Weight: 2.4 Pounds
- Recommended Uses: Painting (primers, topcoats, acrylics, enamel, stain, urethane)
Warranty and Support
For warranty information, please refer to the documentation provided at the time of purchase or contact Valianto customer support directly. For technical assistance or inquiries, please visit the official Valianto website or contact their customer service department.
Brand: Valianto