Introduction
Thank you for choosing the KWS KitchenWare Station TC-22 Professional Commercial Meat Grinder. This heavy-duty appliance is designed for efficient meat processing in commercial and home environments. Constructed from high-quality stainless steel, it offers durability and meets international sanitation standards. This manual provides essential information for the safe and effective operation, maintenance, and care of your meat grinder.
Important Safety Instructions
- Read all instructions thoroughly before operating the appliance.
- Always ensure the appliance is unplugged before assembly, disassembly, or cleaning.
- Keep hands and utensils away from moving parts during operation. Use the food pusher provided.
- Do not operate the grinder with wet hands or in wet conditions.
- Ensure the appliance is placed on a stable, level surface during use.
- Do not overload the motor. Allow the motor to cool down if it becomes overheated.
- Keep out of reach of children.
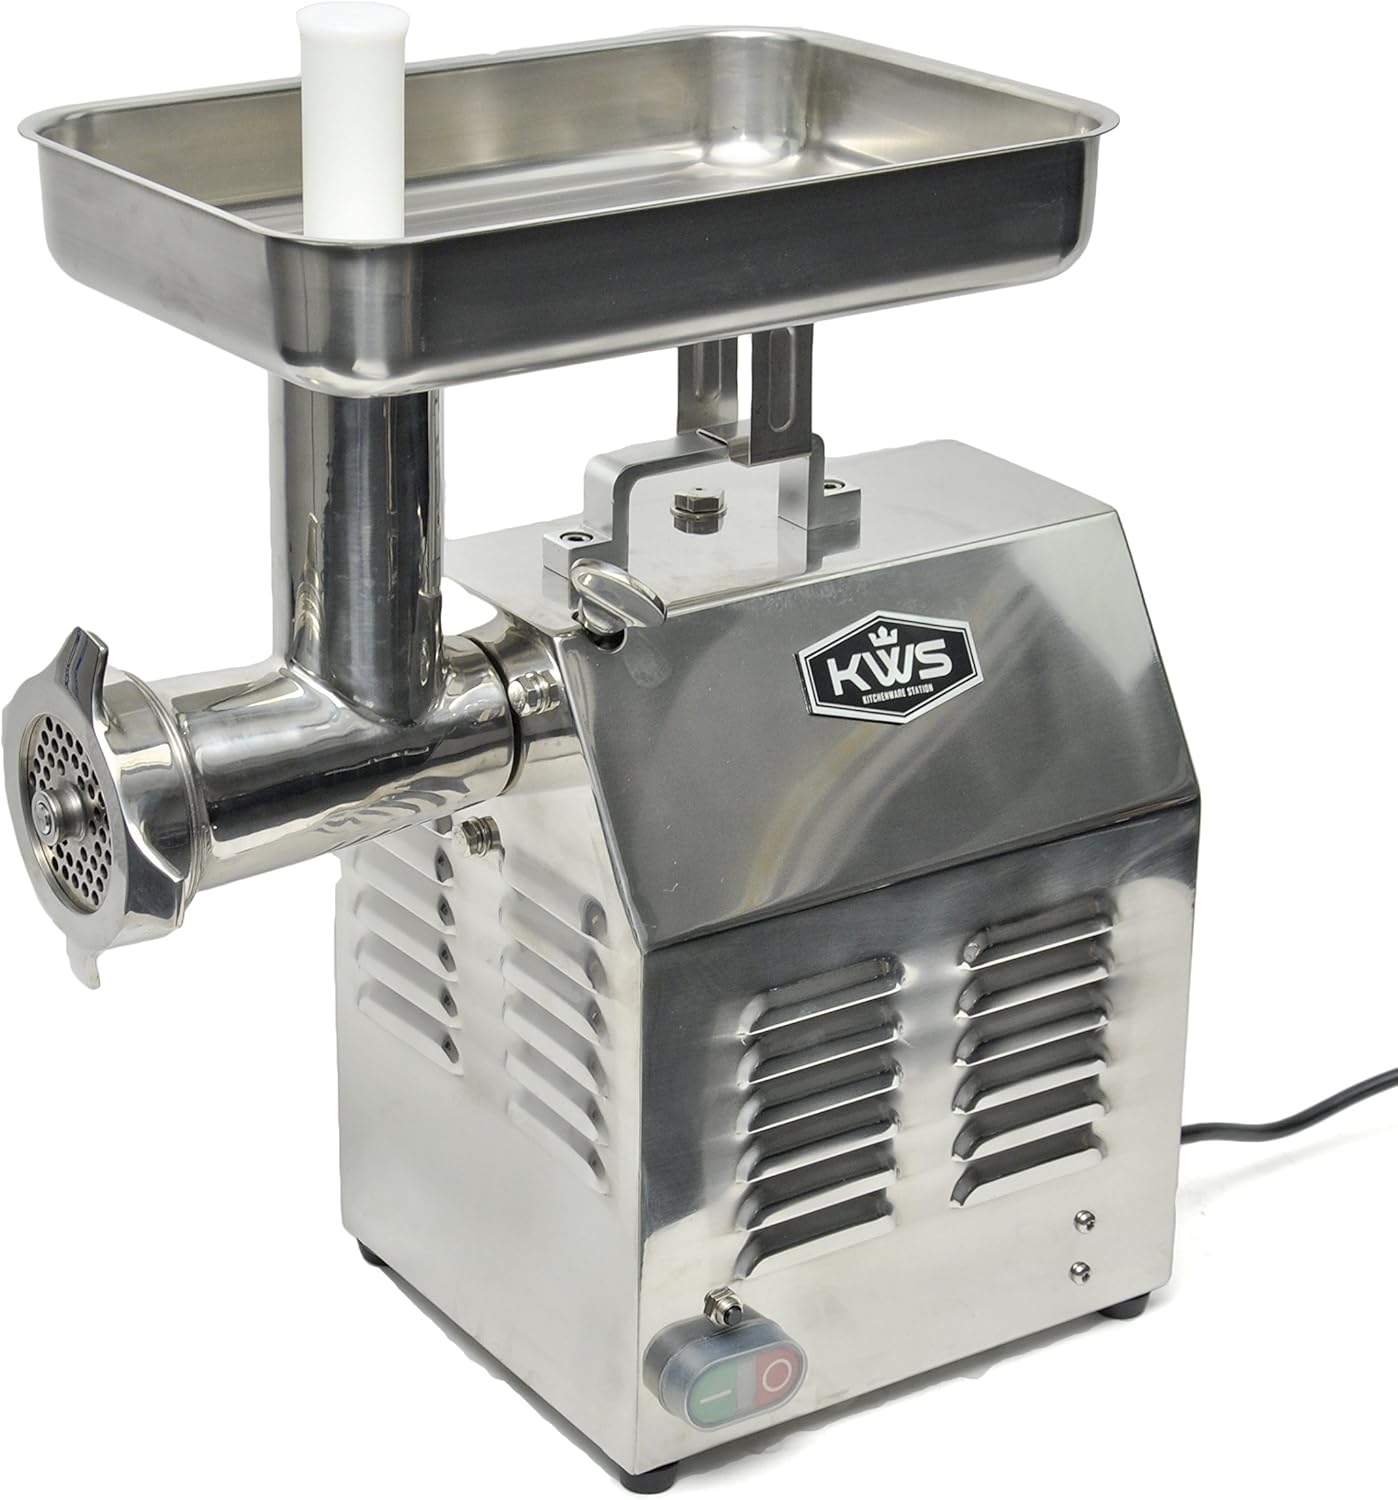
Package Contents
The KWS TC-22 Meat Grinder package includes the following items:
- KWS TC-22 Meat Grinder Unit
- Stainless Steel Meat Tray
- Auger Shaft
- Grinder Knife (Cutting Blade)
- Grinder Plates: 1/4” (6.35mm) and 5/16” (7.94mm)
- 3 Sausage Stuffing Tubes
- Plastic Food Pusher
- Gasket
- Power Cord (5 feet)

Setup and Assembly
Before first use, wash all removable parts with warm, soapy water. Ensure all parts are completely dry before assembly.
- Attach Grinder Head: Insert the grinder head into the front hub of the main unit. Secure it by tightening the thumb screw clockwise until it is firm.
- Insert Auger Shaft: Ensure the washer is mounted on the back of the auger shaft, then slide the auger into the grinder head.
- Position Grinder Knife: Place the grinder knife (cutting blade) onto the front of the auger shaft, ensuring the cutting edges face outwards.
- Add Grinder Plate: Position your desired grinder plate (e.g., 1/4" or 5/16") onto the front of the auger shaft, aligning the notches.
- Secure Adjusting Ring: Tighten the adjusting ring onto the grinder head. Do not overtighten; it should be snug but not excessively tight.
- Mount Feed Tray: Place the stainless steel feed tray onto the top of the grinder head.
- Connect Power: Plug the 5-foot power cord into a 110V/60Hz power outlet.
Assembly Video Guide
Video 1: Official KWS TC Series Meat Grinder Assembly Instructions. This video demonstrates the step-by-step process of assembling the meat grinder components, including the grinder head, auger, cutting blade, grinding plate, and feed tray.
Operating Instructions
- Prepare Meat: Cut meat into pieces that fit easily into the feed tray opening. For optimal results, meat should be slightly chilled.
- Turn On: Ensure the grinder is securely assembled and plugged in. Use the ON/OFF switch to start the motor.
- Feed Meat: Place prepared meat into the feed tray. Use the plastic food pusher to gently guide the meat down the chute. Never use your hands or fingers to push meat into the grinder.
- Grinding Capacity: The TC-22 can grind approximately up to 485 lbs of meat per hour or 8 lbs per minute.
- Continuous Use: To prolong the life of the motor, avoid continuous operation for extended periods. In warmer conditions, limit use to 40 minutes, and in cooler conditions, up to 60 minutes. Allow the motor to rest between prolonged uses.
- Versatility: This grinder can process various meats (pork, beef, shrimp) and even soft bones like chicken or fish bones. It can also be used for vegetables such as carrots, mushrooms, and chilies.
- Sausage Stuffing: To make sausages, replace the grinding plate with the stuffing plate and attach one of the provided sausage stuffing tubes.
Operation Demonstration Video
Video 2: A demonstration of a commercial meat grinder in operation, showing meat being fed into the machine and ground. This video highlights the efficiency of the grinding process.
Maintenance and Cleaning
Regular cleaning and maintenance will ensure the longevity and optimal performance of your meat grinder.
- Disassembly: Unplug the unit. Reverse the assembly steps to carefully disassemble the grinder head, auger, knife, and plates.
- Washing: Wash all removable parts (grinder head, auger, knife, plates, feed tray, food pusher, stuffing tubes) with warm, soapy water immediately after use. The blades and grinding plates are dishwasher safe.
- Drying: Thoroughly dry all parts to prevent rust and corrosion.
- Motor Unit: Wipe the main motor unit with a damp cloth. Never immerse the motor unit in water.
- Oil Replacement: For first-time use, replace the oil after 50 hours of operation. Subsequently, replace the oil every 150 hours of use. To replace, loosen the screw on the side of the unit and add new oil.

Troubleshooting
- Grinder not starting: Ensure the power cord is securely plugged into a working outlet and the ON/OFF switch is in the 'ON' position. Check for any tripped circuit breakers.
- Meat not grinding properly: Ensure the cutting blade and grinding plate are correctly installed with the cutting edges facing outwards. Make sure the adjusting ring is tightened appropriately. Meat should be slightly chilled and cut into manageable pieces.
- Motor overheating: If the motor feels hot or stops, unplug the unit immediately. Allow it to cool down for at least 30 minutes before resuming operation. Avoid overloading the grinder.
- Unusual noise: Disassemble and check all parts for proper installation and any obstructions. Ensure the oil level is adequate.
Specifications
| Model Number | TC-22 (ME12) |
| Brand | KWS KitchenWare Station |
| Power | 900 Watts (1 1/2 HP) |
| Voltage | 110V / 60Hz |
| Grinding Capacity | Up to 485 lbs/hour (8 lbs/minute) |
| Material | High Quality Stainless Steel |
| Overall Dimensions (L x W x H) | 16.9" x 12.6" x 21.7" |
| Meat Tray Dimensions (L x W x H) | 13.5" x 9" x 2.5" |
| Item Weight | 74 pounds |
| Certifications | CE Approved |
Warranty and Support
For warranty information, technical support, or to purchase replacement parts, please contact KWS KitchenWare Station customer service. Refer to your product packaging or the official KWS KitchenWare Station website for current contact details.


