1. Product Overview
The Inkbird ITC-308 is a reliable and easy-to-use digital temperature controller designed for precise temperature management in various applications. It features dual relay output, allowing simultaneous connection to both heating and cooling devices. The controller supports both Celsius and Fahrenheit display and includes safety features such as temperature calibration, compressor delay protection, and high/low temperature alarms.

Image 1.1: The Inkbird ITC-308 Digital Temperature Controller with its dual power outlets.
Key Features:
- Dual Relay Output: Connects to both heating and cooling devices simultaneously.
- Temperature Range: Wide control range from -50°C to 120°C (-58°F to 248°F).
- Dual Display Window: Shows measured temperature (PV) and set temperature (SV) concurrently.
- Safety Features: Temperature calibration, compressor delay protection, high/low temperature alarms, and sensor fault alarm.
- Waterproof Probe: Equipped with an IP68 rated stainless steel NTC probe for reliable measurements in various environments.
- Versatile Applications: Suitable for homebrewing, fermentation, terrariums, greenhouses, incubation, and more.
2. Setup and Installation
Follow these steps to set up your Inkbird ITC-308 temperature controller:
- Unpack the Device: Carefully remove the ITC-308 controller, temperature probe, and power outlets from the packaging.
- Connect the Probe: Insert the stainless steel temperature probe into the designated port on the main controller unit. Ensure it is securely connected.
- Position the Probe: Place the temperature probe in the environment where temperature monitoring and control are required (e.g., inside a terrarium, fermentation chamber, or greenhouse). Ensure the probe tip is fully immersed or positioned to accurately reflect the desired temperature.
- Connect Heating/Cooling Devices:
- Plug your heating device (e.g., heat mat, ceramic heater) into the "HEATING" outlet on the controller.
- Plug your cooling device (e.g., fan, chiller) into the "COOLING" outlet on the controller.
- Power On: Plug the main power cord of the ITC-308 controller into a standard electrical outlet. The display will illuminate, showing the current temperature (PV) and the default set temperature (SV).

Image 2.1: Example setup showing the ITC-308 controlling a heating lamp in a terrarium.

Image 2.2: All components of the Inkbird ITC-308, including the main unit, temperature probe, and dual power outlets.
3. Operation
3.1 Display Overview
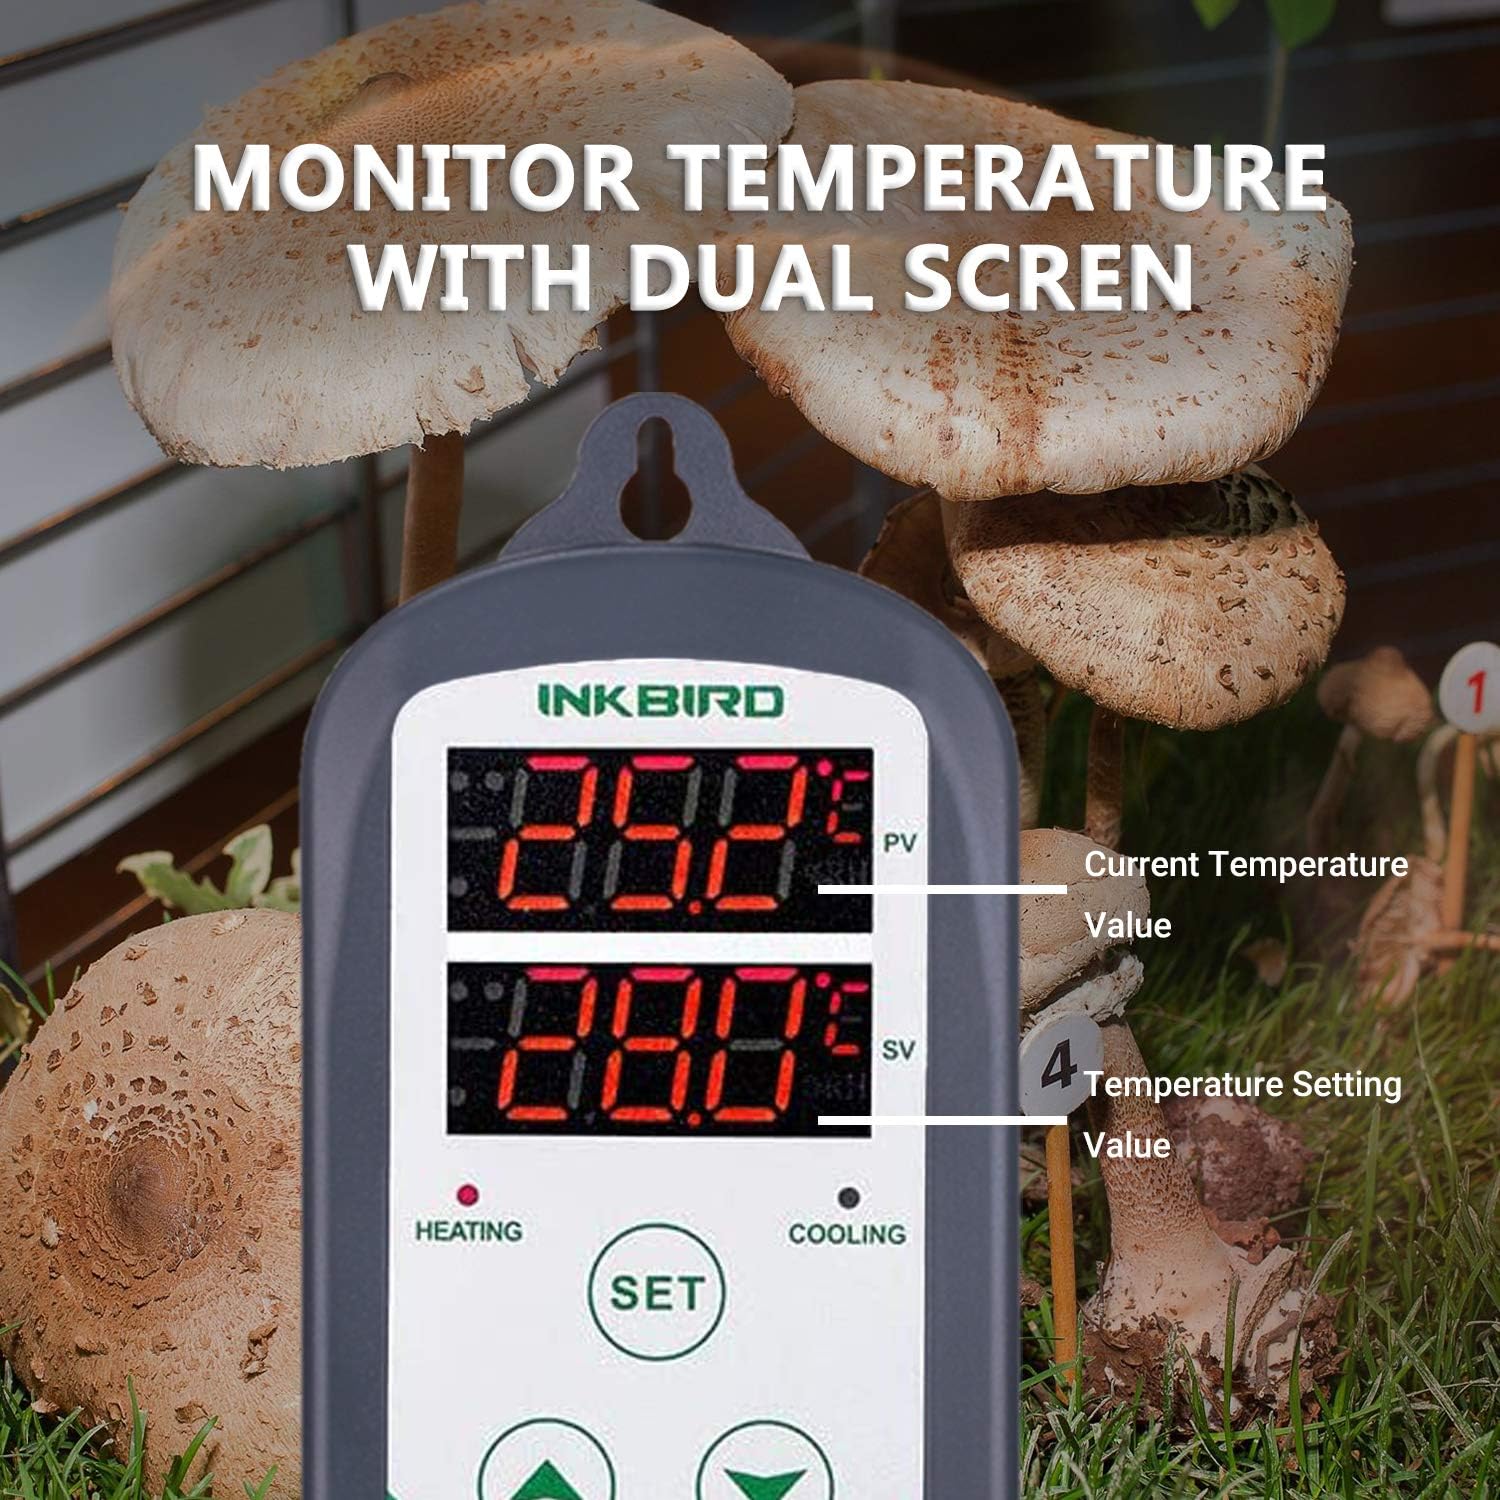
Image 3.1: The dual display shows the Process Value (PV) and Set Value (SV).
- PV (Process Value): Displays the current measured temperature by the probe.
- SV (Set Value): Displays the target temperature you have set.
- HEATING Indicator: Red light illuminates when the heating outlet is active.
- COOLING Indicator: Green light illuminates when the cooling outlet is active.
3.2 Setting Temperature Parameters
The ITC-308 has three buttons: SET, UP (▲), and DOWN (▼).
- Set Target Temperature (SV):
- Press the SET button once. The SV display will flash.
- Use the UP (▲) or DOWN (▼) buttons to adjust the desired target temperature.
- Press the SET button again to confirm and save the setting.
- Access Advanced Settings:
- Press and hold the SET button for 3 seconds to enter the parameter setting mode.
- Use the UP (▲) or DOWN (▼) buttons to navigate through the parameters (e.g., TS, HD, CD, PT, CA, AT, HS, LS).
- Press SET once to view the value of a parameter, then use UP (▲) or DOWN (▼) to modify it.
- Press SET again to save the modified value and move to the next parameter.
- To exit parameter setting mode, press and hold SET for 3 seconds, or wait 10 seconds for it to exit automatically.
3.3 Parameter Descriptions
| Parameter | Description | Range | Default |
|---|---|---|---|
| TS (Temperature Set Value) | The desired target temperature. | -50°C to 120°C | 10.0°C |
| HD (Heating Differential) | The temperature difference below SV at which heating activates. | 0.1 to 30.0°C | 2.0°C |
| CD (Cooling Differential) | The temperature difference above SV at which cooling activates. | 0.1 to 30.0°C | 2.0°C |
| PT (Compressor Delay) | Delay time for compressor protection (cooling). Prevents rapid cycling. | 0 to 10 minutes | 3 minutes |
| CA (Temperature Calibration) | Adjusts the measured temperature to match a known reference. | -10.0 to 10.0°C | 0.0°C |
| AT (Alarm Temperature) | Sets the high/low temperature alarm threshold. | -50°C to 120°C | N/A (User Defined) |
| HS (High Temperature Alarm) | Sets the upper limit for the high temperature alarm. | TS to 120°C | 120°C |
| LS (Low Temperature Alarm) | Sets the lower limit for the low temperature alarm. | -50°C to TS | -50°C |

Image 3.2: Visual representation of the wide temperature control range of the ITC-308.
4. Maintenance
Proper maintenance ensures the longevity and accuracy of your Inkbird ITC-308 controller.
- Cleaning: Disconnect the device from power before cleaning. Wipe the main unit with a soft, damp cloth. Do not use abrasive cleaners or immerse the unit in water.
- Probe Care: The stainless steel probe is waterproof (IP68). Regularly check the probe cable for any signs of damage. Clean the probe tip gently if residue builds up, which could affect accuracy.
- Storage: If storing the device for an extended period, ensure it is clean, dry, and stored in a cool, dry place away from direct sunlight.

Image 4.1: The waterproof stainless steel temperature probe.
5. Troubleshooting
If you encounter issues with your ITC-308, refer to the following common problems and solutions:
- Display shows "HHH" or "LLL":
This indicates a sensor error. "HHH" means the temperature is beyond the upper limit of the probe's range or the sensor is open-circuited. "LLL" means the temperature is below the lower limit or the sensor is short-circuited. Check the probe connection and ensure it is not damaged. Replace the probe if necessary.
- Heating/Cooling device not activating:
- Verify that the heating/cooling device is properly plugged into the correct outlet (HEATING/COOLING) on the ITC-308.
- Check the set temperature (SV) and differential settings (HD/CD) to ensure they are configured correctly for your desired operation.
- Ensure the current temperature (PV) is outside the set range that would trigger the device.
- Check the compressor delay (PT) setting; the device might be waiting for the delay period to expire.
- Temperature reading is inaccurate:
- Ensure the probe is correctly positioned and not influenced by external factors (e.g., direct sunlight, drafts).
- Use the Temperature Calibration (CA) parameter in the advanced settings to adjust the reading if you have a known accurate reference thermometer.
- Inspect the probe for any physical damage or corrosion.
- Alarm sounds frequently:
Check the High Temperature Alarm (HS) and Low Temperature Alarm (LS) settings. Adjust these limits to a suitable range for your application to prevent nuisance alarms.
6. Specifications
| Feature | Detail |
|---|---|
| Model | ITC-308 |
| Temperature Control Range | -50°C to 120°C (-58°F to 248°F) |
| Temperature Resolution | 0.1°C / 0.1°F |
| Input Power | 220V AC, 50Hz/60Hz |
| Output Load | Max 2200W (220V) |
| Sensor Type | NTC Sensor (Waterproof IP68 Stainless Steel) |
| Product Dimensions | 14 x 3.3 x 6.8 cm |
| Weight | 530 g |
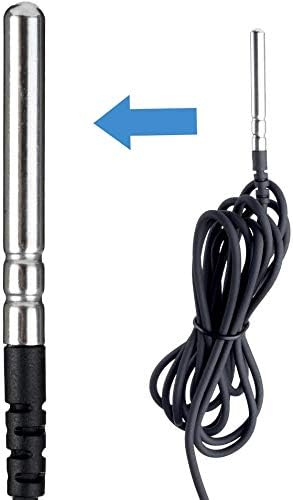
Image 6.1: Diverse applications for the Inkbird ITC-308 temperature controller.
7. Warranty and Support
The Inkbird ITC-308 Digital Temperature Controller comes with a 12-month warranty from the date of purchase. This warranty covers manufacturing defects and malfunctions under normal use. Please retain your proof of purchase for warranty claims.
For technical support, troubleshooting assistance, or warranty inquiries, please visit the official Inkbird website or contact their customer service.
Official Website: http://www.ink-bird.com
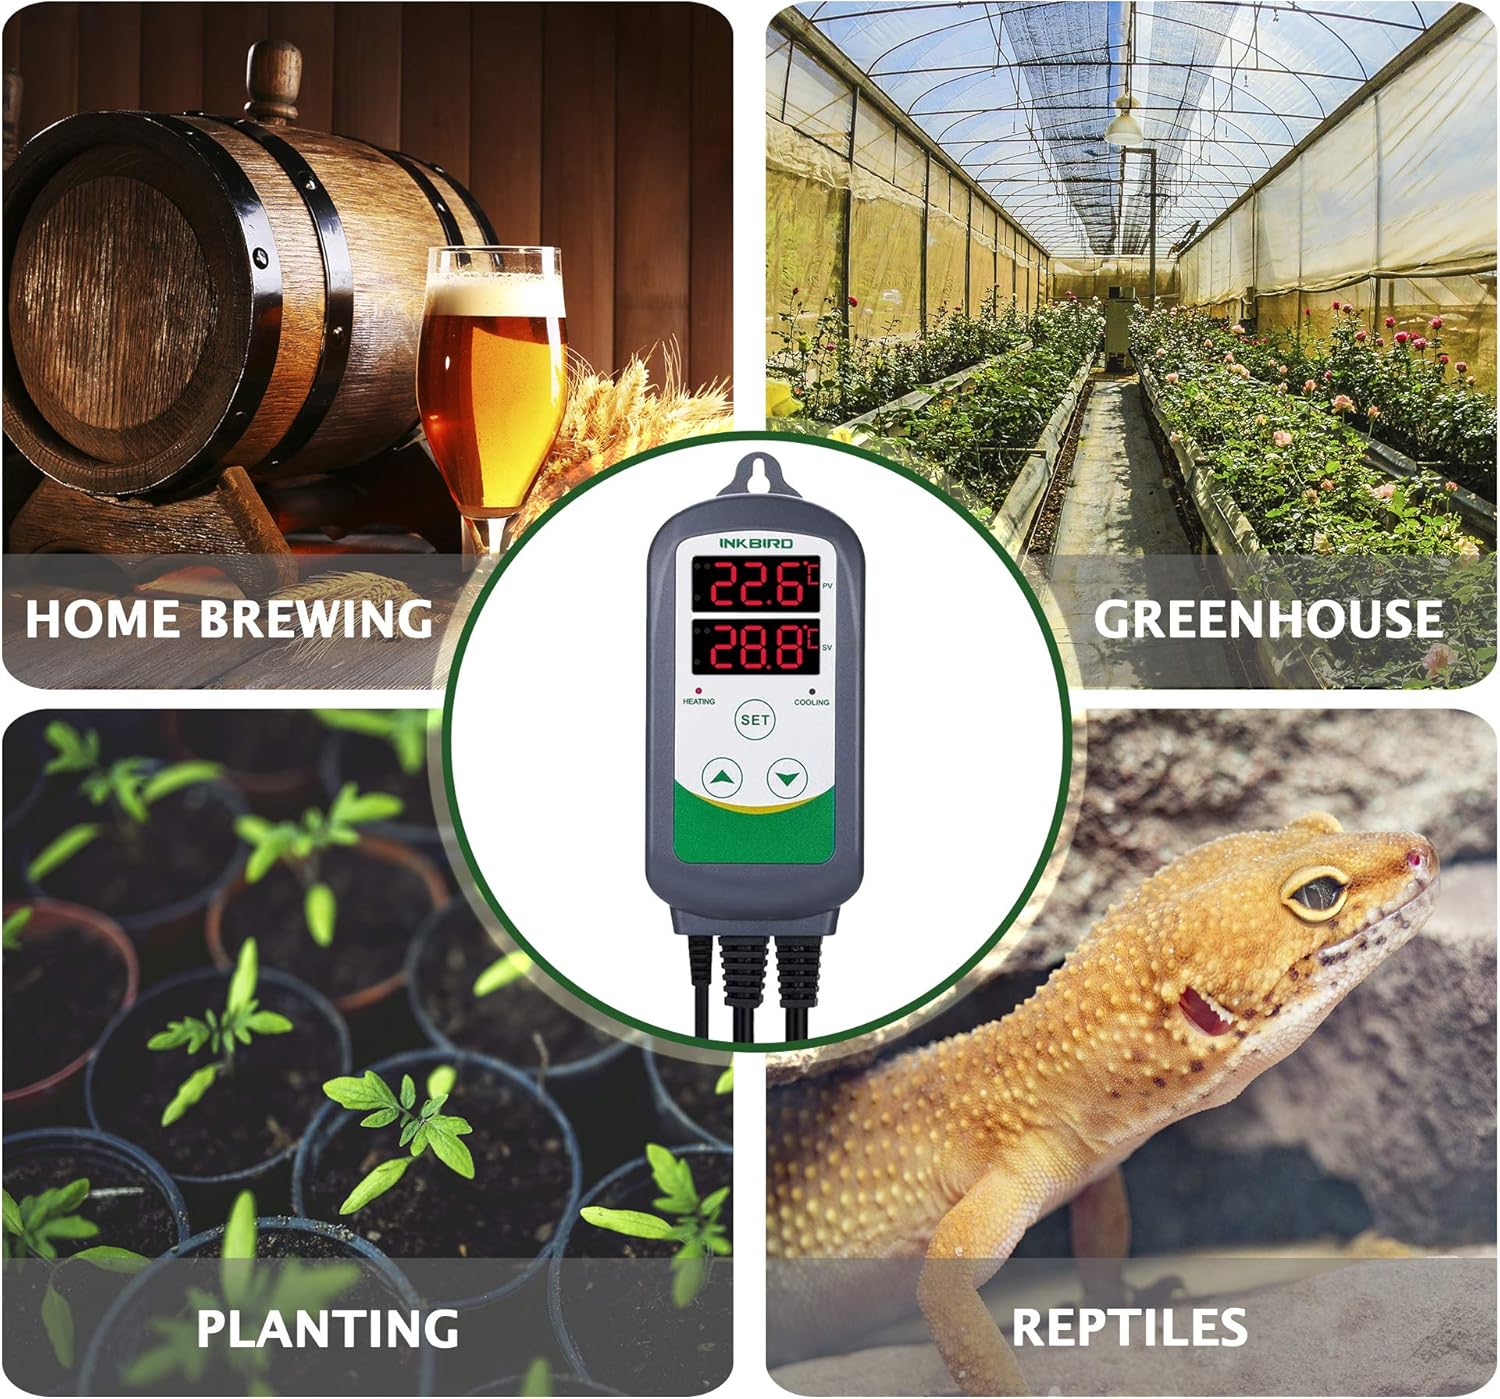
Image 7.1: The product packaging includes the manual and warranty card.