Vivolink VLCP8B
Vivolink Control Panel 8 Button (VLCP8B) User Manual
Model: VLCP8B
Introduction
This manual provides detailed instructions for the installation, operation, and maintenance of the Vivolink Control Panel 8 Button, model VLCP8B. Please read this manual thoroughly before using the device to ensure proper functionality and safety.
Safety Information
Always follow basic safety precautions when using this product to reduce the risk of fire, electric shock, and injury to persons. Keep this manual for future reference.
- Do not expose the device to moisture or extreme temperatures.
- Do not attempt to disassemble or modify the device. Refer all servicing to qualified personnel.
- Ensure the power supply used is compatible with the device's specifications.
- Keep the device away from strong magnetic fields.
Package Contents
Verify that all items are present in the package:
- Vivolink Control Panel 8 Button (VLCP8B)
- Mounting Screws (if applicable)
- Quick Start Guide (if applicable)
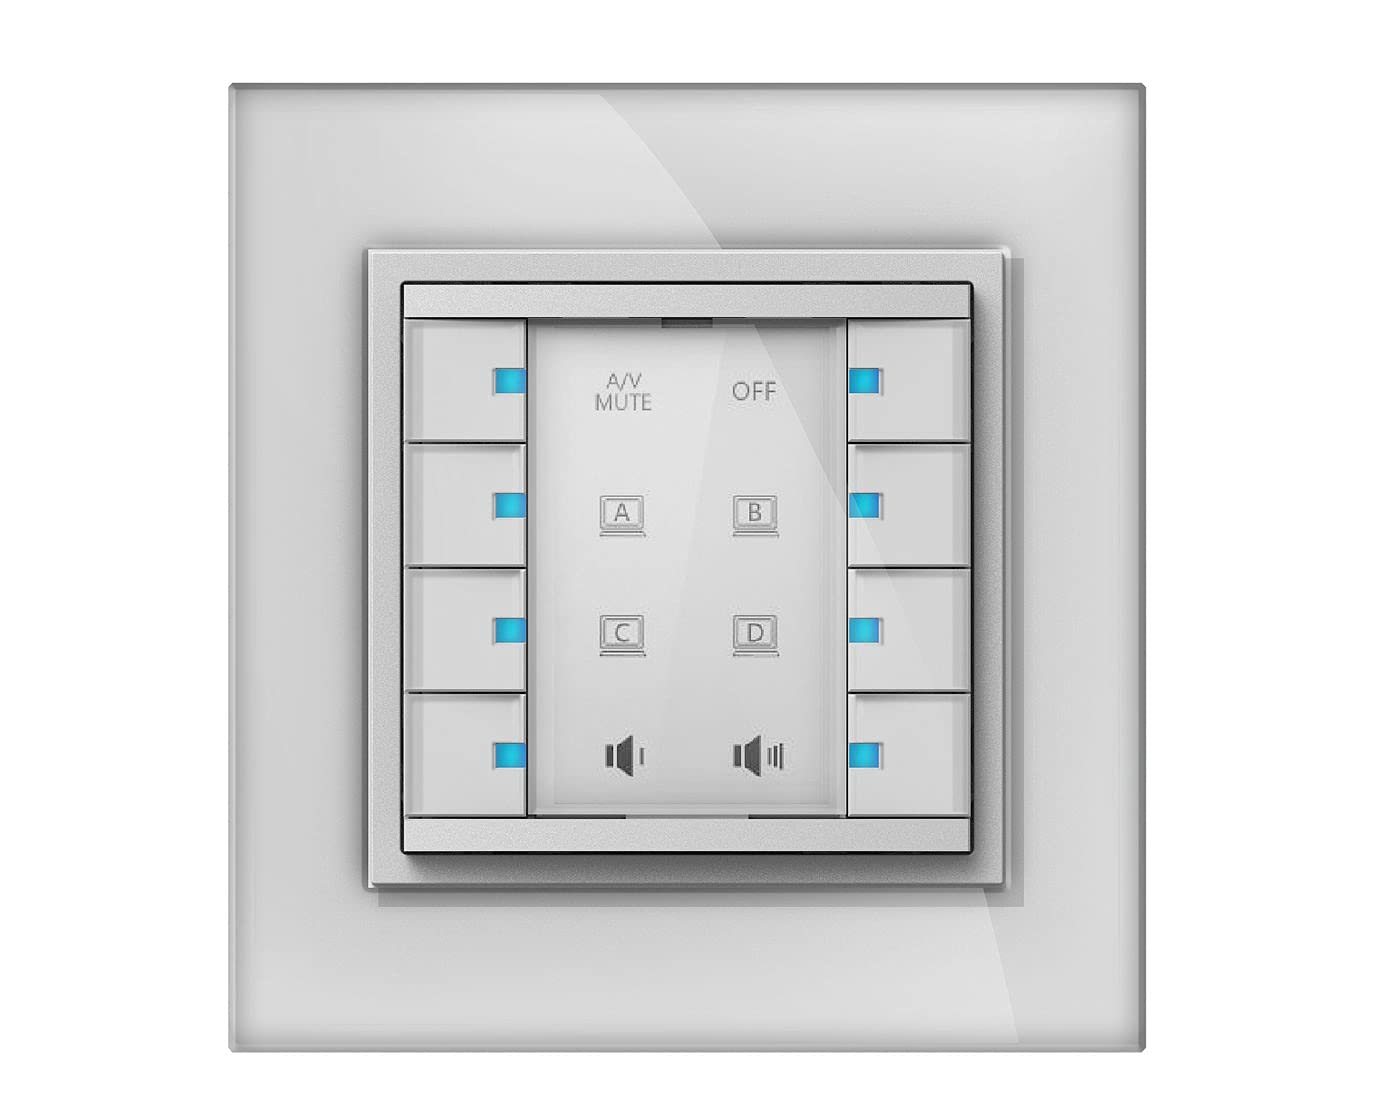
Image: The Vivolink Control Panel 8 Button, model VLCP8B, showing its front face with eight distinct buttons arranged in a grid.
Setup
1. Physical Installation
The VLCP8B control panel is designed for wall mounting or integration into a standard equipment rack. Ensure the mounting surface is stable and can support the device's weight.
- Choose a Location: Select a suitable location that allows for easy access and visibility, away from direct heat sources or excessive dust.
- Mounting: Use appropriate screws and anchors (not always included) to secure the control panel to the desired surface. Refer to the mounting template if provided with the physical product.
2. Connections
Connect the necessary cables to the control panel. The specific connections will depend on the system it is integrating with.
- Power Connection: Connect the power adapter (if external) or power cable to the designated power input port.
- Control Connections: Connect control cables (e.g., Ethernet, RS-232, USB) from the VLCP8B to the devices it will control, following the system's wiring diagram.
3. Powering On
Once all physical and control connections are securely made, connect the power supply to an electrical outlet. The device should power on automatically, indicated by status lights (if present).
Operating Instructions
The Vivolink Control Panel 8 Button is designed for intuitive operation. Each of the eight buttons can be programmed to perform specific functions within your integrated system.
1. Basic Button Functions
Each button on the VLCP8B typically corresponds to a pre-programmed action. Pressing a button will trigger its assigned function.
- Single Press: Activates the primary function assigned to that button.
- Long Press: Some buttons may have a secondary function activated by pressing and holding for a few seconds. Refer to your system's configuration for specific long-press functions.
2. Customization and Programming
The functionality of the 8 buttons is determined by the system's programming. Customization is typically performed using dedicated software or a control system interface, not directly on the panel itself. Consult your system integrator or the Vivolink support website for programming guides and software tools.
Common functions that can be assigned to buttons include:
- Power On/Off for connected devices (e.g., projector, display)
- Source Selection (e.g., HDMI 1, VGA, DisplayPort)
- Volume Control (Up/Down/Mute)
- Lighting Scene Recall
- Macro Execution (a sequence of commands)
Maintenance
Regular maintenance ensures the longevity and optimal performance of your Vivolink Control Panel.
- Cleaning: Use a soft, dry cloth to wipe the surface of the control panel. For stubborn marks, a slightly damp cloth with a mild, non-abrasive cleaner can be used. Ensure no liquid enters the device.
- Firmware Updates: Periodically check the Vivolink support website for firmware updates. Updates can improve performance, add features, or resolve issues. Follow the provided instructions carefully when performing firmware updates.
- Inspection: Periodically inspect cables and connections for any signs of wear or damage.
Troubleshooting
If you encounter issues with your Vivolink Control Panel, refer to the following common problems and solutions:
| Problem | Possible Cause | Solution |
|---|---|---|
| Panel does not power on. | No power supply or faulty connection. | Check power cable connection to the panel and the electrical outlet. Ensure the outlet is functional. |
| Buttons do not respond. | Incorrect programming or communication issue. | Verify the control system's programming. Check control cable connections. Restart the control system and the panel. |
| Incorrect function triggered. | Button misconfiguration. | Review the button assignments in the control system's programming interface. |
If the problem persists after attempting these solutions, contact Vivolink technical support or your system integrator.
Specifications
- Model: VLCP8B
- Brand: Vivolink
- Buttons: 8 programmable buttons
- Connectivity: (Assumed, based on typical control panels: e.g., Ethernet, RS-232, USB) - Specifics not provided in source data.
- Power Supply: (Assumed, based on typical control panels: e.g., DC 5V) - Specifics not provided in source data.
- Dimensions: (Not provided in source data)
- Weight: (Not provided in source data)
Note: Detailed technical specifications may be available on the official Vivolink product page or in a separate technical datasheet.
Warranty and Support
Vivolink products are designed for reliability and performance. For information regarding warranty terms and conditions, please refer to the warranty card included with your product or visit the official Vivolink website.
For technical assistance, troubleshooting, or service inquiries, please contact Vivolink customer support or your authorized dealer. Provide your product model (VLCP8B) and serial number (if applicable) when seeking support.
Vivolink Official Website: www.vivolink.net
Ask a question about this manual
Ask about setup, troubleshooting, compatibility, parts, safety, or missing instructions. Manuals+ will review the question and use this page’s manual context to help answer it.