
1. Introduction
This manual provides comprehensive instructions for the safe and efficient operation, setup, maintenance, and troubleshooting of your Panasonic PT-DZ570U DLP Projector. Please read this manual thoroughly before using the projector and retain it for future reference.
The Panasonic PT-DZ570U is a high-performance DLP projector designed for various applications, offering WUXGA (1920 x 1200) resolution, 4000 lumens brightness, and a 2000:1 contrast ratio for clear and vibrant images.
2. Safety Information
Observe the following safety precautions to prevent damage to the projector and ensure user safety:
- Power Supply: Use only the specified power supply voltage. Ensure the power cord is securely connected.
- Ventilation: Do not block ventilation openings. Ensure adequate space around the projector for proper airflow to prevent overheating.
- Heat: The projector lamp becomes very hot during operation. Allow the projector to cool down before handling or performing maintenance.
- Lens: Do not look directly into the projector lens when the lamp is on, as the bright light can damage your eyes.
- Location: Avoid placing the projector in unstable locations, or areas with high humidity, dust, or extreme temperatures.
- Servicing: Refer all servicing to qualified service personnel. Do not attempt to open or repair the projector yourself.
3. Package Contents
Verify that all items are present in the package:
- Panasonic PT-DZ570U DLP Projector
- Power Cable(s)
- Remote Control with Batteries
- User Manual (this document)
- Lens Cap
4. Product Overview
Familiarize yourself with the main components and controls of your PT-DZ570U projector.
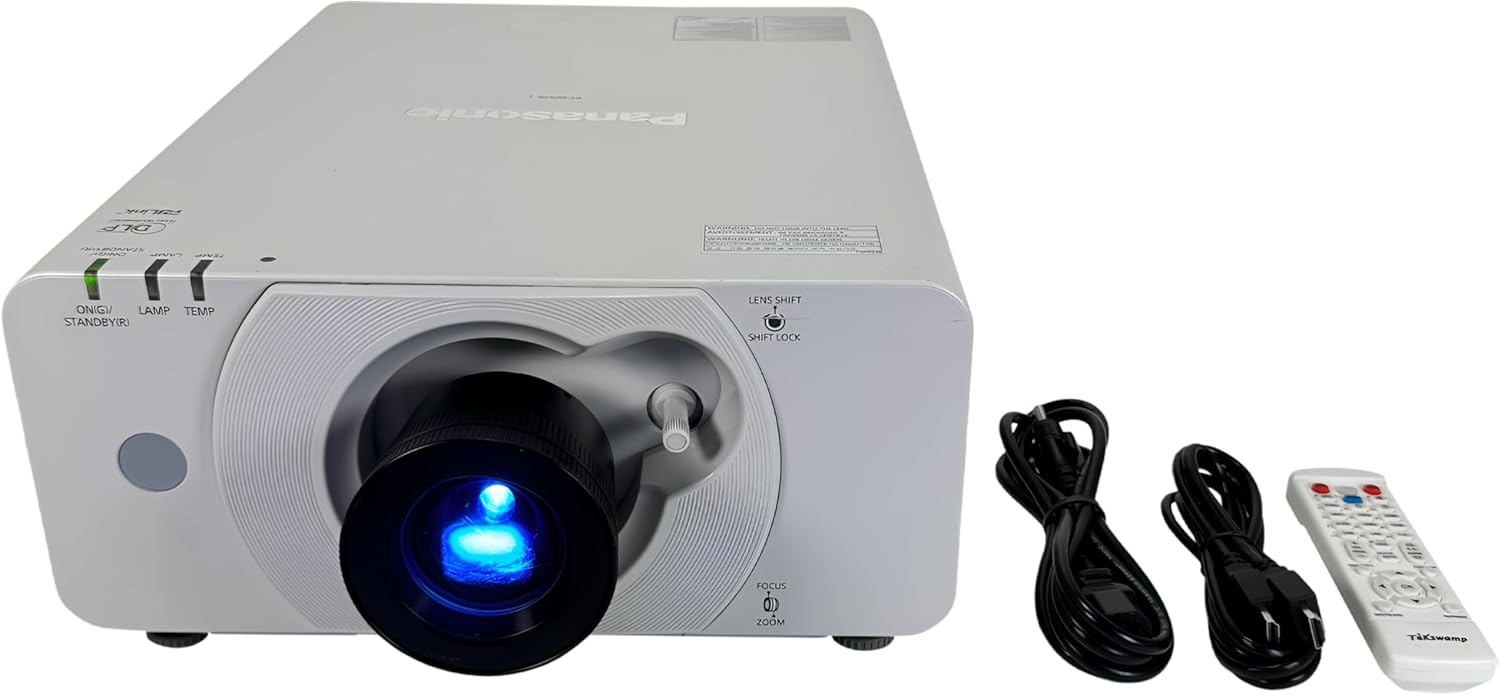
Figure 4.1: Panasonic PT-DZ570U DLP Projector, showing the front lens, top panel indicators, and included accessories.
4.1 Front Panel and Controls
- Projection Lens: The optical component that projects the image onto the screen.
- Focus Ring: Adjusts the sharpness of the projected image.
- Zoom Ring: Adjusts the size of the projected image.
- Lens Shift Dial: Allows vertical and horizontal adjustment of the image position without moving the projector.
- Shift Lock: Secures the lens shift position.
4.2 Top Panel Indicators
- ON(G)/STANDBY(R) Indicator:
- Green: Projector is on.
- Red: Projector is in standby mode.
- Flashing: Indicates a specific status or error (refer to troubleshooting).
- LAMP Indicator:
- Off: Lamp is operating normally.
- On/Flashing: Indicates a lamp issue or end-of-life.
- TEMP Indicator:
- Off: Internal temperature is normal.
- On/Flashing: Indicates overheating.
4.3 Remote Control
The included remote control provides full functionality for operating the projector from a distance. Ensure batteries are correctly inserted.
5. Setup
5.1 Projector Placement
Position the projector on a stable, level surface or mount it securely. Ensure the projector is within the optimal projection distance for your screen size. Maintain adequate ventilation space around the unit (at least 30 cm / 12 inches from walls or obstructions).
5.2 Connecting Power
- Connect the power cable to the projector's AC inlet.
- Plug the other end of the power cable into a grounded electrical outlet.
- The ON/STANDBY indicator will illuminate red, indicating standby mode.
5.3 Connecting Input Sources
The PT-DZ570U supports various input sources. Connect your devices using appropriate cables:
- HDMI: For high-definition digital video and audio.
- VGA (D-sub 15-pin): For analog computer signals.
- Ethernet (LAN): For network control and monitoring.
- Other Inputs: Refer to the projector's rear panel for additional input options like DisplayPort or USB, if available on your specific unit.
6. Operating Instructions
6.1 Powering On/Off
- To Power On: Press the POWER ON button on the remote control or the projector's control panel. The ON/STANDBY indicator will turn green.
- To Power Off: Press the POWER OFF button. A confirmation message may appear. Press it again to confirm. The projector will enter cooling mode, and the ON/STANDBY indicator will turn red after cooling.
6.2 Adjusting Image
- Focus: Rotate the Focus ring on the lens until the image is sharp.
- Zoom: Rotate the Zoom ring on the lens to adjust the image size.
- Lens Shift: Use the Lens Shift dial to move the image vertically or horizontally without tilting the projector. Engage the Shift Lock to secure the position.
- Keystone Correction: If the image is trapezoidal, use the keystone correction function in the projector's menu (usually accessible via the remote control) to square the image.
6.3 Input Selection
Press the INPUT button on the remote control or projector to cycle through available input sources (HDMI, VGA, etc.) until your desired source is displayed.
6.4 Menu Navigation
Use the MENU button on the remote to access the on-screen display (OSD) menu. Navigate using the arrow keys and confirm selections with the ENTER button. Adjust settings such as picture mode, aspect ratio, color, and network configurations.
7. Maintenance
Regular maintenance ensures optimal performance and extends the lifespan of your projector.
7.1 Cleaning the Lens
Gently wipe the lens with a soft, lint-free cloth specifically designed for optical surfaces. Do not use abrasive cleaners or excessive force.
7.2 Cleaning Air Filters
The projector has air filters to prevent dust accumulation. Clean or replace the filters regularly (e.g., every 100-200 hours of operation, depending on environment) to maintain proper cooling. Refer to the projector's internal menu for filter usage time and replacement instructions.
7.3 Lamp Replacement
The lamp has a finite lifespan. When the LAMP indicator illuminates or the image becomes dim, the lamp may need replacement. Always use genuine Panasonic replacement lamps. Follow the specific lamp replacement procedure outlined in the full service manual or consult a qualified technician.
8. Troubleshooting
If you encounter issues, refer to the following common problems and solutions:
| Problem | Possible Cause | Solution |
|---|---|---|
| No image displayed. |
|
|
| Image is blurry. |
|
|
| Projector shuts down unexpectedly / TEMP indicator on. |
|
|
| LAMP indicator on/flashing. |
|
|
For more detailed troubleshooting, refer to the full service manual or contact Panasonic customer support.
9. Specifications
| Feature | Detail |
|---|---|
| Model Number | PT-DZ570U |
| Display Technology | DLP |
| Native Resolution | WUXGA (1920 x 1200) |
| Brightness | 4000 Lumens |
| Contrast Ratio | 2000:1 |
| Aspect Ratio | 16:10 (Native) |
| Connectivity | HDMI, VGA, Fast Ethernet, DisplayPort, USB, Wireless (optional) |
| Power Consumption | 415 W |
| Dimensions (W x D x H) | 23.5 x 18.5 x 16 inches |
| Weight | 18.7 pounds |
| Special Features | Portable, RGB Booster, Built-in Waveform Monitor |
10. Warranty and Support
Your Panasonic PT-DZ570U DLP Projector is covered by a limited warranty. Please refer to the warranty card included with your product or visit the official Panasonic website for detailed warranty terms and conditions.
For technical support, service, or to purchase replacement parts, please contact Panasonic customer support or visit their official support portal. Keep your model number (PT-DZ570U) and serial number ready when contacting support.
Panasonic Official Website: www.panasonic.com