The Beadsmith DP2100
Instruction Manual
The Beadsmith Steel Circle Disc Cutter Set
Model: DP2100
Product Overview
The Beadsmith Professional Quality Disc Cutter Set is designed for precisely cutting circular discs from soft sheet metals. This robust tool simplifies the process of creating uniform metal blanks for various crafting and jewelry-making applications. It includes a die block and 14 punches of varying sizes, allowing for a wide range of disc diameters.
The set is constructed from solid, high-density, and durable alloy steel, ensuring longevity and consistent performance. The holes in the die block are meticulously drilled, reamed, and homed to facilitate clean and accurate cuts.
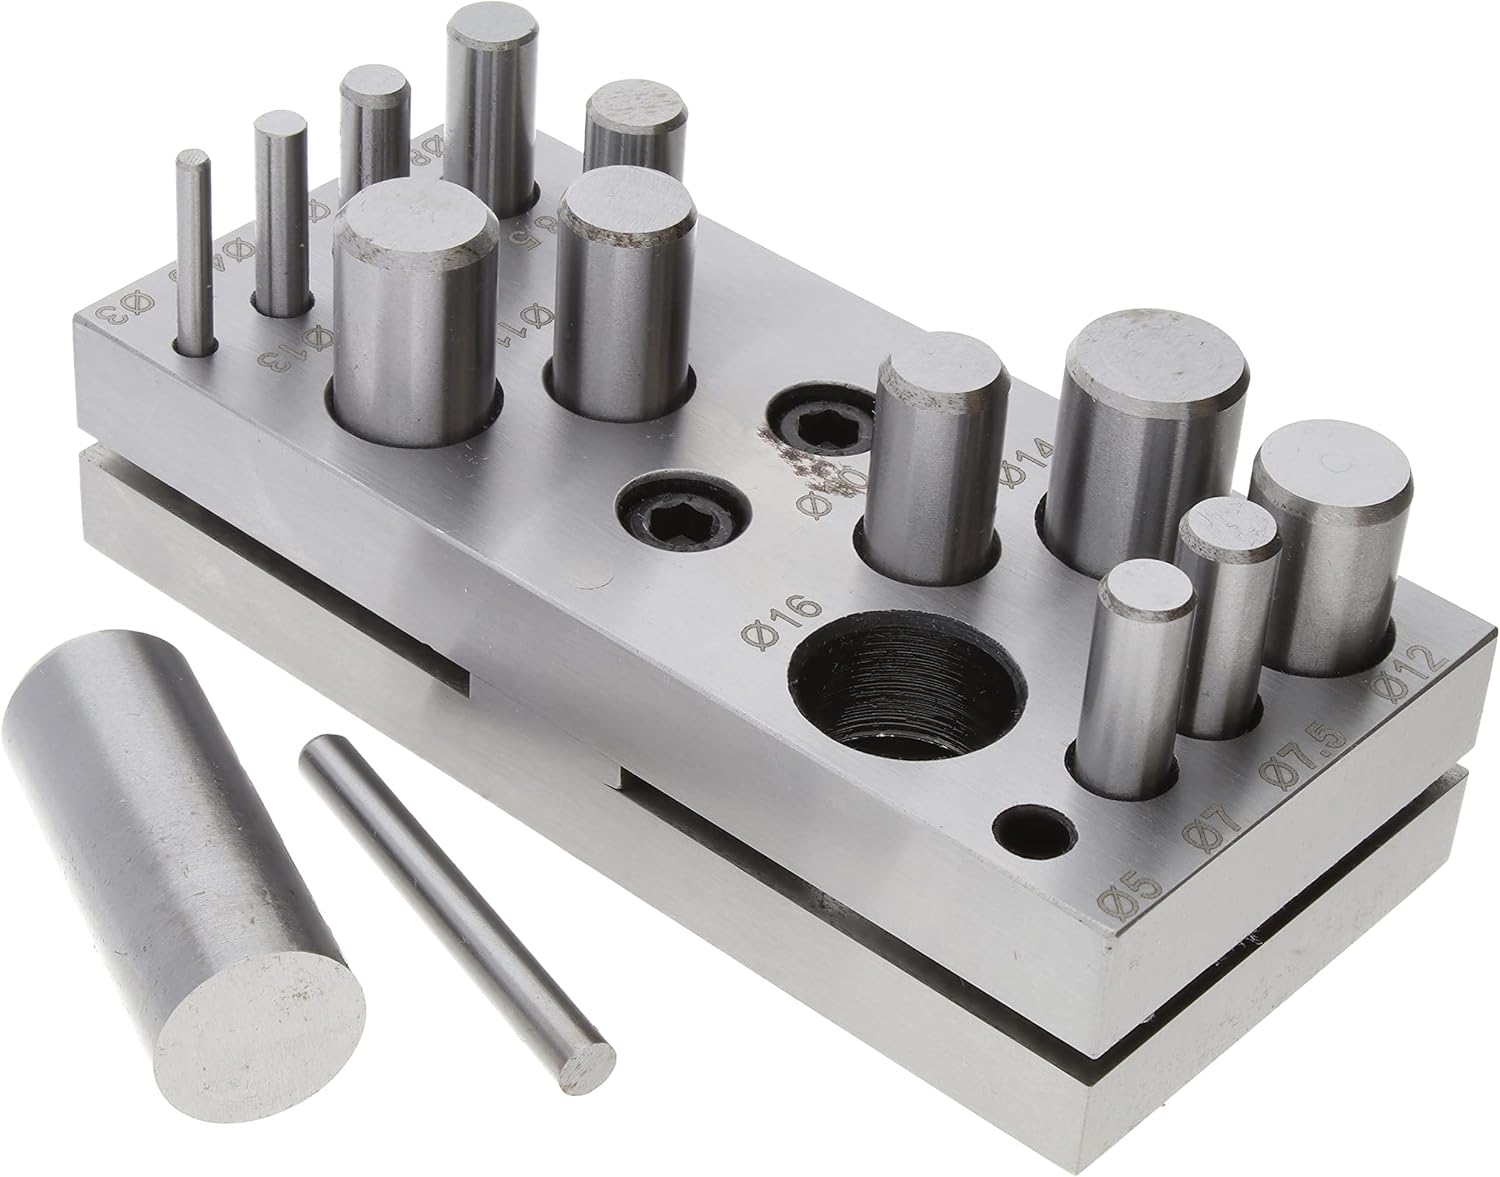
Image: The complete Beadsmith Steel Circle Disc Cutter Set, showcasing the die block and the assortment of 14 punches.
Safety Information
Always prioritize safety when using this disc cutter set. Failure to follow safety guidelines can result in injury.
- Eye Protection: Always wear safety glasses or goggles to protect your eyes from flying debris or metal shards during the cutting process.
- Stable Work Surface: Ensure the disc cutter is placed on a sturdy, durable, and level work surface that can withstand the force of hammering.
- Hand Protection: Consider wearing gloves to protect your hands from sharp edges of metal sheets and the tool itself.
- Proper Hammer Use: Use a copper or brass hammer of appropriate weight (1-2 lbs) to strike the punches. Avoid using steel hammers, which can damage the punches.
- Clear Work Area: Keep your work area clean and free of clutter to prevent accidents.
- Adult Supervision: This tool is not a toy. Keep out of reach of children.
Setup
- Unpacking and Cleaning: The tool may be packaged with a protective oil coating. Before first use, carefully wipe off any excess oil with a clean cloth.
- Work Surface Preparation: Place the disc cutter die block on a sturdy, durable work surface. For optimal performance and to absorb impact, it is highly recommended to place the die block on a rubber bench block or pad.
- Lubrication: Apply a small amount of lubricant (such as beeswax, cutting fluid, or a specialized metalworking lubricant) to the cutting edges of the punch you intend to use. This reduces friction and helps ensure a cleaner cut.
Operating Instructions
Follow these steps to cut accurate metal discs:
- Select Metal: Choose a soft sheet metal suitable for cutting, such as aluminum, brass, silver, or gold. The tool is designed for metal up to 14 gauge and thinner.
- Insert Metal Sheet: Slide the metal sheet into the slot of the die block. Position the sheet so that the desired cutting area aligns with the chosen hole.
- Select Punch: Choose the punch corresponding to the desired disc size. The set includes 14 punches for circles of the following diameters: 7/64", 11/64", 3/16", 15/64", 17/64", 19/64", 5/16", 21/64", 25/64", 7/16", 15/32", 1/2", 35/64", and 5/8" (equivalent to 3, 4, 4.5, 5, 6.5, 7.5, 8, 10, 11, 12, 12.5, 14 & 16mm).
- Position Punch: Insert the selected punch into the corresponding hole in the die block. Ensure the flat side of the punch is facing down towards the metal sheet, and the bevel side is facing up.
- Strike the Punch: Using a 1-2 lb copper or brass hammer, deliver a clean, strong, and decisive strike to the top of the punch. The goal is to push the cutter completely through the metal sheet in a single, forceful blow. This creates a crisp and clean circular disc.
- Retrieve Disc: Once cut, the disc will fall through the die block. Carefully remove the cut disc and the remaining metal sheet.
- Repeat: Reposition the metal sheet and repeat the process for additional discs.

Image: The disc cutter set in operation, showing a metal sheet inserted and several perfectly cut circular discs.
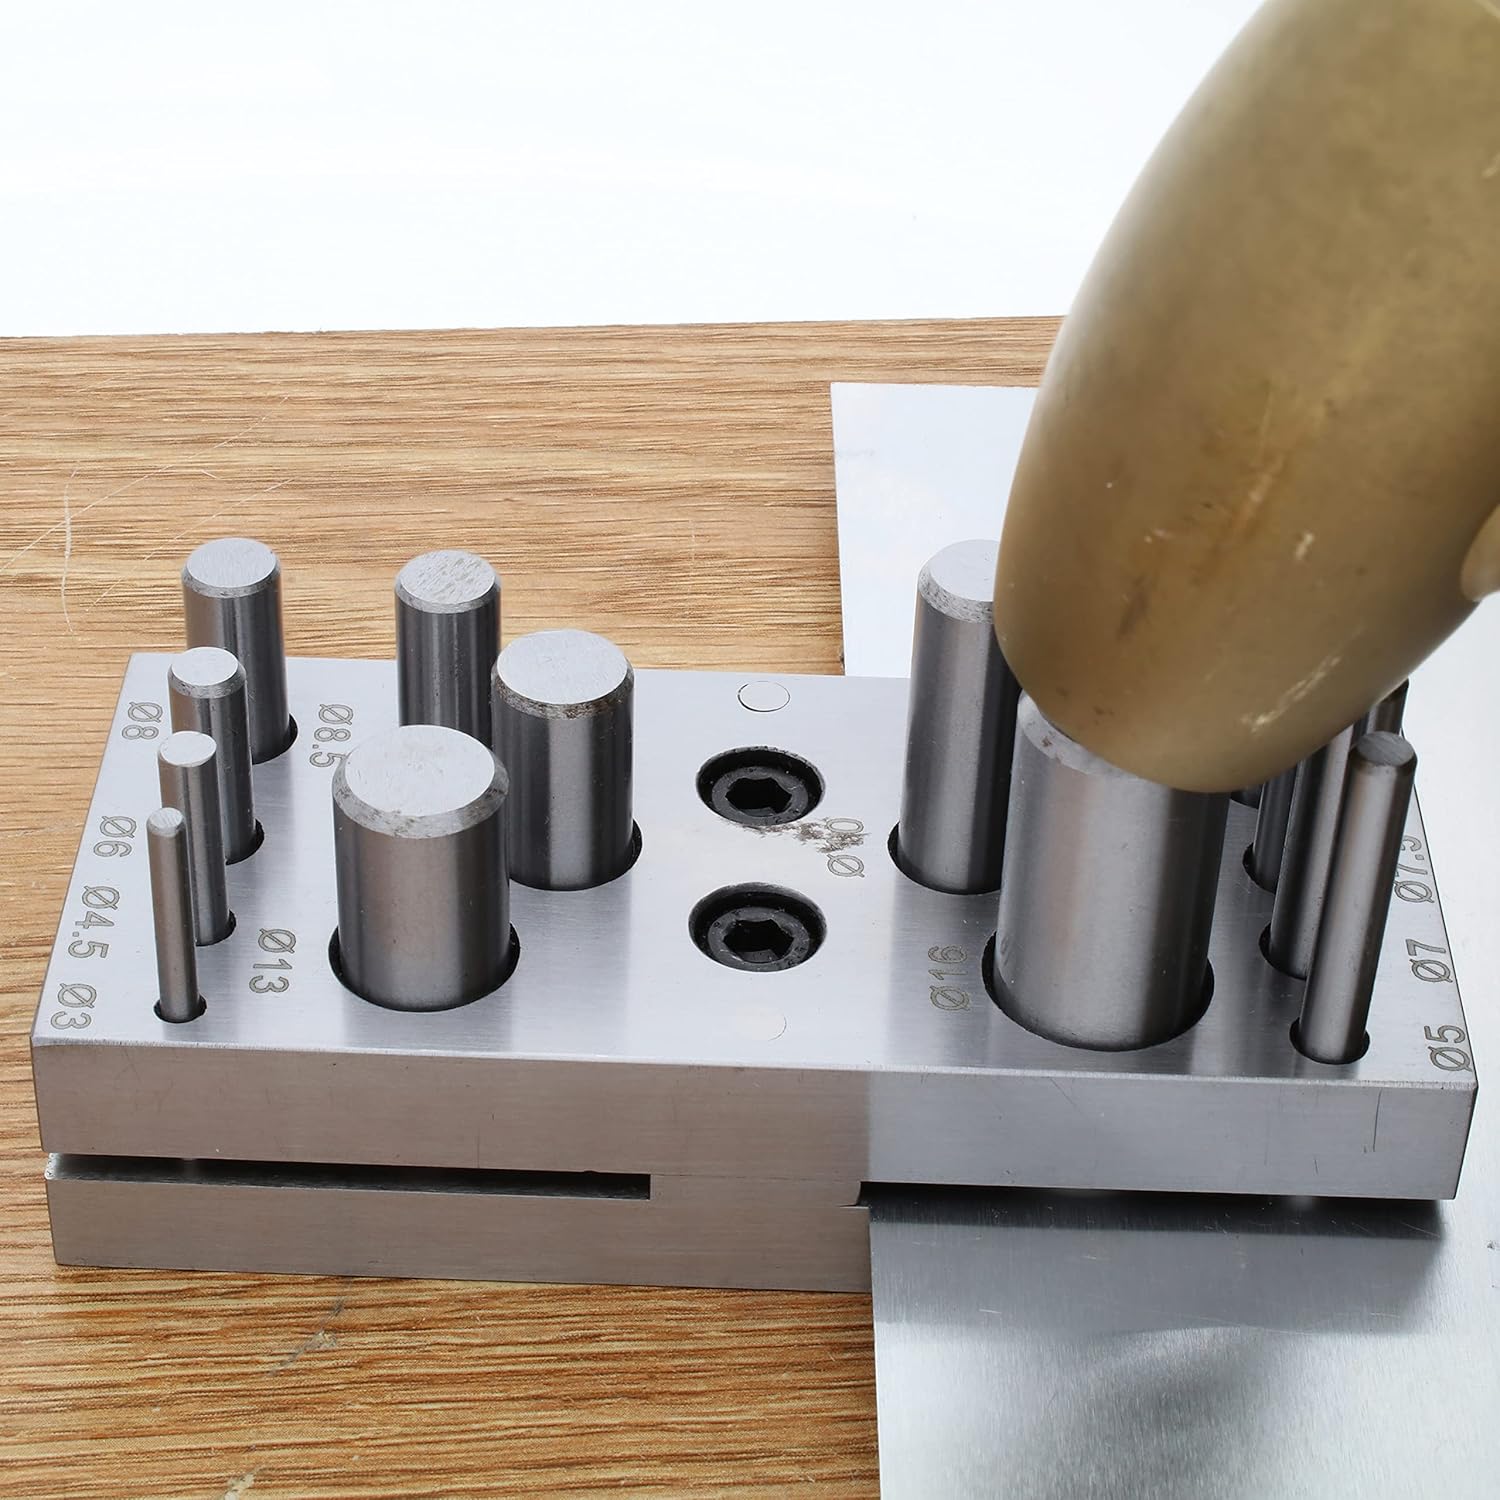
Image: Demonstrating the use of a hammer to strike a punch, driving it through the metal sheet to create a disc.
Note: Some users find that using a hydraulic press provides more consistent and cleaner cuts, especially for thicker gauges or larger discs, as it minimizes lateral movement during the cutting process.
Maintenance
Proper maintenance will extend the life and performance of your disc cutter set.
- Cleaning: After each use, wipe down the die block and punches to remove any metal dust, debris, or excess lubricant. A soft cloth is usually sufficient.
- Lubrication: Periodically re-lubricate the punches and the inside of the die holes, especially if the tool will be stored for an extended period or if you notice increased friction during use. A light machine oil or rust preventative is suitable.
- Storage: Store the disc cutter set in a dry environment to prevent rust. The original packaging or a dedicated tool box is ideal.
- Inspection: Regularly inspect the punches and die block for any signs of wear, damage, or burrs. While the tool is designed for durability, proper care ensures optimal cutting results.
Troubleshooting
| Problem | Possible Cause | Solution |
|---|---|---|
| Metal sheet bends or deforms during cutting. | Metal is too thick for the tool; insufficient striking force; improper support; metal type is too hard. | Ensure metal is 14 gauge or thinner and is a soft metal (aluminum, brass, silver, gold). Use a firm, single, strong strike. Ensure the die block is on a stable, supportive surface (e.g., rubber bench block). Consider using a hydraulic press for more consistent force. |
| Punch gets stuck in the die block. | Insufficient lubrication; metal is too thick; punch inserted incorrectly; lateral movement during strike. | Apply ample lubricant to the punch's cutting edge. Ensure metal is within the specified gauge. Verify the punch is inserted flat-side down. Use a direct, strong strike to minimize lateral movement. Do NOT reverse the cutting die. |
| Cut discs have ragged or uneven edges. | Insufficient lubrication; dull punch (unlikely for new tool); weak or multiple strikes; metal too thick. | Ensure adequate lubrication. Use a single, clean, strong strike. Verify metal gauge. |
| Punches do not fit or are too tight in the holes. | Protective oil not fully removed; lack of lubrication; manufacturing tolerance. | Thoroughly clean and lubricate the punch and hole. If the issue persists after lubrication, contact customer support. |
| Discs are not perfectly round or are offset. | Die block not stable; lateral movement of punch during strike; metal sheet not properly aligned. | Ensure the die block is on a completely stable and level surface. Use a direct, vertical strike. Ensure the metal sheet is flat and properly positioned in the slot. |
Specifications

Image: Detailed diagram illustrating the dimensions of the disc cutter base and the various punch sizes included in the set.
| Feature | Detail |
|---|---|
| Product Name | The Beadsmith Steel Circle Disc Cutter Set |
| Model Number | DP2100 |
| Material | Solid High-Density Durable Alloy Steel |
| Number of Punches | 14 |
| Circle Sizes (Imperial) | 7/64", 11/64", 3/16", 15/64", 17/64", 19/64", 5/16", 21/64", 25/64", 7/16", 15/32", 1/2", 35/64", 5/8" |
| Circle Sizes (Metric) | 3mm, 4mm, 4.5mm, 5mm, 6.5mm, 7.5mm, 8mm, 10mm, 11mm, 12mm, 12.5mm, 14mm, 16mm |
| Maximum Metal Gauge | 14 Gauge (and thinner) |
| Compatible Metals | Soft metals such as Aluminum, Brass, Silver, Gold |
| Base Dimensions | 4-1/4" x 1-3/4" x 1" (108mm x 44.5mm x 25.4mm) |
| Item Weight | 2.29 pounds |
| Manufacturer | The Beadsmith |
| Date First Available | March 21, 2017 |
Warranty Information
Specific warranty details for The Beadsmith Steel Circle Disc Cutter Set are not provided in this manual. For information regarding product warranty, please contact The Beadsmith directly or refer to the product packaging and purchase documentation.
Customer Support
For further assistance, technical support, or inquiries about your Beadsmith Steel Circle Disc Cutter Set, please contact The Beadsmith customer service.
You can often find contact information on the manufacturer's official website or through the retailer where the product was purchased.
Visit The Beadsmith Store on Amazon for more information and product resources.
Ask a question about this manual
Ask about setup, troubleshooting, compatibility, parts, safety, or missing instructions. Manuals+ will review the question and use this page’s manual context to help answer it.