
1. Product Overview
The HAYEAR 14MP TV HDMI USB Industry Digital C-Mount Microscope Camera HY-2307 is a versatile imaging solution designed for industrial, educational, and research applications. It features a 14-megapixel Japanese Color CMOS sensor, offering high-resolution image and video capture. The camera supports both HDMI 1080P @60FPS output for direct monitor connection and USB2.0 @ 30FPS for PC connectivity.

Figure 1: HAYEAR 14MP Microscope Camera, showing the camera unit, remote control, and various ports including TF card slot, HDMI, and USB output.

Figure 2: Detailed view of the camera's top panel, highlighting the Type-C interface, HDMI interface, LED indicator, IR receiver, and control buttons for menu, mode, zoom, and photo/video capture.
Key Features:
- Sensor: 14-megapixel Japanese Color CMOS sensor (1/2.5 inch).
- Output Modes: HDMI 1080P @60FPS, USB2.0 @ 30FPS.
- Image Resolution: 4320*3240 (JPG format).
- Video Resolution: 1920*1080 @ 60FPS (HDMI), 1920*1080 @ 30FPS (USB).
- Storage: TF card support for MP4 video format.
- Cross Lines: Support for multi-color, 5 transverse/vertical lines, movable and adjustable.
- PC Compatibility: Windows / Mac System (USB output).
2. Setup Guide
2.1 Unboxing and Component Identification
Carefully unpack all components from the box. Verify that all items listed in the packing list are present and undamaged.
Video 1: Digital Microscope Installation Guide. This video demonstrates the unboxing and assembly process for a digital microscope, including attaching the camera to the stand and connecting accessories.
2.2 Assembly
- Attach the Camera to the Microscope: Secure the 14MP camera to your C-mount compatible microscope. Ensure a snug fit to prevent movement during operation.
- Connect the Lens: If using an external lens, attach it to the camera's C-mount interface.
- Install Ring Light (Optional): If using a ring light for illumination, attach it around the lens and connect its power supply.
- Power Connection: Connect the DC 12V/1A power adapter to the camera's power interface.
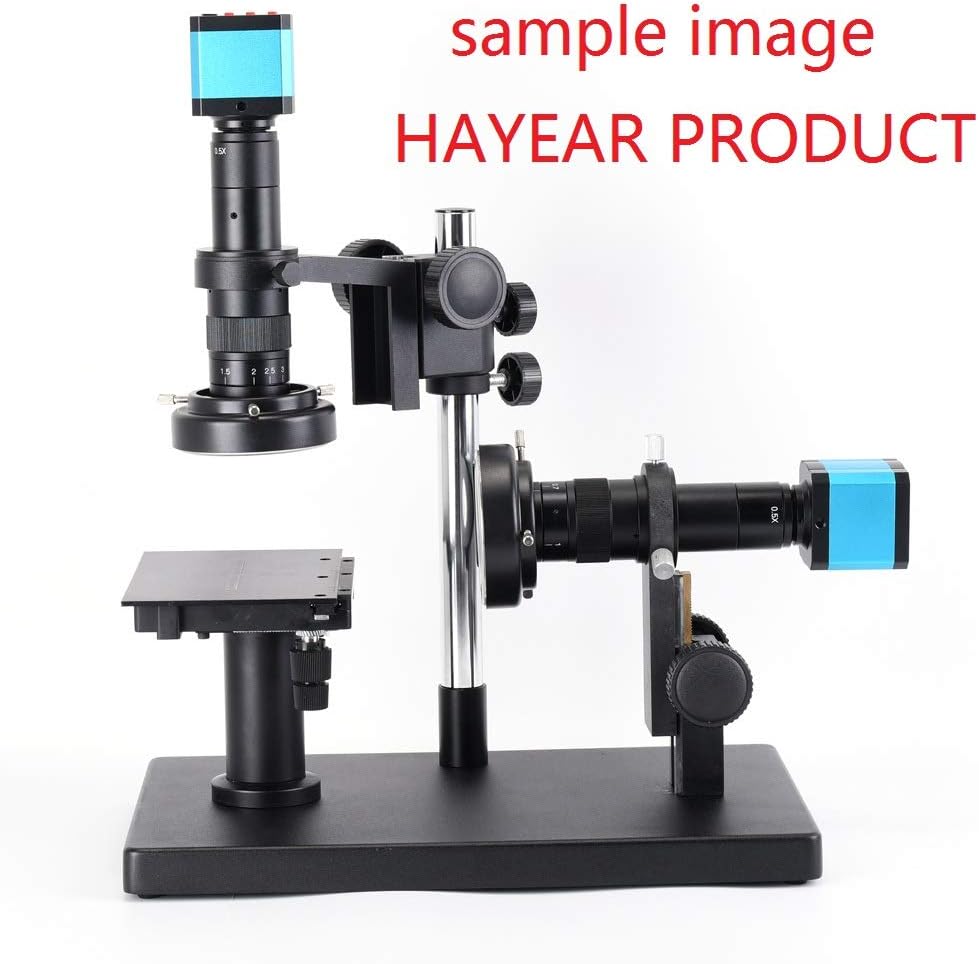
Figure 3: The HAYEAR 14MP camera mounted on a microscope stand, ready for observation.
2.3 Connection Options
The camera offers two primary connection methods:
- HDMI Mode: Connect the camera to an HDMI monitor using an HDMI cable. This provides a direct, high-frame-rate display.
- USB Mode: Connect the camera to a computer (Windows/Mac) via a USB cable. This allows for image/video capture and software control through the computer.

Figure 4: Connection diagrams illustrating how to set up the camera in HDMI mode (connected to a monitor with power adapter) and USB mode (connected to a computer).
3. Operating Instructions
3.1 Basic Operation
- Power On/Off: Press the 'ON/OFF' button on the camera or remote control to power the device.
- Focus Adjustment: Use the microscope's focus knobs to achieve a clear image on the connected display.
- Zoom: Use the 'UP' and 'DOWN' buttons on the camera or remote for digital zoom (if available and configured).
3.2 Menu Navigation (HDMI Mode)
When connected via HDMI, use the remote control or the camera's buttons to access and navigate the on-screen display (OSD) menu.
- MENU: Press to open/close the OSD menu.
- UP/DOWN: Navigate through menu options.
- OK/AE: Select an option or adjust auto-exposure.
- MODE: Switch between different modes (e.g., photo, video).

Figure 5: The camera's on-screen display menu shown on a monitor, allowing adjustment of settings like line set, picture scale, exposure, white balance, and color.
3.3 Image and Video Capture
- Photo: In photo mode, press the 'OK' button or the dedicated photo button on the remote to capture an image. Images are saved to the TF card.
- Video: In video mode, press the 'OK' button or the dedicated video button on the remote to start/stop recording. Videos are saved to the TF card.
Video 2: HAYEAR 14MP 1080P 60FPS Microscope Camera HY-2307 in action, demonstrating its image capture capabilities and clarity.
3.4 USB Output and PC Software
When connected to a PC via USB, the camera functions as a standard USB video device. Dedicated software may be available from the manufacturer for advanced control and measurement features. Note that parameter and remote control adjustments may not be available via USB output.

Figure 6: The microscope camera connected to a laptop, displaying the magnified image through PC software, suitable for detailed analysis and measurements.
4. Maintenance
4.1 Cleaning
- Lens: Use a soft, lint-free cloth and lens cleaning solution to gently wipe the lens. Avoid abrasive materials.
- Camera Body: Wipe the camera body with a dry, soft cloth. Do not use harsh chemicals or solvents.
- Sensor: The camera sensor is delicate. If cleaning is required, consult a professional or refer to specialized sensor cleaning kits.
4.2 Storage
Store the camera in a dry, dust-free environment when not in use. Protect it from extreme temperatures and humidity.
5. Troubleshooting
- No Image on Monitor (HDMI):
- Ensure the HDMI cable is securely connected to both the camera and the monitor.
- Verify the monitor input is set to the correct HDMI source.
- Check if the camera is powered on.
- No Image on PC (USB):
- Ensure the USB cable is securely connected and the camera is powered.
- Check your computer's device manager to see if the camera is recognized.
- Try a different USB port or cable.
- Unclear or Blurry Image:
- Adjust the microscope's focus knobs.
- Ensure the lens is clean and free of dust or smudges.
- Verify the correct C-mount adapter is used for your microscope (some microscopes may require a CS-mount adapter with an extension ring).
- Remote Control Not Responding:
- Check the remote control's battery.
- Ensure there are no obstructions between the remote and the camera's IR receiver.
- TF Card Issues:
- Ensure the TF card is inserted correctly.
- Check if the TF card is formatted correctly (FAT32 is common).
- If recording video, use a high-speed TF card (Class 10 or higher) to prevent recording interruptions.
6. Specifications
| Feature | Detail |
|---|---|
| Sensor | 14 megapixel Japanese Color CMOS sensor 1/2.5 inch |
| Model | Camera with HDMI 1080P @60FPS, USB2.0 @ 30FPS |
| Output | Either HDMI or USB output |
| Transverse and Vertical Line | Support multi-color, 5 pcs of transverse lines/vertical lines, movable, color adjustable |
| Video Format | MP4, TF card storage |
| Image Format | JPG |
| Image Resolution | 4320*3240 |
| Video Resolution (HDMI) | 1920*1080 @ 60FPS |
| Video Resolution (USB) | 1920*1080 @ 30fps |
| USB PC Support | Windows / Mac System (USB output Resolution is 1080P, 1920*1080 30fps); parameter and remote control can't adjust via USB out. |
| Item Weight | 1.13 ounces (32 Grams) |
| Item Model Number | HY-2307 |
| Eye Piece Lens Description | C-mount |
| Product Dimensions | 2.17"D |
| Focus Type | Manual Focus |
| Power Source | DC 12V/1A |
| Compatible Devices | Television |
7. Warranty and Support
For warranty information and technical support, please refer to the documentation included with your purchase or contact HAYEAR customer service directly. Keep your proof of purchase for warranty claims.
Online resources and additional support may be available on the official HAYEAR website.


