
BLACK+DECKER PLR3602
BLACK+DECKER 3.6V Cordless Twist Driver PLR3602
User Manual
1. Safety Information
Always read and understand all safety warnings, instructions, illustrations, and specifications provided with this power tool. Failure to follow all instructions listed below may result in electric shock, fire, and/or serious injury.
General Power Tool Safety Warnings
- Keep work area clean and well lit. Cluttered or dark areas invite accidents.
- Do not operate power tools in explosive atmospheres, such as in the presence of flammable liquids, gases or dust. Power tools create sparks which may ignite the dust or fumes.
- Keep children and bystanders away while operating a power tool. Distractions can cause you to lose control.
Electrical Safety
- Do not expose power tools to rain or wet conditions. Water entering a power tool will increase the risk of electric shock.
- Do not abuse the cord. Never use the cord for carrying, pulling or unplugging the power tool. Keep cord away from heat, oil, sharp edges or moving parts. Damaged or entangled cords increase the risk of electric shock.
Personal Safety
- Stay alert, watch what you are doing and use common sense when operating a power tool. Do not use a power tool while you are tired or under the influence of drugs, alcohol or medication.
- Use personal protective equipment. Always wear eye protection. Protective equipment such as dust mask, non-skid safety shoes, hard hat, or hearing protection used for appropriate conditions will reduce personal injuries.
- Prevent unintentional starting. Ensure the switch is in the off-position before connecting to power source, picking up or carrying the tool.
2. Product Overview
The BLACK+DECKER PLR3602 Cordless Twist Driver is a versatile and compact electric screwdriver designed for various fastening tasks. Its unique features include an adjustable body for inline or angled use, a 7-stage clutch for precise torque control, and integrated LED lights for improved visibility in dark areas.

Figure 2.1: The BLACK+DECKER 3.6V Cordless Twist Driver PLR3602 in its angled configuration.
Key Features
- Position Change Button: Allows easy transformation between inline and angled configurations for optimal access in different work environments.
- 7-Stage Clutch: Provides precise torque adjustment to prevent over-tightening and damage to screws or workpieces.
- Compact Design: Lightweight and ergonomic, making it easy to handle and maneuver in tight spaces.
- LED Lights: Four integrated LED lights illuminate the work area, enhancing visibility in dimly lit conditions.

Figure 2.2: Diagram highlighting the 7-stage clutch, position change button, and LED lights.

Figure 2.3: The tool demonstrating its ability to switch between inline and angled configurations.
Included Accessories
The PLR3602 comes with a selection of common bits and a charger:
- 50mm Length Bits: #1 Phillips, #2 Phillips, #2 Pozidrive, #8 Slotted, 3mm Hex, 4mm Hex, 5mm Hex, 6mm Hex
- 100mm Length Bits: #2 Phillips, #2 Pozidrive
- Charger (approx. 5 hours charging time)

Figure 2.4: The included charger and various bit accessories.
3. Setup
Charging the Battery
- Connect the charger to a standard power outlet.
- Insert the charger plug into the charging port on the tool.
- Allow approximately 5 hours for a full charge. The charging indicator light (if present) will show the charging status.
- Disconnect the charger once charging is complete.
Installing/Removing Bits
- Ensure the tool is turned off and the trigger is not pressed.
- Insert the desired 6.35mm hex shank bit firmly into the chuck until it clicks into place.
- To remove, pull the bit straight out from the chuck.
4. Operating Instructions
Powering On/Off
To operate the tool, simply press the trigger switch. The tool will start rotating. Release the trigger switch to turn off the tool.
Changing the Tool Angle
The PLR3602 features a position change button that allows you to switch between an inline (straight) and an angled configuration.
- Locate the position change button on the side of the tool.
- Press and hold the button.
- While holding the button, pivot the front section of the tool to your desired angle (inline or angled).
- Release the button once the tool is securely locked in the new position.

Figure 4.1: Using the tool in its angled configuration for easier access.
Adjusting the Clutch Setting
The 7-stage clutch allows you to control the amount of torque applied, preventing damage to screws or materials. Rotate the clutch collar located near the chuck to select the desired setting. Lower numbers provide less torque, suitable for delicate materials or small screws, while higher numbers provide more torque for larger screws or harder materials.
Using the LED Lights
The four LED lights automatically illuminate when the trigger is pressed, providing visibility in dark work areas. This feature is particularly useful when working inside cabinets or in poorly lit spaces.
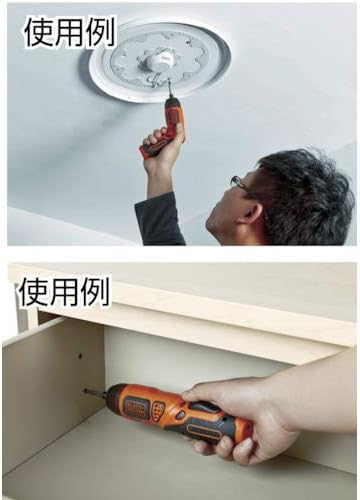
Figure 4.2: The tool being used to fasten a screw on a ceiling, demonstrating its compact design and LED light utility.
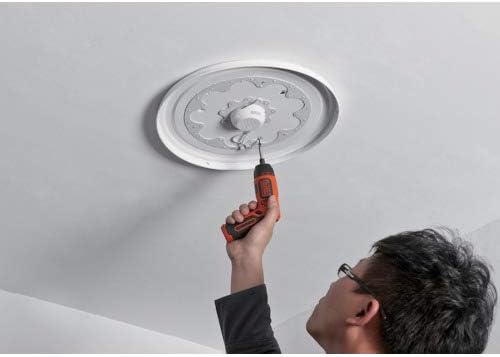
Figure 4.3: The tool in use inside a cabinet, showcasing its maneuverability in confined spaces.
5. Maintenance
Cleaning
- Regularly clean the ventilation slots on the tool to prevent overheating.
- Use a soft, damp cloth to wipe down the exterior of the tool. Do not use harsh chemicals or abrasive cleaners.
- Keep the chuck area free of dust and debris to ensure proper bit insertion and removal.
Storage
- Store the tool in a dry, cool place, away from direct sunlight and moisture.
- Ensure the battery is partially charged before long-term storage to maintain battery health.
- Keep the tool out of reach of children.
6. Troubleshooting
| Problem | Possible Cause | Solution |
|---|---|---|
| Tool does not turn on. | Battery is depleted. | Charge the battery for approximately 5 hours. |
| Tool lacks power or stops during use. | Battery is low or depleted. | Recharge the battery. |
| Bit wobbles or is not held securely. | Bit not fully inserted or incorrect bit type. | Ensure the bit is a 6.35mm hex shank and is fully inserted into the chuck. |
| Clutch slips too easily or not at all. | Incorrect clutch setting for the task. | Adjust the clutch collar to a higher or lower setting as needed for the material and screw size. |
| Tool body does not lock into position. | Position change button not fully pressed or released. | Ensure the position change button is fully depressed when adjusting and fully released to lock the angle. |
7. Specifications
| Feature | Specification |
|---|---|
| Model Number | PLR3602-JP |
| Power Source | Rechargeable (DC 3.6V) |
| Battery Type | Lithium-ion |
| Battery Capacity | 1.5Ah (approx. 5 hours charging) |
| Maximum Torque | 4.2 N·m |
| No-Load Speed | 200 RPM |
| Chuck Type | Hex Shaft (6.35mm two-face width) |
| Clutch Settings | 7 stages |
| LED Lights | 4 lights |
| Body Weight | 0.38 kg (381 g) |
| Body Dimensions (Angled) | Width 4.7 × Depth 16 × Height 12.5 cm |
| Body Dimensions (Inline) | Width 4.7 × Depth 21.5 × Height 5 cm |
| Maximum Screw Tightening Capacity | 40mm length |
| Maximum Work Volume | Approx. 300 pieces (φ3.5mm × 20mm screws) |
| Country of Origin | China |
8. Warranty and Support
Specific warranty information for the BLACK+DECKER PLR3602 is not provided within this manual. For details regarding warranty coverage, service, or technical support, please refer to the warranty card included with your product or contact BLACK+DECKER customer service directly through their official website or designated support channels.
Always ensure you have your product model number (PLR3602) and proof of purchase available when contacting support.
Related documentsPLR3602


Ask a question about this manual
Ask about setup, troubleshooting, compatibility, parts, safety, or missing instructions. Manuals+ will review the question and use this page’s manual context to help answer it.