
Introduction
This manual provides comprehensive instructions for the installation, operation, and maintenance of your RAIJINTEK Styx 0R200028 Micro-ATX Tower Computer Case. Designed for compact yet powerful computer builds, this aluminum chassis offers features for efficient component integration and thermal management. Please read this manual thoroughly before beginning assembly to ensure proper setup and safe operation.
Safety Information
- Always disconnect the power supply from the wall outlet before installing or removing any components.
- Wear an anti-static wrist strap to prevent electrostatic discharge (ESD) damage to sensitive components.
- Handle components carefully to avoid physical damage.
- Ensure all cables are properly routed and secured to prevent interference with cooling fans or other moving parts.
- Do not operate the computer case with side panels removed unless performing maintenance or troubleshooting.
- Keep the case away from direct sunlight, heat sources, and moisture.
Package Contents
Verify that all items are present in your package:
- RAIJINTEK Styx 0R200028 Micro-ATX Tower Computer Case
- Accessory Box (screws, standoffs, cable ties, etc.)
- User Manual (this document)
Specifications
| Feature | Specification |
|---|---|
| Brand | Raijintek |
| Model Name | Styx |
| Model Number | 0R200028 |
| Case Type | Micro-ATX Tower |
| Motherboard Compatibility | Micro ATX |
| Material | Aluminium, SPCC |
| Color | Blue |
| Item Weight | 3.8 Kilograms |
| Power Supply Mounting Type | Bottom Mount |
| Cooling Method | Air |
| Total USB 3.0 Ports | 2 |
| Internal Bays Quantity | 8 (Supports 3x 3.5" HDD + 2x 2.5" HDD or 1x 3.5" HDD + 4x 2.5" HDD) |
| Max CPU Cooler Height | 180mm |
| Max VGA Card Length | 280mm |
| Special Features | Side window, Removable Side Panels, Removable Drive Cages, Thermally Advantaged Chassis |
Setup and Installation
1. Preparing the Case
Carefully remove the case from its packaging. Place it on a stable, flat surface. Remove the side panels by unscrewing the thumbscrews at the rear of the case and sliding the panels backward.

Image: Front view of the RAIJINTEK Styx Micro-ATX Tower Computer Case. This shows the brushed aluminum finish and the power button at the top.

Image: Side view of the RAIJINTEK Styx Micro-ATX Tower Computer Case, highlighting the clear side window for viewing internal components.
2. Motherboard Installation
Install the necessary motherboard standoffs onto the motherboard tray according to your Micro-ATX motherboard's screw holes. Carefully place the motherboard onto the standoffs, aligning the screw holes, and secure it with screws from the accessory box.
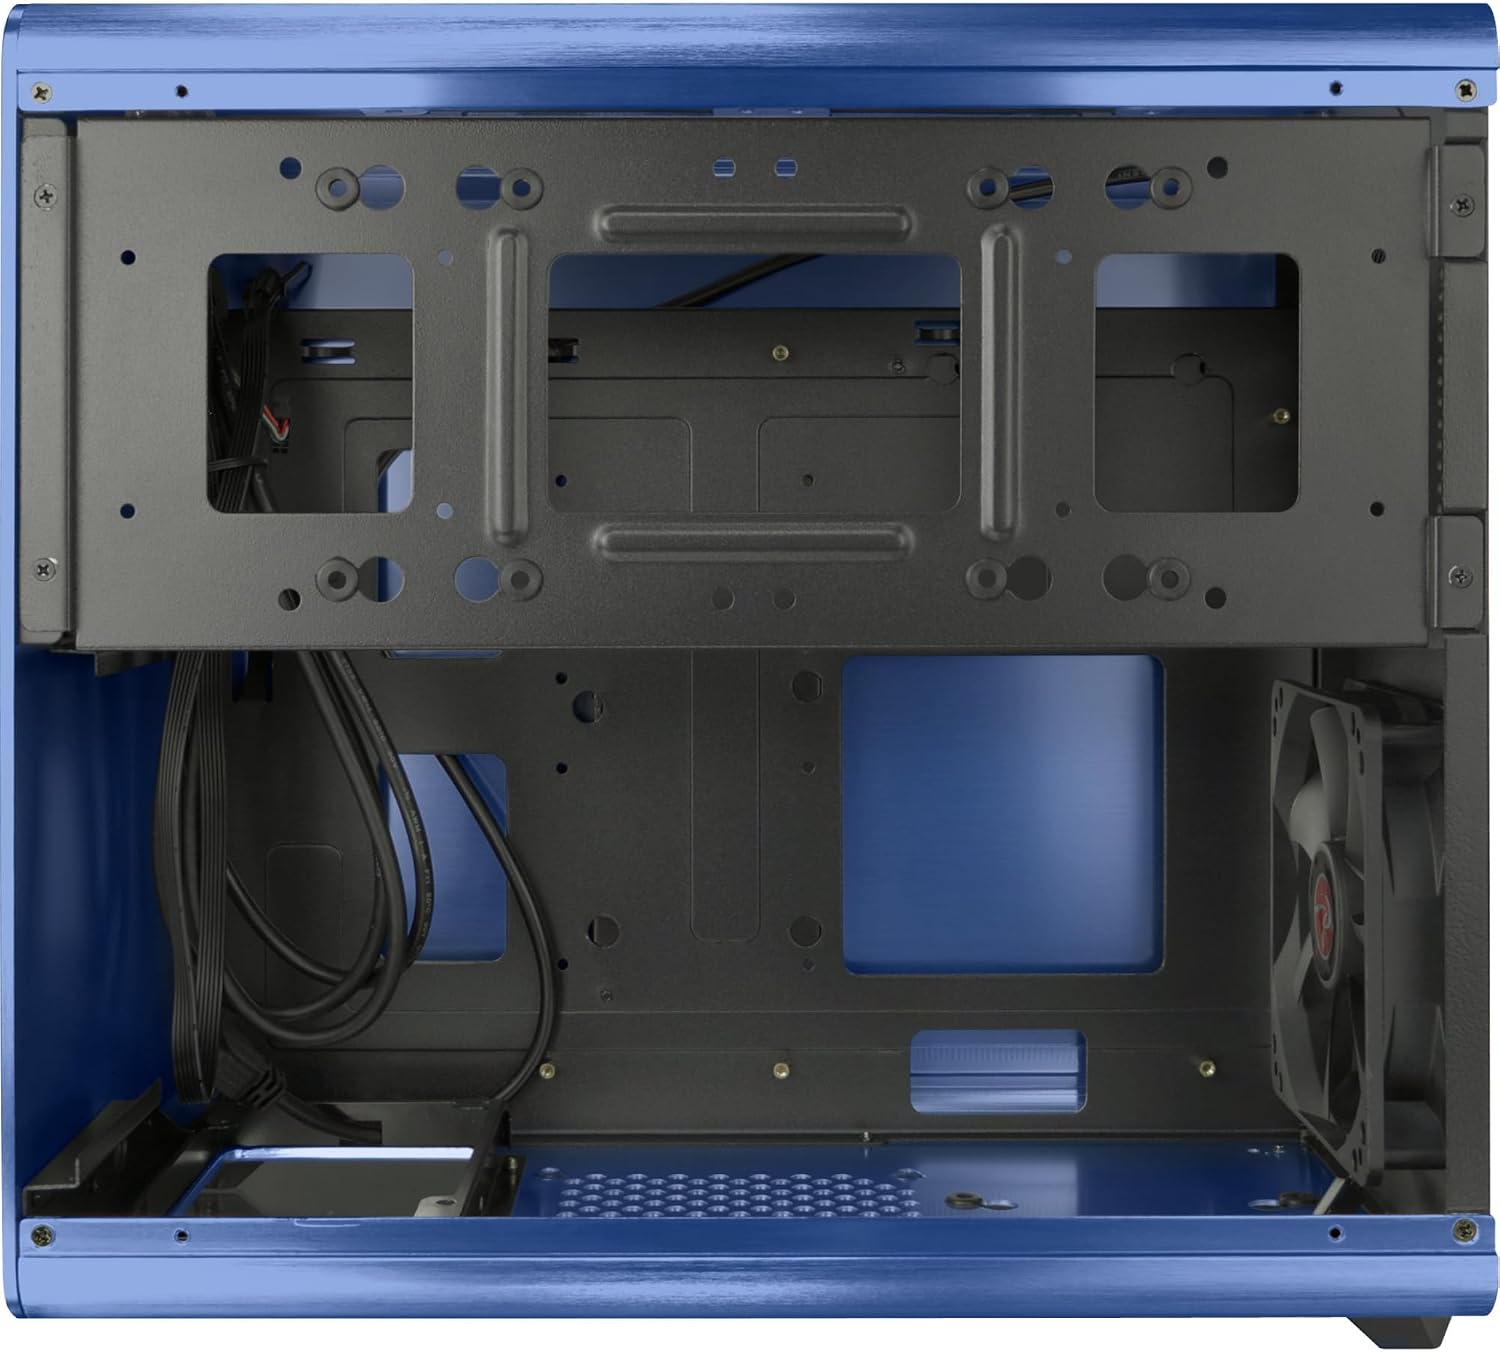
Image: Internal view of the RAIJINTEK Styx case, illustrating the motherboard tray and the layout for component installation.
3. Power Supply Installation
The Styx case supports standard ATX power supplies. Install the power supply into the designated bottom-mount area. Secure it with screws from the rear of the case. Route the power cables through the cable management cutouts.
Video: This video demonstrates the internal layout and component compatibility of the RAIJINTEK Styx Micro-ATX PC Case, including power supply installation.
4. Drive Installation (HDD/SSD)
The case features removable drive cages and supports various drive configurations (e.g., 3x 3.5" HDD + 2x 2.5" HDD or 1x 3.5" HDD + 4x 2.5" HDD). Install your 3.5-inch hard drives and 2.5-inch solid-state drives into the appropriate bays and secure them with the provided screws. Ensure proper cable connections for power and data.

Image: Rear view of the RAIJINTEK Styx case, illustrating the layout for the motherboard I/O shield, expansion slots, and the power supply mounting area.
5. VGA Card Installation
The Styx case supports VGA cards up to 280mm in length. Remove the necessary expansion slot covers at the rear of the case. Insert your graphics card into the PCIe slot on your motherboard and secure it with the retention clip and a screw to the case chassis.
6. Cooling Fan Installation
A 120mm fan is pre-installed at the rear for exhaust. Additional fans can be installed at the top and front for optimal airflow. Refer to your fan's manual for specific installation instructions. Ensure fans are oriented correctly for intake or exhaust as desired.

Image: Internal view of the RAIJINTEK Styx case, highlighting the pre-installed 120mm rear fan and the internal space for other components.
7. Front I/O Connections
Connect the front panel cables (USB 3.0, audio, power switch, reset switch, LED indicators) to the corresponding headers on your motherboard. Refer to your motherboard manual for the correct pin assignments.
Operating
Once all components are installed and secured, and all cables are connected, replace the side panels. Connect your monitor, keyboard, mouse, and power cable to the rear of your system. Press the power button on the front panel to start your computer. Ensure adequate ventilation around the case during operation.
Maintenance
- Cleaning: Regularly clean dust filters (if present) and internal components using compressed air. Ensure the system is powered off and unplugged before cleaning.
- Cable Management: Periodically check cable routing to ensure it does not obstruct airflow or fan operation.
- Ventilation: Ensure the case's ventilation openings are not blocked to maintain optimal cooling performance.
Troubleshooting
- System not powering on: Check all power connections, including the 24-pin ATX, 8-pin CPU, and GPU power cables. Ensure the power supply switch is in the 'ON' position. Verify front panel power switch connection to the motherboard.
- No display: Ensure the monitor is connected to the graphics card (not the motherboard integrated graphics, unless no dedicated GPU is present). Reseat the graphics card and RAM modules.
- Overheating: Check fan connections and ensure they are spinning. Verify proper airflow direction. Clean any dust buildup on fans and heatsinks.
- Component not detected: Reseat the component (e.g., RAM, GPU, storage drive). Check power and data cable connections.
Warranty and Support
For warranty information and technical support, please refer to the official RAIJINTEK website or contact their customer service directly. Keep your proof of purchase for warranty claims.
Official Website: www.raijintek.com