1. Introduction
Thank you for purchasing the Rollins ROL243 61-Key Electronic Keyboard. This manual provides essential information for the safe and efficient operation of your new instrument. Please read it thoroughly before use and keep it for future reference.
2. Safety Instructions
- Power Supply: Use only the specified AC/DC adapter. Ensure the voltage matches your local power supply.
- Water and Moisture: Do not expose the keyboard to water or moisture. Avoid placing liquids near the instrument.
- Ventilation: Do not block ventilation openings. Ensure adequate airflow around the keyboard.
- Heat Sources: Keep the keyboard away from heat sources such as radiators, heat registers, stoves, or other apparatus that produce heat.
- Cleaning: Clean only with a dry cloth. Do not use liquid cleaners or aerosols.
- Servicing: Do not attempt to service this product yourself. Refer all servicing to qualified service personnel.
3. Package Contents
Please check that all the following items are included in your package:
- Rollins ROL243 61-Key Electronic Keyboard
- AC/DC Power Adapter
- Instruction Manual
4. Product Overview
The Rollins ROL243 features 61 standard-sized keys, an LCD display, and various controls for sound, rhythm, and performance. Familiarize yourself with the layout before operation.
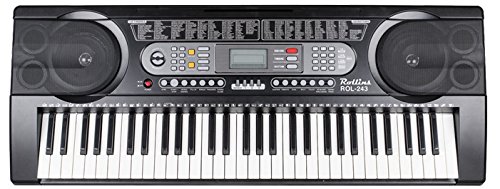
Image 1: Front view of the Rollins ROL243 61-Key Electronic Keyboard, showing the keys, control panel, and LCD display.
4.1. Control Panel Features
- LCD Display: Shows current settings, rhythm, timbre, and other operational information.
- Volume Control: Adjusts the overall output volume.
- Tempo Control: Adjusts the speed of rhythms and demonstration songs.
- Rhythm/Timbre Selection Buttons: Used to select from 128 rhythms and 128 timbres.
- Record/Playback Buttons: For recording and playing back your performances.
- Metronome Button: Activates the metronome function.
- Keyboard Split Button: Divides the keyboard into two sections for different sounds.
- Memory Function Buttons: For saving and recalling custom settings.
4.2. Rear Panel Connections
- DC IN Jack: Connect the AC/DC power adapter here.
- Headphone Jack (3.5mm): For connecting headphones for private practice.
- Speaker Outputs (L/R): For connecting to external amplifiers or speakers.
- MIDI Output: For connecting to other MIDI-compatible devices.
5. Setup
5.1. Power Connection
- Ensure the keyboard is turned off.
- Connect the AC/DC power adapter to the DC IN jack on the rear panel of the keyboard.
- Plug the other end of the adapter into a standard wall outlet.
5.2. Headphone/Speaker Connection
- Headphones: Insert a 3.5mm stereo headphone plug into the Headphone Jack. The internal speakers will automatically mute.
- External Speakers: Connect the L/R Speaker Outputs to an external amplifier or powered speakers using appropriate cables.
5.3. MIDI Connection
To connect the keyboard to other MIDI devices (e.g., computers, sound modules), use a MIDI cable from the MIDI Output port to the MIDI Input of the external device.
6. Operating Instructions
6.1. Power On/Off
Press the POWER button to turn the keyboard on. Press it again to turn it off.
6.2. Adjusting Volume and Tempo
- Use the VOLUME control knob or buttons to adjust the overall sound level.
- Use the TEMPO buttons to increase or decrease the speed of rhythms and demonstration songs.
6.3. Selecting Rhythms and Timbres
The ROL243 offers 128 rhythms and 128 timbres (instrument sounds).
- Press the RHYTHM button to enter rhythm selection mode. Use the number pad or +/- buttons to select a rhythm.
- Press the TIMBRE button to enter timbre selection mode. Use the number pad or +/- buttons to select an instrument sound.
- The selected rhythm or timbre number will be displayed on the LCD.
6.4. Playing Demonstration Songs
The keyboard includes 15 demonstration songs.
- Press the DEMO button. The first demonstration song will begin to play.
- Press the DEMO button again to cycle through the songs or use the +/- buttons.
- Press STOP to end playback.
6.5. Touch Sensitivity
The keyboard features touch sensitivity, meaning the volume of a note changes based on how hard you press the key. This allows for more expressive playing.
6.6. Record and Playback
You can record your performances and play them back.
- Press the RECORD button. The record indicator will light up.
- Play your desired melody on the keyboard.
- Press RECORD again or STOP to end recording.
- Press the PLAYBACK button to listen to your recorded performance.
6.7. Metronome
The metronome provides a steady beat for practice.
- Press the METRONOME button to start the metronome.
- Use the TEMPO buttons to adjust the metronome speed.
- Press METRONOME again to turn it off.
6.8. Keyboard Split Feature
This feature allows you to divide the keyboard into two sections, each with a different timbre.
- Press the SPLIT button. The keyboard will be divided at a preset point.
- You can then assign different timbres to the left and right sections. Refer to the LCD for specific split point and timbre assignments.
- Press SPLIT again to deactivate the feature.
6.9. Memory Function
The memory function allows you to save and recall your favorite settings (e.g., timbre, rhythm, tempo).
- Set your desired timbre, rhythm, and tempo.
- Press the MEMORY button, then press one of the numbered memory buttons (e.g., M1, M2) to save the settings.
- To recall saved settings, simply press the corresponding numbered memory button.
7. Maintenance
7.1. Cleaning
Wipe the keyboard with a soft, dry cloth. Do not use abrasive cleaners, waxes, or solvents as they may damage the finish.
7.2. Storage
When not in use, store the keyboard in a clean, dry place away from direct sunlight and extreme temperatures. If storing for an extended period, disconnect the power adapter.
8. Troubleshooting
- No Power: Ensure the AC/DC adapter is securely connected to both the keyboard and a working power outlet.
- No Sound: Check the volume level. If headphones are connected, disconnect them to enable internal speakers. Ensure external speakers/amplifier are powered on and connected correctly if used.
- Keys Not Responding: Ensure the keyboard is powered on. If only some keys are not responding, contact customer support.
- Distorted Sound: Check volume levels on both the keyboard and any connected external audio equipment. Ensure cables are securely connected.
9. Specifications
| Feature | Specification |
|---|---|
| Model Name | ROL243 |
| Number of Keys | 61 |
| Rhythms | 128 |
| Timbres | 128 |
| Demonstration Songs | 15 |
| Display | LCD |
| Special Features | Touch Sensitivity, Record/Playback, Rhythm Programming, Metronome, Keyboard Split, Memory Function |
| Connectivity | MIDI Output, Headphone Jack (3.5mm), Speaker Outputs (L/R) |
| Power Source | AC/DC Adapter |
| Item Weight | 4.31 kg |
| Item Dimensions | 40.6 x 101.6 x 15.2 Centimeters |
10. Warranty and Support
10.1. Warranty Information
This Rollins ROL243 Electronic Keyboard comes with a 1-year warranty from the date of purchase. This warranty covers manufacturing defects under normal use. It does not cover damage caused by misuse, accidents, unauthorized modifications, or normal wear and tear.
10.2. Customer Support
For technical assistance, warranty claims, or any questions regarding your Rollins ROL243 keyboard, please contact your retailer or the manufacturer's customer service department. Please have your purchase receipt and product model number ready when contacting support.