1. Product Overview
The ONKYO SL-T300 is a compact powered subwoofer designed to enhance the low-frequency audio experience in your home theater or stereo system. Its slim design allows for flexible placement, either horizontally or vertically, to fit seamlessly into various living spaces. This subwoofer incorporates a highly efficient digital amplifier and Onkyo's proprietary AERO ACOUSTIC DRIVE technology to deliver powerful, clear, and deep bass while minimizing unwanted noise.
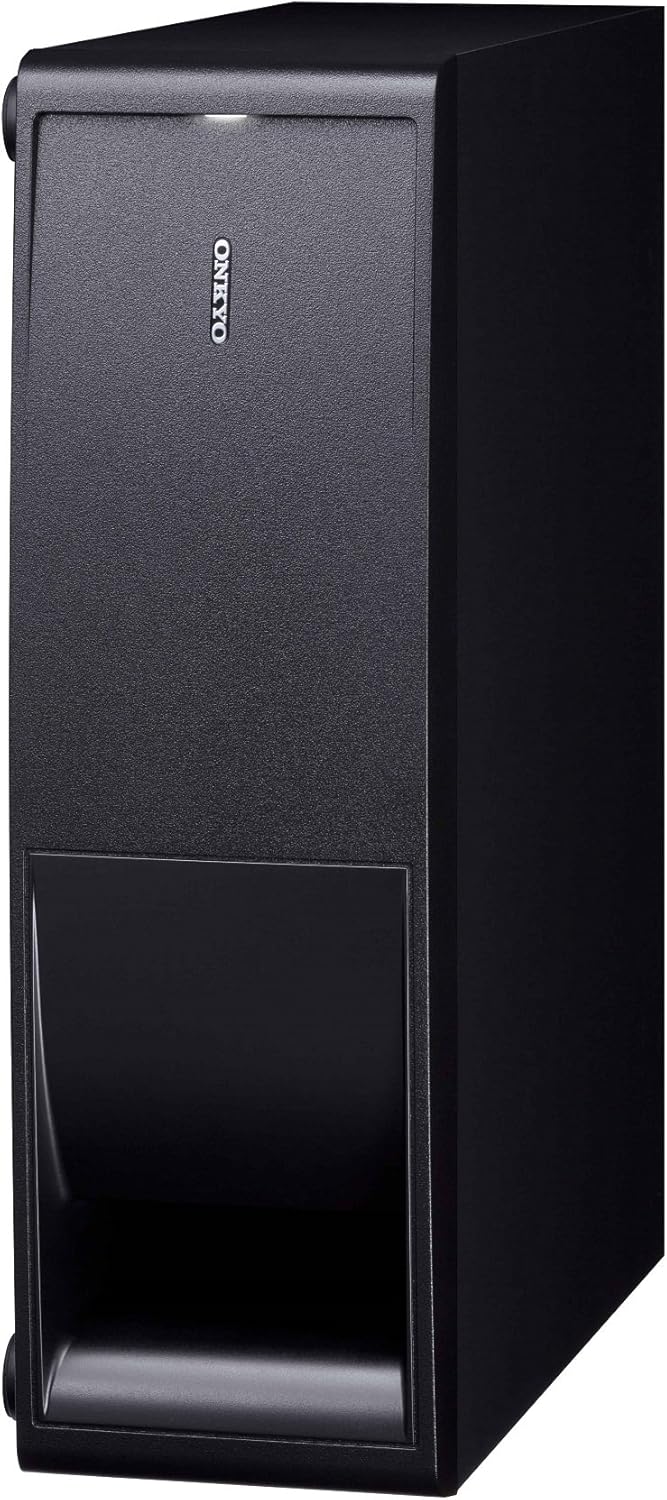
Image 1.1: The ONKYO SL-T300 subwoofer shown in its vertical placement configuration. This orientation is ideal for narrow spaces next to entertainment units or walls.

Image 1.2: The ONKYO SL-T300 subwoofer shown in its horizontal placement configuration. This orientation is suitable for placement under furniture or in wider, lower spaces.
2. Setup
2.1 Unpacking
Carefully remove the subwoofer from its packaging. Retain all packaging materials for future transport or storage. Ensure all components are present:
- ONKYO SL-T300 Powered Subwoofer
- Power Cord
- Instruction Manual (this document)
2.2 Placement
The SL-T300 offers versatile placement options:
- Vertical Placement: Position the subwoofer upright, ensuring stability. This is suitable for narrow spaces.
- Horizontal Placement: Lay the subwoofer flat. This is ideal for placement under furniture or in wider, lower areas.
For optimal bass performance, place the subwoofer in a corner or near a wall. Experiment with different locations to find the best sound balance for your room. Avoid placing it directly against a wall or in an enclosed cabinet, which can lead to boomy or muffled bass.
2.3 Connections
Before making any connections, ensure all audio equipment is turned off and unplugged from the power outlet.
- Connect to your AV Receiver/Amplifier: Use an RCA audio cable (not included) to connect the subwoofer's LFE (Low-Frequency Effects) input or Subwoofer Pre-Out to the corresponding output on your AV receiver or amplifier.
- Power Connection: Connect the supplied power cord to the subwoofer's AC inlet and then to a suitable wall outlet.
Note: If your receiver does not have a dedicated subwoofer output, consult your receiver's manual for alternative connection methods, such as using speaker-level inputs (if available on the subwoofer, though not explicitly listed in specifications, common for some subwoofers).
3. Operating Instructions
3.1 Power On/Off
After all connections are made, plug in the subwoofer's power cord. The subwoofer typically has an auto-standby feature, meaning it will power on automatically when it detects an audio signal and enter standby mode after a period of inactivity.
- Auto On/Standby: The subwoofer will automatically turn on when an audio signal is received and switch to standby mode when no signal is detected for a certain period.
- Manual Power: Some models may include a physical power switch. Refer to the unit's rear panel for specific controls.
3.2 Adjusting Settings
The SL-T300 features controls to fine-tune its performance to your listening environment and preferences. These controls are typically located on the rear panel of the subwoofer.
- Volume/Gain Control: Adjusts the output level of the subwoofer. Start with a low setting and gradually increase until the bass blends smoothly with your main speakers.
- Crossover Frequency Control: Determines the highest frequency the subwoofer will reproduce. Set this based on the low-frequency capabilities of your main speakers. A common starting point is 80 Hz. If your main speakers are small, you might set it higher (e.g., 100-120 Hz). If they are large, you might set it lower (e.g., 60 Hz).
- Phase Control (0°/180°): Adjusts the phase of the subwoofer's output relative to your main speakers. Experiment with both settings to find the one that produces the most impactful and coherent bass. Listen for the setting that provides the strongest and clearest bass response at your listening position.
Recommendation: Use test tones or familiar music/movies to calibrate the settings. Aim for a balanced sound where the subwoofer is not overly dominant but provides a solid foundation for the audio.
4. Maintenance
4.1 Cleaning
To maintain the appearance and performance of your subwoofer:
- Wipe the exterior surfaces with a soft, dry cloth.
- For stubborn marks, slightly dampen the cloth with water and then wipe dry immediately.
- Do not use abrasive cleaners, waxes, or solvents, as these can damage the finish.
- Avoid spraying liquids directly onto the subwoofer.
4.2 General Care
- Ensure adequate ventilation around the subwoofer to prevent overheating.
- Keep the subwoofer away from direct sunlight, heat sources, and excessive moisture.
- Avoid placing heavy objects on top of the unit.
- If the subwoofer will not be used for an extended period, unplug it from the power outlet.
5. Troubleshooting
If you experience issues with your ONKYO SL-T300 subwoofer, refer to the following common problems and solutions:
| Problem | Possible Cause | Solution |
|---|---|---|
| No sound from the subwoofer. |
|
|
| Bass is weak or unclear. |
|
|
| Humming or buzzing noise. |
|
|
If the problem persists after trying these solutions, please contact ONKYO customer support or a qualified service technician.
6. Specifications
| Feature | Specification |
|---|---|
| Model Number | SL-T300 |
| Brand | Onkyo |
| Speaker Type | Powered Subwoofer |
| Maximum Output Power | 95 Watts |
| Mounting Type | Tabletop Mount (Flexible for Horizontal/Vertical) |
| Color | Black |
| Item Weight | 6.4 kg |
| Power Source | Power Cord (AC) |
| Key Feature 1 | Slim design for horizontal/vertical placement |
| Key Feature 2 | Digital amplifier for efficiency and compact size |
| Key Feature 3 | AERO ACOUSTIC DRIVE for high-speed, rich bass |
| Key Feature 4 | Minimizes unwanted noise |
| Key Feature 5 | Expanded low-frequency reproduction range |
Note: Specifications are subject to change without notice for product improvement.
7. Warranty & Support
7.1 Warranty Information
ONKYO products are covered by a limited warranty. The specific terms and duration of the warranty may vary by region and purchase date. Please refer to the warranty card included with your product or visit the official ONKYO website for detailed warranty information applicable to your location.
Important: Keep your proof of purchase (receipt or invoice) as it will be required for any warranty claims.
7.2 Customer Support
For technical assistance, service, or further inquiries, please contact ONKYO customer support:
- Website: Visit the official ONKYO Global Website for support resources, FAQs, and contact information.
- Service Centers: Information on authorized service centers can be found on the ONKYO website.
When contacting support, please have your product model number (SL-T300) and serial number ready.