1. Introduction
Thank you for choosing the hjh OFFICE XXL G 300 Faux Leather Office Chair. This heavy-duty chair is designed to meet the highest requirements, offering ample space, comfort, and quality materials, particularly for taller or heavier individuals. Its luxurious padding and ergonomically shaped backrest, including integrated lumbar support, promote correct posture and comfort during extended use. This manual provides essential information for assembly, operation, maintenance, and troubleshooting to ensure optimal performance and longevity of your chair.
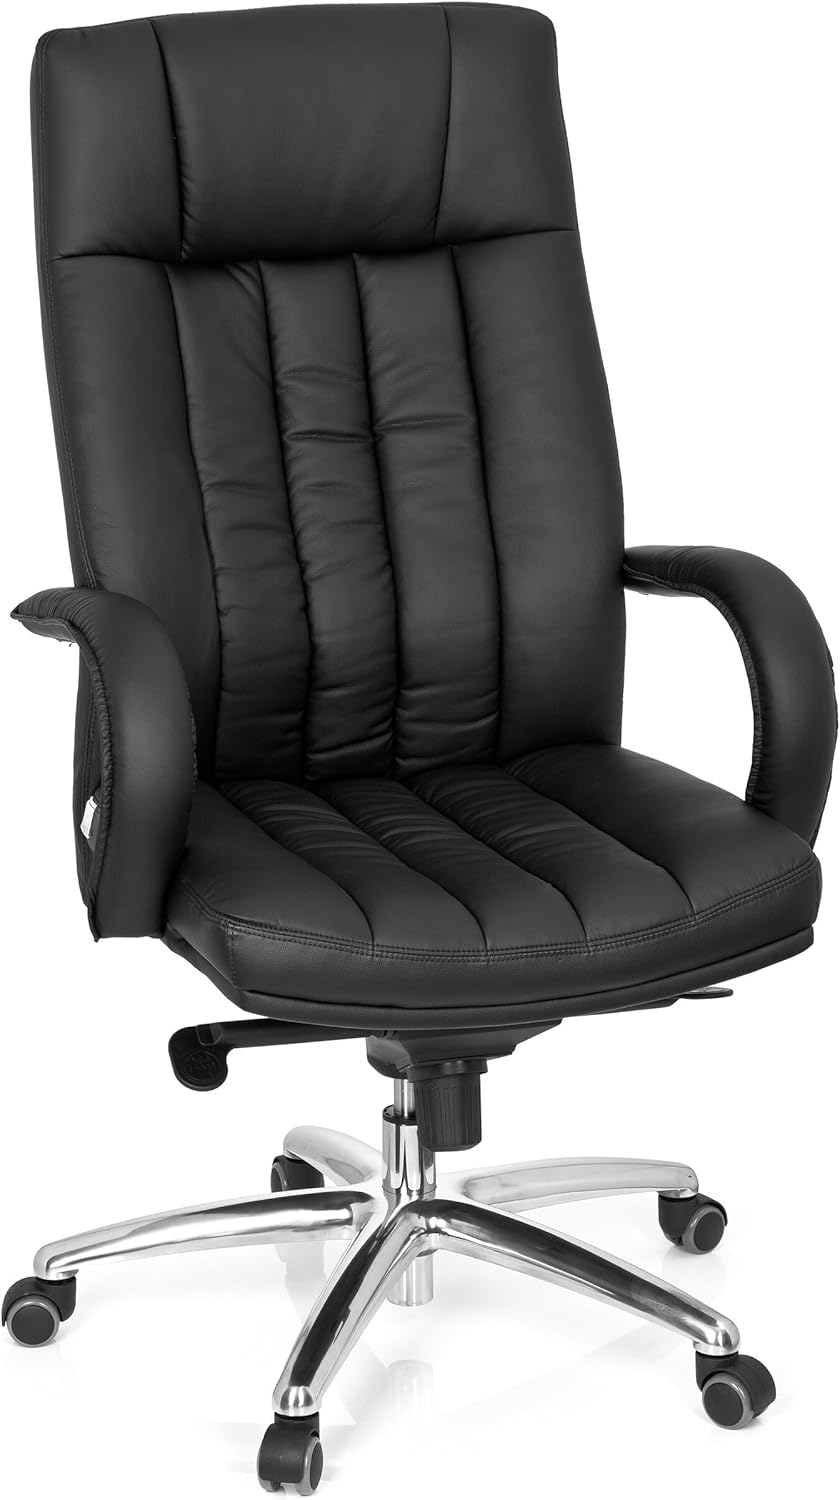
This image displays the hjh OFFICE XXL G 300 office chair from the front, highlighting its black faux leather upholstery, padded armrests, and chrome-plated five-star base with casters.
2. Safety Information
WARNING: This seat can bear a maximum load of 150 kg (approximately 330 lbs). Always ensure the chair is used on a stable, level surface to maintain safety and stability. Do not exceed the maximum weight capacity. Avoid standing on the chair or using it for purposes other than its intended use as an office chair.
3. Package Contents
Before assembly, please ensure all components are present and undamaged. If any parts are missing or damaged, please contact customer support.
- Seat cushion with armrests attached
- Backrest
- Gas lift cylinder
- Five-star base (chrome-plated steel)
- Set of multi-purpose casters (5 pieces)
- Knee tilt mechanism
- Assembly hardware (screws, washers, Allen key)
4. Setup and Assembly Instructions
Follow these steps carefully to assemble your hjh OFFICE XXL G 300 chair. It is recommended to assemble the chair on a soft, clean surface to prevent damage.
- Attach Casters to Base: Insert each of the five multi-purpose casters into the openings at the end of each leg of the five-star base. Push firmly until they click into place.
- Insert Gas Lift: Place the gas lift cylinder into the central hole of the five-star base. Ensure it is seated securely.
- Attach Mechanism to Seat: Align the knee tilt mechanism with the pre-drilled holes on the underside of the seat cushion. Use the provided screws and Allen key to secure it firmly. Ensure the front of the mechanism faces the front of the seat.
- Attach Backrest to Seat: Align the backrest with the mounting points on the rear of the seat cushion. Secure it using the appropriate screws. Ensure the faux leather is not pinched during this step.
- Place Assembled Top onto Gas Lift: Carefully place the assembled seat and backrest onto the gas lift cylinder. The tapered end of the gas lift should fit into the central opening of the mechanism attached to the seat. Apply gentle downward pressure to seat it properly.
Important Note on Screws and Holes: During assembly, some users have reported that screw holes in the faux leather may appear small or that screws may seem short. Exercise care when aligning components and inserting screws. If a hole is genuinely too small, gently widen it with a small, blunt tool. If screws do not engage properly, ensure all parts are correctly aligned and compressed. Do not force screws, as this may strip threads or damage components. Contact customer support if you encounter persistent difficulties.

A detailed view of the chair's chrome-plated five-star base, multi-function casters, and the levers for seat height and tilt adjustment located beneath the seat.
5. Operating Instructions
Your hjh OFFICE XXL G 300 chair features several adjustment mechanisms to customize your seating experience:
- Pneumatic Seat Height Adjustment: Locate the lever on the right side, beneath the seat. To raise the seat, lift the lever while taking your weight off the chair. To lower the seat, lift the lever while seated. Release the lever to lock the seat at the desired height.
- Knee Tilt Mechanism: This mechanism allows the seat and backrest to tilt together. The lever on the left side, beneath the seat, controls the tilt lock. Pull the lever outwards to unlock the tilt function, allowing you to recline. Push the lever inwards to lock the chair in an upright or desired tilted position. The tension of the tilt can often be adjusted by a knob located at the front, under the seat. Turn clockwise to increase tension (requiring more force to recline) and counter-clockwise to decrease tension.
- Integrated Lumbar Support: The backrest is ergonomically padded with integrated lumbar support to promote a healthy posture. This support is fixed and not adjustable.
- Weight-Activated Multi-Function Casters: The chair is equipped with casters that feature a safety brake mechanism. When you are seated, the casters unlock, allowing free movement. When you stand up, the casters automatically lock to prevent the chair from rolling away unintentionally. The casters will unlock again when pressure is applied to the seat.
6. Maintenance
Proper care will extend the life and appearance of your office chair.
- Cleaning: The faux leather upholstery should be wiped clean with a damp cloth. For stubborn stains, use a mild soap solution and then wipe with a clean, damp cloth. Avoid harsh chemicals, abrasive cleaners, or solvents, as these can damage the faux leather.
- Base and Casters: Periodically check the chrome-plated steel base and casters for dust and debris. Clean with a damp cloth. Ensure casters are free of hair or other obstructions that could impede their movement.
- Hardware: Occasionally check all screws and bolts to ensure they are tight. Retighten if necessary to maintain stability and safety.
7. Troubleshooting
If you encounter issues with your chair, refer to the following common problems and solutions:
- Casters Not Rotating: Ensure the weight-activated brake mechanism is not engaged. The casters are designed to lock when no weight is on the chair. If they remain locked while seated, check for obstructions (e.g., hair, debris) in the caster wheels. If the issue persists, the casters may be faulty; contact support for replacements.
- Difficulty with Assembly Screws: If screws are difficult to insert or seem too short, ensure all components are perfectly aligned. Sometimes, slight pressure or wiggling can help align the holes. If the faux leather holes are too small, carefully and gently enlarge them with a small, blunt tool. If screws are genuinely too short or threads are stripped, contact customer support for assistance.
- Seat Back Feels Too Upright: The ergonomic backrest of the XXL G 300 is designed for supportive posture. While the tilt mechanism allows for recline, the fixed angle of the backrest itself is part of its ergonomic design. Individual comfort preferences may vary.
- Chair Sinks or Does Not Hold Height: This typically indicates an issue with the gas lift cylinder. Contact customer support for a replacement gas lift.
8. Specifications
| Feature | Specification |
|---|---|
| Brand | hjh OFFICE |
| Model Name | XXL G 300 |
| Model Number | 724200 |
| Material Type | Faux Leather |
| Frame Material | Alloy Steel (Base) |
| Color | Black (Upholstery), Chrome (Base) |
| Product Dimensions (D x W x H) | 50 x 62 x 129 cm |
| Seat Height Range | 47 cm - 56 cm |
| Seat Width | 52 cm |
| Backrest Height | 73 cm (from seat) |
| Item Weight | 22.2 kg |
| Maximum Weight Capacity | 150 kg |
| Casters | 11mm x 50mm multi-purpose, weight-activated |
| Special Feature | Ergonomic design, Knee tilt mechanism |

A technical diagram illustrating the key dimensions of the office chair, including seat height (47-56 cm), seat width (52 cm), backrest height (73 cm), and overall depth (50 cm). It also indicates a maximum user height of 160-190 cm and a maximum weight capacity of 150 kg.
9. Warranty and Support
The hjh OFFICE XXL G 300 Faux Leather Office Chair comes with a 24-month warranty from the date of purchase. This warranty covers manufacturing defects and material faults under normal use. It does not cover damage resulting from misuse, accidents, unauthorized repairs, or normal wear and tear.
For warranty claims, technical support, or inquiries regarding parts and service, please contact hjh OFFICE customer support through your retailer or the official hjh OFFICE website. Please have your proof of purchase and model number (724200) available when contacting support.


