
1. Product Overview
The DK2 Snow Plow allows for efficient snow removal from driveways or small parking lots. This personal plow kit is designed to mount onto vehicle-specific custom mounting brackets (sold separately). Each kit includes a hardened steel cutting edge scraper, a rubber snow deflector, polymer-wrapped wire rope plow markers, skid shoes, a castor kit for easy storage, and a 3000 lb wireless electric winch.
The Summit II model measures 88 inches by 26 inches, suitable for most light trucks and SUVs.
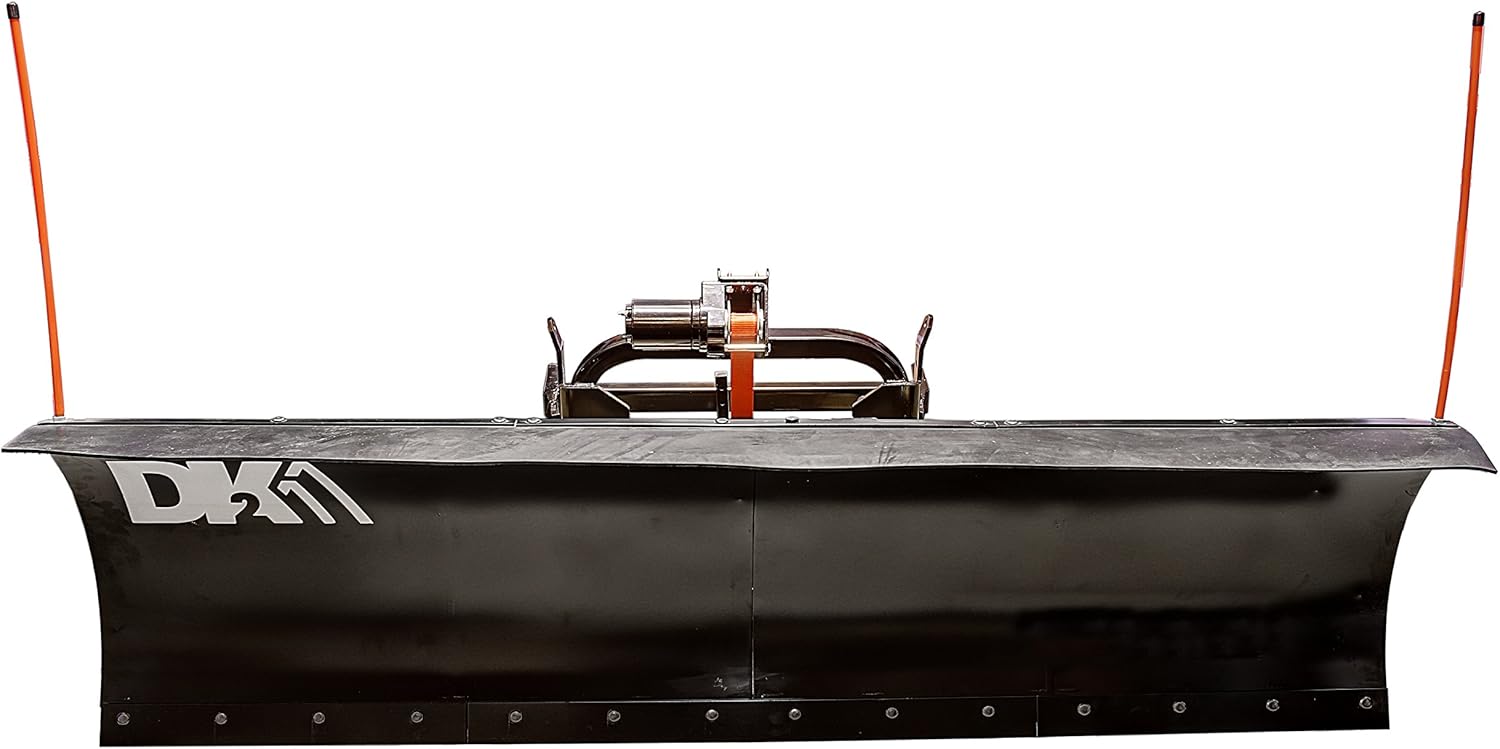
Figure 1: Front view of the K-2 Snow Plows SUMM8826 Detail K2 Summit II Snow Plow Kit, 88 x 26, showcasing its robust design and snow deflector.
2. Key Features
- 88" x 26" Blade Dimension: Provides ample coverage for efficient snow clearing.
- Easy Mounting: Slides onto vehicle-specific custom mounting brackets (sold separately) in seconds.
- Adjustable Blade Positions: Features 3 blade locking positions (straight on, angled to the right, angled to the left) for versatile snow management.
- Durable Construction: Powder-coated all-steel construction with UV-protected paint ensures longevity.
- Wireless Electric Winch: Includes a 3000 lb wireless electric winch for convenient blade lifting and lowering from inside the vehicle.
- Easy Storage: Locking castors allow for easy plow attachment, removal, and roll-away storage.
- Safety Features: Rubber snow deflector prevents snow from rising over the blade, and plow markers enhance blade visibility.
3. Setup and Installation
The DK2 Summit II Snow Plow Kit is designed for straightforward assembly and attachment. Please ensure you have the correct vehicle-specific custom mounting brackets (sold separately) before proceeding.
3.1 Unpacking and Initial Assembly
The entire snow plow kit ships in a single carton for convenience. Carefully unpack all components and verify against the parts list (refer to the separate assembly guide for detailed steps).

Figure 2: Rear view of the snow plow, highlighting the robust spring-loaded trip mechanism and the electric winch assembly.
3.2 Attaching to Vehicle
- Ensure your vehicle has the appropriate DK2 vehicle-specific custom mounting brackets installed.
- Position the snow plow in front of your vehicle.
- Utilize the flip-down castors on the plow for easy maneuverability. Lock the castors once the plow is in position.
- Align the plow's attachment points with the vehicle's mounting brackets. The plow is designed to slide onto these brackets.
- Secure the plow to the mounting brackets using the provided pins or locking mechanisms.
- Connect the electric winch to your vehicle's power source as per the separate electrical installation guide.

Figure 3: Close-up view of the snow plow's attachment mechanism connecting to the vehicle's custom mounting bracket.

Figure 4: Detailed view of the manual lever used to adjust the blade's angle into one of three locking positions.
4. Operating Instructions
Operating the DK2 Summit II Snow Plow is designed for user convenience and efficiency. Always ensure the plow is securely attached and all electrical connections are sound before operation.
4.1 Blade Control
- Lifting and Lowering: Use the 3000 lb wireless electric winch to raise and lower the blade. This can be controlled from inside your vehicle for ease of use.
- Angling the Blade: The blade can be set to three locking positions: straight on, angled to the right, or angled to the left. Adjust the blade angle manually using the single lever and pin mechanism.

Figure 5: Side view of the snow plow, illustrating the trip springs that allow the blade to absorb shock from uneven surfaces, and the adjustable skid shoes.
4.2 Snow Removal Tips
- The rubber snow deflector helps prevent snow from rising over the blade during plowing, maintaining visibility.
- Plow markers provide better blade visibility, assisting in guiding your snow removal path.
- The trip springs allow the blade to absorb shock from uneven surfaces, protecting the plow and vehicle.
4.3 Official Product Video
Video 1: This video demonstrates the features and operation of the DK2 Snow Plow, including assembly, attachment to a vehicle, blade angling, and the electric winch functionality. It provides a visual guide to the product's capabilities.
5. Maintenance
Regular maintenance ensures the longevity and optimal performance of your snow plow. Perform these checks periodically, especially before and after each snow season.
- Inspect Fasteners: Regularly check all bolts, nuts, and pins for tightness. Tighten any loose fasteners to prevent component wear or failure.
- Lubrication: Lubricate moving parts, such as the blade pivot points and the winch mechanism, with appropriate grease or lubricant to ensure smooth operation and prevent rust.
- Blade Inspection: Examine the hardened steel cutting edge for wear or damage. Replace if necessary to maintain effective snow clearing.
- Paint Protection: The plow features powder-coated all-steel construction with UV-protected paint. Touch up any chips or scratches to prevent rust and maintain appearance.
- Electrical System: Check the wireless electric winch and its connections for any signs of wear, corrosion, or damage. Ensure the remote control batteries are functional.
- Storage: When not in use, especially during off-season, store the plow in a dry, protected area. Utilize the locking castors for easy movement and storage.
6. Troubleshooting
This section provides solutions to common issues you might encounter with your snow plow. For problems not listed here, please contact customer support.
6.1 Blade Not Lifting/Lowering
- Check Power Connection: Ensure the electric winch is properly connected to the vehicle's power source and that the connection is secure and free of corrosion.
- Remote Control Battery: Verify that the wireless remote control has working batteries. Replace if needed.
- Winch Mechanism: Inspect the winch cable/strap for tangles, fraying, or damage. Ensure the winch drum is clear of obstructions.
- Obstructions: Check for any physical obstructions preventing the blade from moving freely.
6.2 Blade Not Angling Correctly
- Lever Mechanism: Ensure the manual lever and pin mechanism for blade angling is clean and free of debris. Lubricate if stiff.
- Locking Positions: Confirm that the pin fully engages in the desired locking position.
6.3 Excessive Wear on Cutting Edge
- Skid Shoe Adjustment: Ensure the adjustable skid shoes are set correctly to control the height of the scrape, preventing excessive contact of the cutting edge with the ground.
- Replacement: If the cutting edge is significantly worn, it should be replaced to maintain plowing efficiency and protect the blade.
7. Specifications
| Feature | Specification |
|---|---|
| Product Dimensions (L x W x H) | 88 x 32 x 26 inches |
| Item Weight | 296 pounds |
| Blade Dimension | 88" x 26" |
| Winch Capacity | 3000 lb (Electric Wireless) |
| Construction Material | Powder-coated all-steel |
| Mounting Type | Custom Mounting Bracket (sold separately) |
| Model Number | SUMM8826 |
| UPC | 693495992181 |
8. Warranty and Support
The K-2 Snow Plows SUMM8826 Detail K2 Summit II Snow Plow Kit comes with a 1-year limited warranty. For warranty claims, technical assistance, or replacement parts, please contact K-2 Snow Plows customer support directly. Ensure you have your model number (SUMM8826) and proof of purchase available when contacting support.
For additional information or to purchase accessories, please visit the official K-2 Snow Plows store or authorized retailers.