1. Introduction
This manual provides detailed instructions for the setup, operation, and maintenance of your Peavey PV 14 AT 14 Channel Compact Mixer. The PV 14 AT is designed for professional audio applications, featuring 14 channels, integrated Bluetooth connectivity, and Antares Auto-Tune pitch correction technology. Please read this manual thoroughly to ensure proper use and to maximize the performance and longevity of your mixer.
2. Important Safety Instructions
- Power Source: Connect the unit only to the type of power supply specified in this manual or on the unit.
- Moisture and Liquids: To reduce the risk of fire or electric shock, do not expose this apparatus to rain or moisture. Do not place objects filled with liquids, such as vases, on the apparatus.
- Ventilation: Ensure proper ventilation. Do not block any ventilation openings. Install in accordance with the manufacturer's instructions.
- Heat: Do not install near any heat sources such as radiators, heat registers, stoves, or other apparatus (including amplifiers) that produce heat.
- Grounding: Do not defeat the safety purpose of the polarized or grounding-type plug. A polarized plug has two blades with one wider than the other. A grounding type plug has two blades and a third grounding prong. The wide blade or the third prong are provided for your safety. If the provided plug does not fit into your outlet, consult an electrician for replacement of the obsolete outlet.
- Power Cord Protection: Protect the power cord from being walked on or pinched, particularly at plugs, convenience receptacles, and the point where they exit from the apparatus.
- Servicing: Refer all servicing to qualified service personnel. Servicing is required when the apparatus has been damaged in any way, such as power-supply cord or plug is damaged, liquid has been spilled or objects have fallen into the apparatus, the apparatus has been exposed to rain or moisture, does not operate normally, or has been dropped.
3. Product Overview and Features
3.1 Front Panel Controls
The front panel of the PV 14 AT mixer provides access to all channel inputs, equalization controls, effects, and master output faders. Each channel features dedicated gain, EQ, and auxiliary send controls for precise audio shaping.

Image: Angled view of the Peavey PV 14 AT mixer's front panel, showing various knobs, faders, and input jacks.
3.2 Rear Panel Connections
The rear panel houses essential power and digital audio connections, including the DC power input, power switch, and the Digital Audio Port for USB connectivity to a computer. Bluetooth pairing information is also located here.

Image: Rear view of the Peavey PV 14 AT mixer, displaying the DC power input, power switch, Digital Audio Port (USB), and Bluetooth pairing information.
3.3 Dimensions
The compact design of the PV 14 AT makes it suitable for various setups. Refer to the image below for approximate dimensions.
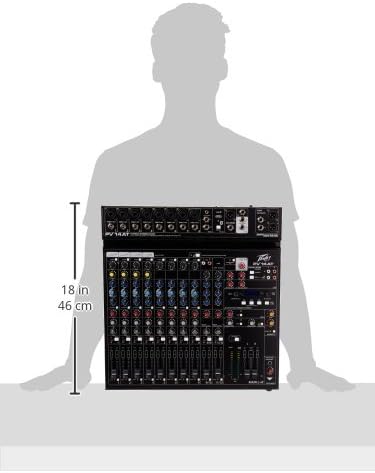
Image: Diagram showing the approximate dimensions of the Peavey PV 14 AT mixer, indicating a height of 18 inches (46 cm).
4. Setup
4.1 Unpacking
Carefully remove the mixer from its packaging. Retain all packaging materials for future transport or storage. Inspect the unit for any signs of damage incurred during shipping. If damage is found, contact your dealer immediately.
4.2 Power Connection
- Ensure the mixer's power switch is in the OFF position.
- Connect the provided power adapter to the DC IN port on the rear panel of the mixer.
- Plug the power adapter into a suitable AC power outlet.
4.3 Audio Connections
Connect your microphones, instruments, and other audio sources to the appropriate input channels. Use XLR cables for microphones and 1/4-inch TRS/TS cables for line-level instruments. Connect your main speakers or recording interface to the MAIN L+R outputs using XLR or 1/4-inch cables.
5. Operating Instructions
5.1 Channel Operation
Each input channel features a GAIN control to adjust input sensitivity, a 3-band EQ (High, Mid, Low) for tone shaping, and AUX SEND controls for monitor mixes or external effects. The channel fader controls the individual channel's level in the main mix. The SOLO button allows you to monitor a single channel without affecting the main output.
5.2 Antares Auto-Tune
The PV 14 AT includes Antares Auto-Tune on select channels. To activate Auto-Tune, locate the dedicated Auto-Tune button on the desired channel and press it. Adjust the Auto-Tune parameters (if available) via the mixer's digital display and controls to achieve the desired pitch correction effect.
5.3 Bluetooth Connectivity
- Press the Bluetooth button on the mixer to activate Bluetooth pairing mode. The Bluetooth indicator light will flash.
- On your smart device (phone, tablet, computer), search for available Bluetooth devices and select "PV 14 AT" (or similar name).
- Once paired, the Bluetooth indicator light will become solid. You can now stream audio wirelessly to the mixer.
5.4 Digital Effects
The mixer features built-in digital effects. Use the EFFECTS section controls and LCD display to browse and select various effects such as reverb, delay, and chorus. Adjust the effect send levels on individual channels and the master effect return level to blend effects into your mix.
5.5 USB Audio Interface
The Digital Audio Port (USB) on the rear panel allows the PV 14 AT to function as an audio interface for your computer. Connect a USB cable from the mixer to your computer. The mixer will be recognized as an audio input/output device, enabling multi-track recording to a Digital Audio Workstation (DAW) or playback from your computer through the mixer.
6. Maintenance
6.1 Cleaning
To clean the mixer, use a soft, dry cloth. Do not use abrasive cleaners, solvents, or waxes. Ensure the unit is powered off and disconnected from the power source before cleaning.
6.2 Storage
When not in use for extended periods, store the mixer in a cool, dry place, away from direct sunlight and extreme temperatures. It is recommended to use the original packaging for protection during storage or transport.
7. Troubleshooting
7.1 No Power
- Check if the power adapter is securely connected to both the mixer and a working power outlet.
- Ensure the power switch on the rear panel is in the ON position.
- Verify the power outlet is functional by plugging in another device.
7.2 No Sound Output
- Confirm that all channel faders and the MAIN L+R faders are raised.
- Check all audio cables for secure connections and proper functionality.
- Ensure input sources (microphones, instruments) are active and producing sound.
- Verify that the connected speakers or headphones are powered on and functioning correctly.
7.3 Hum or Noise
- Ensure all cables are properly shielded and in good condition.
- Check for ground loops by ensuring all equipment is connected to the same power circuit or using a ground loop isolator.
- Reduce gain levels if input signals are too hot, causing clipping.
7.4 Bluetooth Connection Issues
- Ensure the mixer's Bluetooth is in pairing mode.
- Move your smart device closer to the mixer to ensure it is within range.
- Forget the device from your smart device's Bluetooth settings and attempt to re-pair.
8. Specifications
| Item Weight | 12 pounds |
| Product Dimensions | 12 x 12 x 12 inches |
| Item Model Number | PV14AT |
| Hardware Interface | Bluetooth |
| Material Type | Stainless Steel |
| Mixer Channel Quantity | 14 |
| Power Source | Corded Electric |
| Connectivity Technology | Bluetooth |
9. Warranty and Support
For warranty information and technical support, please refer to the warranty card included with your product or visit the official Peavey website. You can also contact Peavey customer service directly for assistance with product registration, troubleshooting, and service inquiries.


