
1. Introduction
This manual provides detailed instructions for the safe and efficient operation, maintenance, and troubleshooting of your Oliso Pro Smart Vacuum Sealer VS95A. Please read all instructions carefully before using the appliance to ensure proper function and to prevent injury or damage.
Important Safety Information
- Always unplug the appliance from the power outlet before cleaning or when not in use.
- Do not immerse the appliance, power cord, or plug in water or other liquids.
- Keep hands and fingers away from the sealing area during operation.
- This appliance is not intended for use by persons with reduced physical, sensory, or mental capabilities, or lack of experience and knowledge, unless they have been given supervision or instruction concerning use of the appliance by a person responsible for their safety.
- Use only Oliso VAC-SNAP bags and accessories with this vacuum sealer.
2. Package Contents
Verify that all items are present in the packaging:
- 1 Oliso Pro Smart Vacuum Sealer (VS95A)
- 1 Flexi Tube
- 1 Magnetic Zip Disc
- 1 Wine + Oil Freshkeeper
- 3 Medium (1 Quart) VAC-SNAP bags
- 2 Large (1 Gallon) VAC-SNAP bags
- Instruction Manual

Image: The Oliso Pro Smart Vacuum Sealer shown with all standard included accessories, such as the Flexi Tube, Magnetic Zip Disc, Wine + Oil Freshkeeper, and various sizes of VAC-SNAP bags.
3. Product Overview
Familiarize yourself with the components and controls of your Oliso Pro Smart Vacuum Sealer.
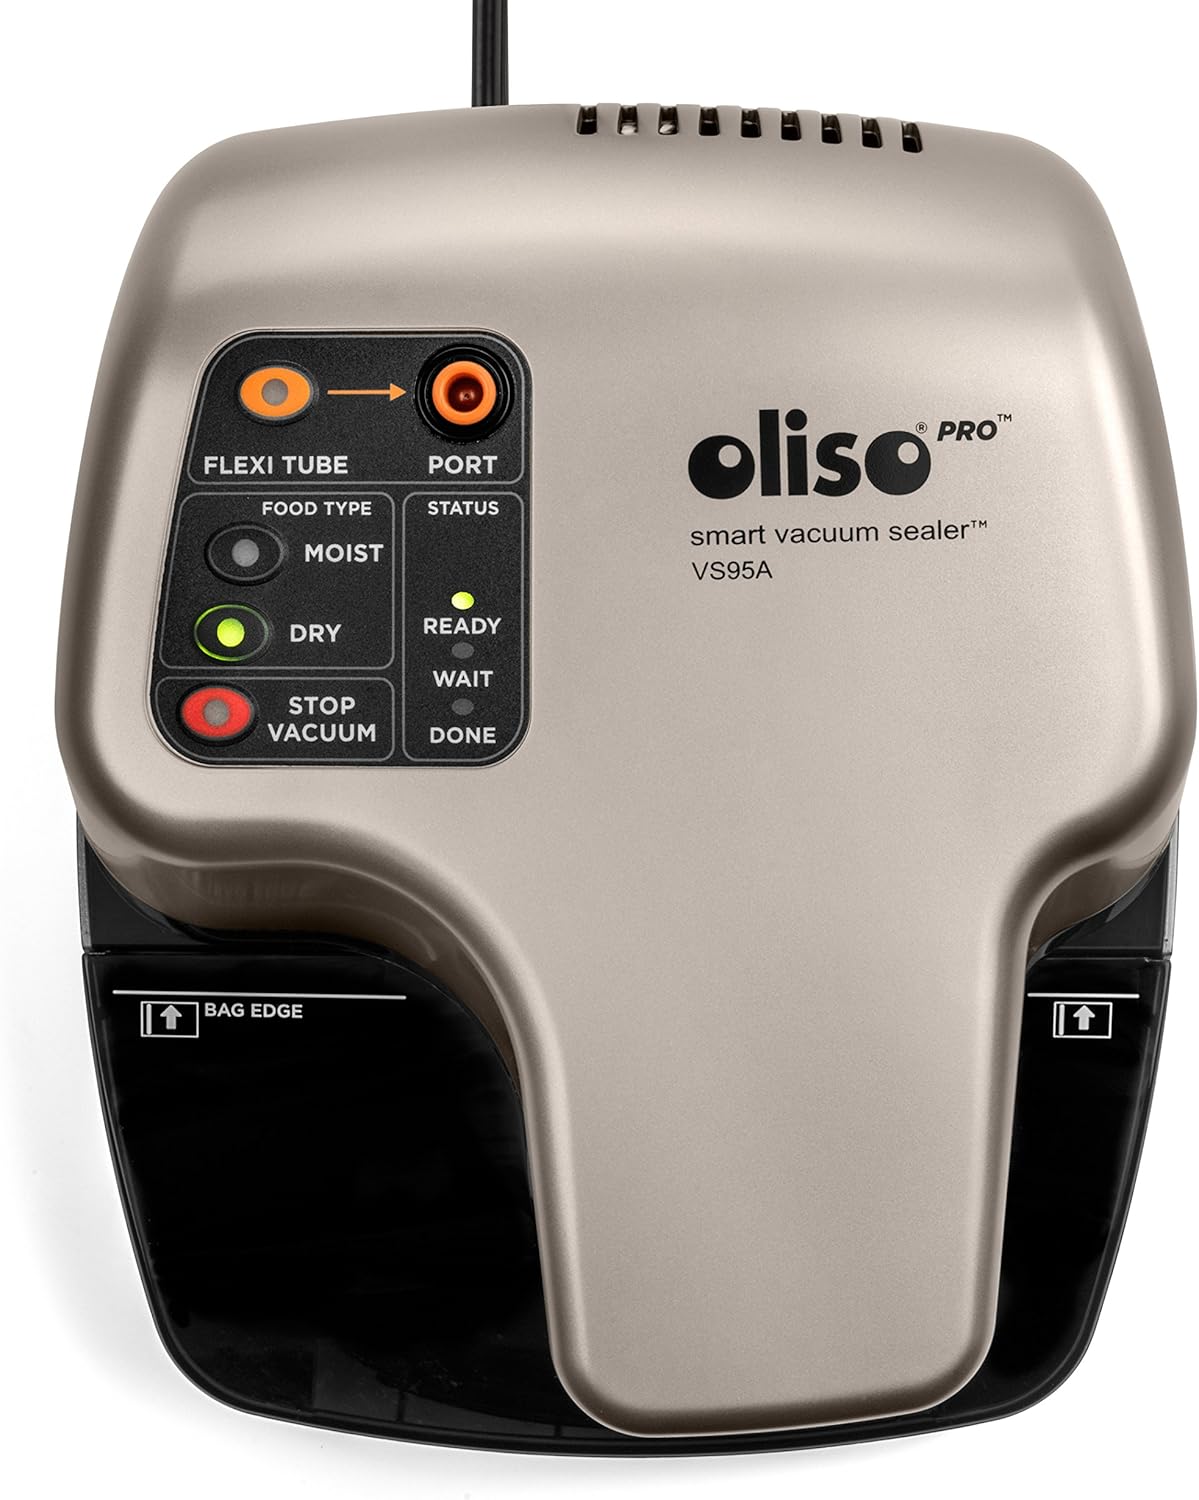
Image: Top view of the Oliso Pro Smart Vacuum Sealer, highlighting the control panel with buttons for Flexi Tube, Moist, Dry, Stop Vacuum, and status indicators for Port, Ready, Wait, and Done.
Control Panel Features:
- FLEXI TUBE Button: Activates the vacuum function for the Flexi Tube port.
- MOIST Indicator: Illuminates when the liquid detection feature is active for wet foods.
- DRY Indicator: Illuminates when the appliance is set to seal dry goods.
- STOP VACUUM Button: Allows manual control to stop the vacuum process, useful for delicate or fragile foods.
- PORT Indicator: Indicates activity at the Flexi Tube port.
- STATUS Indicators (READY, WAIT, DONE): Provide visual feedback on the sealing process.
4. Setup
- Unpack: Remove all packaging materials from the vacuum sealer and accessories.
- Placement: Place the appliance on a flat, stable, and dry surface. Ensure adequate space around the unit for operation. The compact design allows for convenient storage in a drawer or on a countertop.
- Power Connection: Plug the power cord into a standard electrical outlet. The unit is now ready for use.

Image: The Oliso Pro Smart Vacuum Sealer neatly stored inside a kitchen drawer, demonstrating its compact size and ease of storage.
5. Operating Instructions
5.1. Sealing with VAC-SNAP Bags
The Oliso Pro Smart Vacuum Sealer uses a no-touch start system for VAC-SNAP bags.
- Place food inside a VAC-SNAP bag, ensuring the top zipper is closed and the bag edge is clean and dry.
- Insert the edge of the VAC-SNAP bag into the bag slot of the vacuum sealer. The appliance will automatically detect the bag.
- The vacuum sealer will automatically begin to remove air from the bag and then create an airtight heat seal. The STATUS indicators will progress from WAIT to DONE.
- Once the DONE indicator illuminates, remove the sealed bag.

Image: The Oliso Pro Smart Vacuum Sealer positioned next to a VAC-SNAP bag containing a salmon fillet, demonstrating a successful vacuum seal.
5.2. Moist Mode (Liquid Detection)
The appliance features a liquid detection system for sealing moist foods or liquids. When moisture is detected, the MOIST indicator will illuminate, and the sealing process will adjust for optimal results, ensuring a precise seal without drawing liquids into the vacuum chamber.
5.3. Dry Mode
For dry goods such as herbs, spices, or crackers, the appliance operates in Dry Mode. This mode ensures efficient air removal and sealing without special adjustments.
5.4. Stop & Seal Mode (for Fragile Foods)
To prevent crushing delicate or fragile foods (e.g., bread, chips), press the STOP VACUUM button at any point during the vacuum process to manually stop air removal. The appliance will then proceed directly to the sealing phase.
5.5. Using the Flexi Tube Attachment
The Flexi Tube allows you to vacuum seal bottles, jars, and other containers using compatible accessories like the Wine + Oil Freshkeeper or Magnetic Zip Disc.
- Insert one end of the Flexi Tube into the PORT on the vacuum sealer.
- Attach the other end of the Flexi Tube to the accessory (e.g., Wine + Oil Freshkeeper on a bottle, or Magnetic Zip Disc on a jar).
- Press the FLEXI TUBE button on the control panel. The appliance will begin to remove air from the container.
- Once the vacuum is complete, the appliance will automatically stop. Remove the Flexi Tube and accessory.

Image: A close-up view of the Oliso Pro Smart Vacuum Sealer's control panel, showing the Flexi Tube securely connected to the designated port.
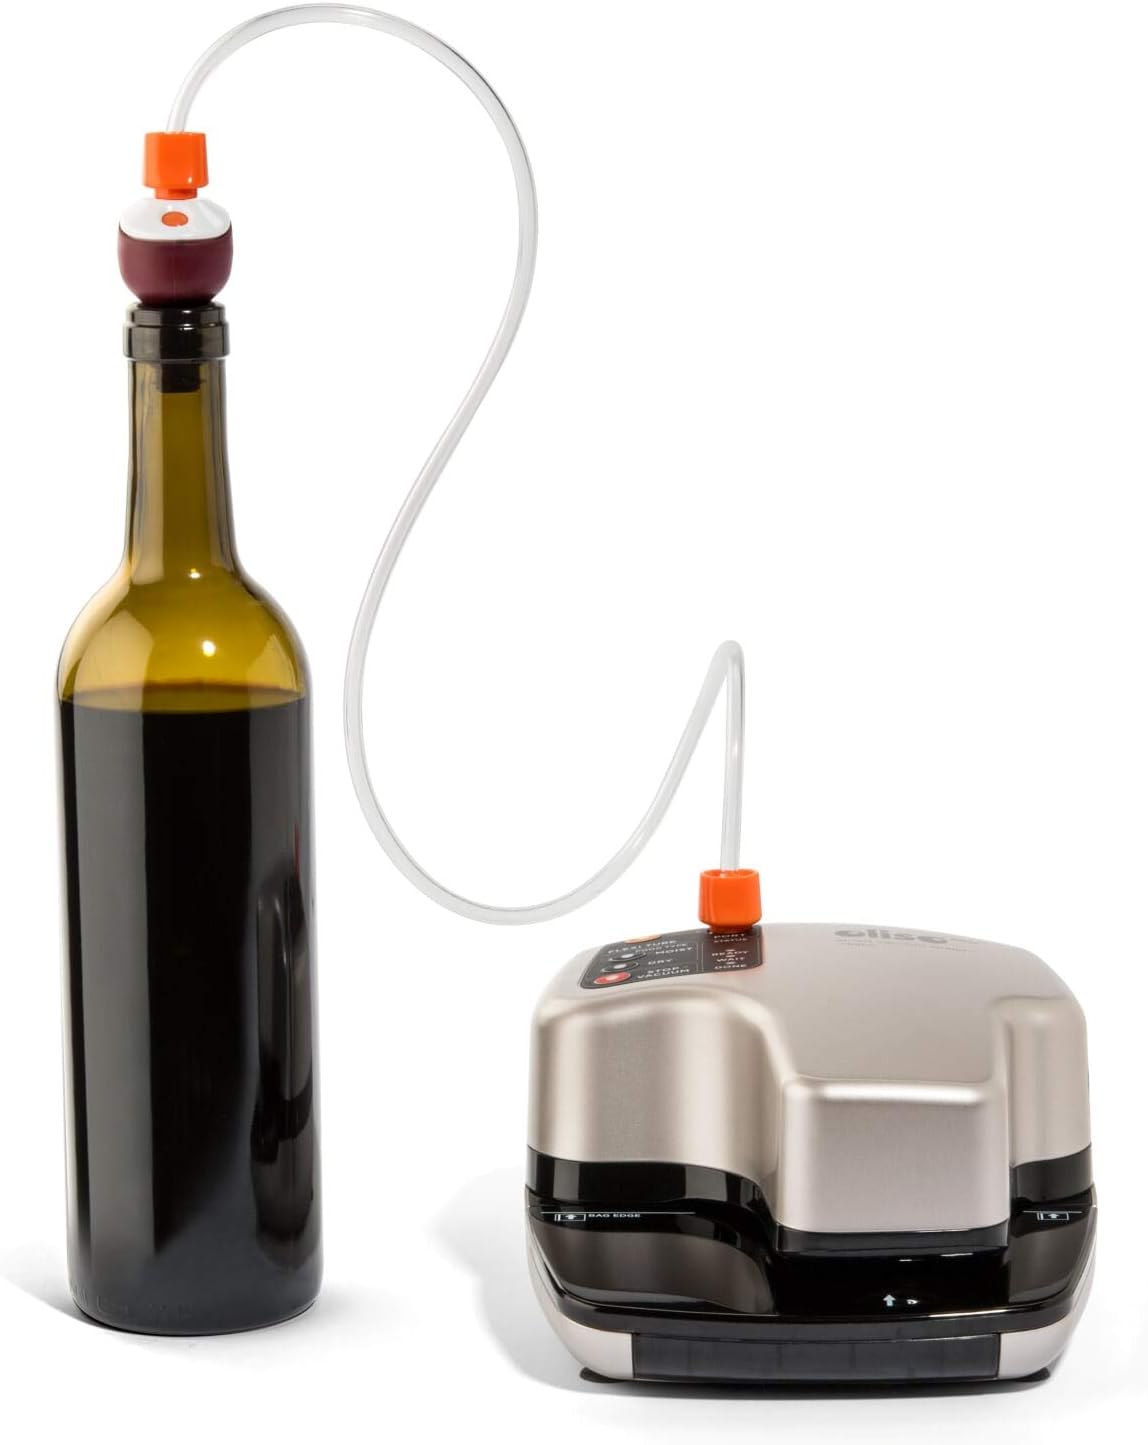
Image: The Oliso Pro Smart Vacuum Sealer actively using the Flexi Tube and Wine + Oil Freshkeeper to remove air from a wine bottle, preserving its contents.
6. Maintenance and Cleaning
6.1. Cleaning the Drip Tray
The large drip tray is removable and dishwasher safe for easy cleaning. Regularly remove and clean the drip tray to prevent buildup from liquids or food particles.
- Ensure the appliance is unplugged.
- Carefully pull out the drip tray from the front of the unit.
- Wash the drip tray by hand with warm, soapy water or place it in the dishwasher.
- Ensure the drip tray is completely dry before reinserting it into the appliance.
6.2. Cleaning the Exterior
Wipe the exterior of the vacuum sealer with a damp cloth. Do not use abrasive cleaners or immerse the unit in water.
6.3. VAC-SNAP Bag Care
Oliso VAC-SNAP bags are designed for multiple uses. They are BPA-free and made of #7 recyclable material. After use, wash bags with warm, soapy water, rinse thoroughly, and allow them to air dry completely before reuse. Bags can be resealed up to 10 times depending on content and care.
7. Troubleshooting
If you encounter issues with your Oliso Pro Smart Vacuum Sealer, refer to the following common problems and solutions:
- Appliance does not power on:
Ensure the power cord is securely plugged into a working electrical outlet. - Appliance is not vacuuming or sealing:
Check that the VAC-SNAP bag is properly inserted into the bag slot and that the bag's zipper is fully closed. Ensure the bag edge is clean and dry. Verify that the drip tray is correctly installed. - Vacuum is weak or inconsistent:
Inspect the sealing area for any food debris or moisture that might be interfering with the seal. Ensure the Flexi Tube is securely connected if using accessories. - Liquid is being drawn into the vacuum chamber:
The appliance has a liquid detection feature (Moist Mode). If excessive liquid is present, consider pre-freezing the liquid portion of the food before sealing, or use the Stop & Seal mode to manually control the vacuum process.
For issues not resolved by the above steps, please contact customer support.
8. Specifications
- Brand: Oliso
- Model Number: VS95A
- Item Weight: 3.5 pounds
- Product Dimensions: 16.8 x 12 x 4.5 inches
- Power Source: Corded Electric
- Operation Mode: Automatic
- Wattage: 130 watts
- Voltage: 220 Volts
- UPC: 850769001653
9. Warranty and Support
The Oliso Pro Smart Vacuum Sealer VS95A is backed by a 1-year limited lifetime manufacturer warranty. Please retain your proof of purchase for warranty claims.
For technical assistance, warranty service, or to purchase additional accessories, please visit the official Oliso website or contact their customer support directly.
