
1. Important Safety Information
This section contains critical safety warnings. Please read carefully before installation or operation.
- Electrical Components: This product contains electrical components. Always follow proper electrical safety guidelines when installing, operating, and maintaining.
- Qualified Installation: Do not install if you are not qualified. Installation should be performed by a licensed electrician or qualified professional.
- Moisture Warning: Keep away from water and other liquids. Do not use if damaged.
- GFCI Protection: Always use a GFCI (Ground Fault Circuit Interrupter) protected outlet.
- Child and Pet Safety: Keep out of reach of children and pets.
- Manufacturer Instructions: Always follow manufacturer's instructions for safe operation and installation.
2. Package Contents
Verify that all components are present before beginning installation.
- Electric Floor Warming Mat (40 sq ft, 20" Wide x 24' Long)
- Touch Screen GFCI Protected Digital Programmable Thermostat (UDG4-4999)
- Floor Temperature Sensor
- Installation Warning Monitor (sounds alarm if wire is damaged)
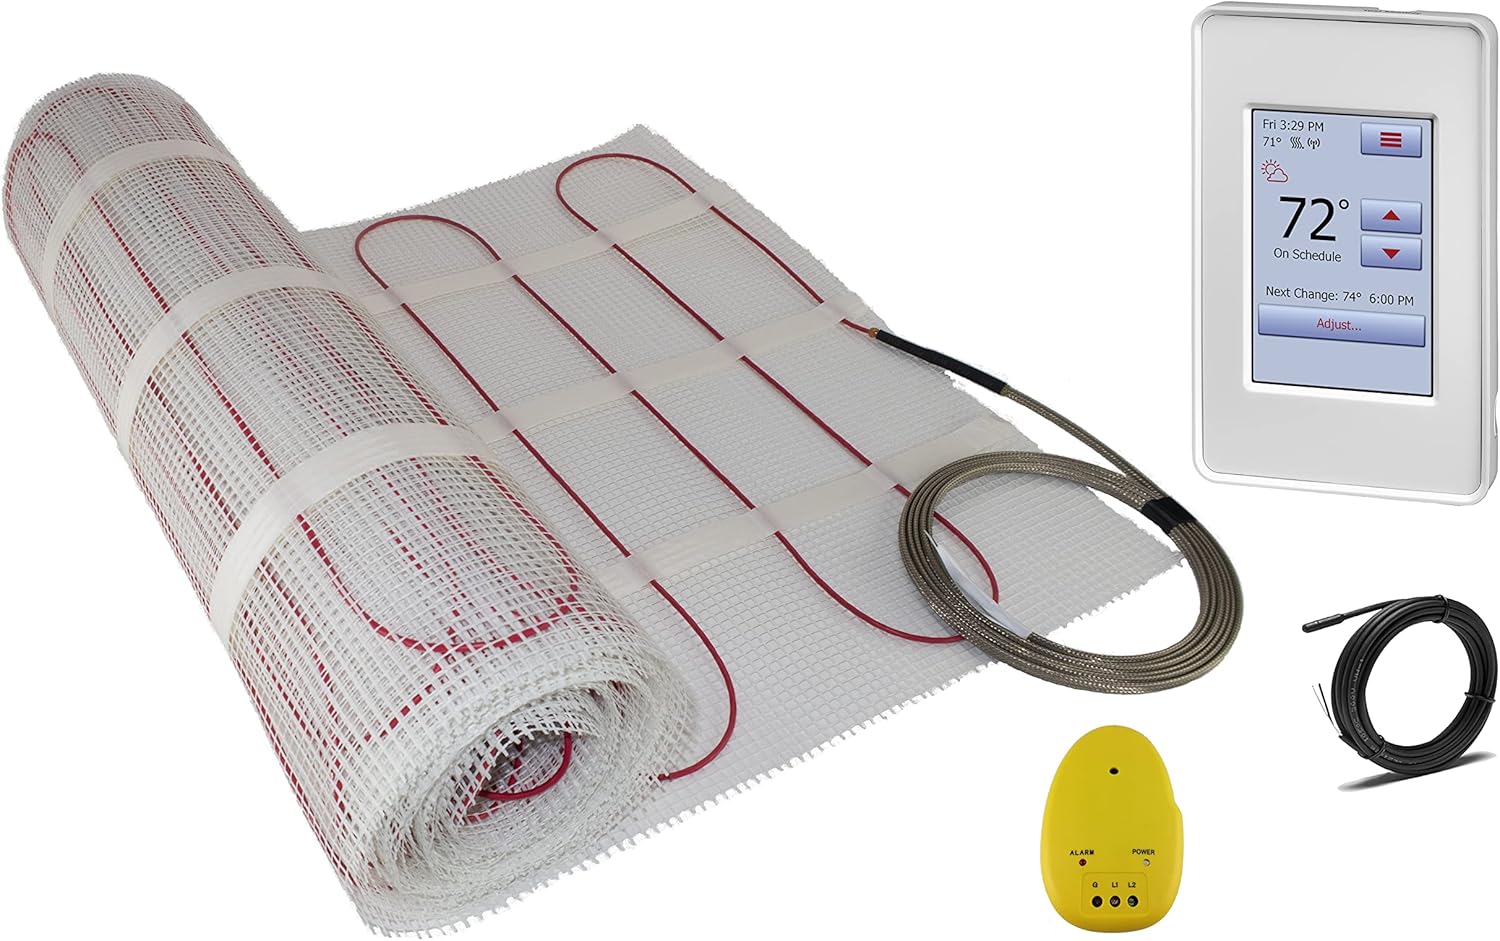
Image: The complete package contents, including the rolled heating mat, digital thermostat, floor sensor, and installation monitor.
3. Setup and Installation
Proper installation is crucial for the safe and efficient operation of your radiant floor heating system. It is recommended that installation be performed by a qualified professional.
3.1 Planning and Measurement
Careful planning ensures optimal heat coverage and avoids installation issues.
- Voltage Selection: Mats are available in 120V and 240V. Ensure you have the correct voltage mat for your electrical supply. This model is 120V.
- Clearance from Walls and Fixtures: Maintain at least 2 inches from walls and permanent fixtures.
- Toilet Wax Ring: Maintain at least 6 inches from the center of the toilet wax ring.
- HVAC Vents/Heating Appliances: Maintain at least 3 inches from HVAC vents or other heating appliances.
- Fixed Objects: Do not install the heating mat under fixed objects such as cabinets, bathtubs, or toilets (except for the specified clearance around the wax ring).

Image: An illustration demonstrating the correct layout of the heating mat in a bathroom, highlighting areas to avoid and required clearances from walls, fixtures, and the toilet wax ring.
3.2 Mat Placement
- The electric radiant floor heating mat is designed to be flipped and turned to fit various shaped areas.
- The mat features double-sided tape on both sides to adhere securely to the sub-floor, ensuring it lays flat during installation.
- The white fiberglass mesh can be cut to rotate and flip the mat to cover the desired area. Do not cut the red heating wire.
- If necessary, the heating wire can be removed from the mesh and laid loose on the floor using hot glue, particularly in tight or irregular spaces.

Image: A close-up view of the heating mat, illustrating the double-sided tape that helps secure the mat to the sub-floor for a flat and stable installation.
3.3 Embedding the System
- The heating system must be fully covered with mortar or self-leveling compound. This protects the heating elements and ensures even heat distribution.
3.4 Electrical Connection
- The thermostat requires a 120V electrical connection and is rated for 16 Amps.
- Connect the heating mat's cold lead to the thermostat. The mat includes a 10-foot cold lead for easy connection.
- Install the floor temperature sensor in the floor, equidistant between two heating wires, ensuring it is fully embedded in the mortar/compound.
- Utilize the included Installation Warning Monitor during the entire installation process. This device will sound an alarm if the heating wire is damaged, allowing for immediate detection and repair before the floor is fully installed.
- All electrical connections must comply with local electrical codes and be performed by a licensed electrician.
4. Operation
The UDG4-4999 Touch Screen GFCI Protected Digital Programmable Thermostat provides precise control over your floor heating system.
4.1 Thermostat Overview

Image: A detailed diagram of the UDG4-4999 thermostat's touch screen interface, indicating the location and function of the GFCI test button, menu, temperature adjustment, schedule adjustment, and on/off/reset button.
- GFCI Test Button: Located on the thermostat, used to test the Ground Fault Circuit Interrupter.
- Day and Time: Displays the current day and time.
- Current Temperature: Shows the actual floor temperature detected by the sensor.
- Heating Indicator: Icon indicating when the heating system is active.
- Target Temperature: The desired floor temperature setting.
- Menu: Accesses thermostat settings and programming options.
- Adjust Temperature: Up and down arrows to manually change the target temperature.
- Adjust Schedule: Button to modify the programmable heating schedule.
- On/Off/GFCI Reset Button: Located on the side of the thermostat, controls power and resets the GFCI.
4.2 Setting the Temperature
- Press the "Adjust Temperature" up or down arrows on the touch screen to set your desired floor temperature.
- The thermostat will automatically maintain this temperature according to its programming.
4.3 Programming the Schedule
- Press the "Adjust Schedule" button or navigate to the menu to access scheduling options.
- Follow the on-screen prompts to set different temperature levels for various times of the day and week, optimizing comfort and energy savings.
4.4 GFCI Operation
- The integrated GFCI protects against electrical shock.
- Testing: Regularly press the GFCI Test Button to ensure it is functioning correctly. The thermostat should trip, cutting power to the heating mat.
- Resetting: If the GFCI trips, press the On/Off/GFCI Reset Button on the side of the thermostat to restore power. If it trips repeatedly, consult a qualified electrician.
5. Maintenance
The Warming Systems Electric Tile Radiant Floor Heating Mat is designed for minimal maintenance.
- Cleaning: The thermostat can be cleaned with a soft, damp cloth. Do not use abrasive cleaners or solvents.
- Regular GFCI Testing: Test the GFCI monthly to ensure proper operation.
- System Inspection: Periodically inspect the thermostat and visible wiring for any signs of damage. If damage is found, disconnect power and contact a qualified electrician.
- No user-serviceable parts are inside the heating mat or thermostat beyond basic cleaning and GFCI testing.
6. Troubleshooting
This section addresses common issues you might encounter.
| Problem | Possible Cause | Solution |
|---|---|---|
| Floor is not heating. |
|
|
| Floor is not as warm as expected. |
|
|
| Thermostat touch screen unresponsive. |
|
|
7. Product Specifications
| Feature | Detail |
|---|---|
| Model Number | 40mat120-20-OJ |
| Brand | Warming Systems |
| Mat Size | 40 sq ft (20" Wide x 24' Long) |
| Voltage | 120 Volts (AC) |
| Wattage | 480 Watts |
| Amperage | 4 Amps |
| Watts per Square Foot | 12 Watts/Sqft |
| Mat Thickness | Less than 1/8 inch |
| Thermostat Model | UDG4-4999 (Touch Screen, GFCI Protected, Programmable) |
| Thermostat Amperage Rating | 16 Amps |
| Safety Certifications | UL Listed for USA and Canada, safe for wet areas. |
| Included Components | Digital Thermostat, Electric Floor Heating Mat, Floor Temperature Sensor, Installation Monitor. |
| Origin | Made in the USA (Spring Grove, IL) |
8. Warranty and Support
Warming Systems stands behind the quality of its products.
- Warranty: This product is covered by a 25-year warranty. Please refer to the official Warming Systems warranty documentation for full terms and conditions.
- Technical Support: Warming Systems offers engineering support for any questions regarding installation or operation.
- Contact Information: For support, please visit the Warming Systems Store on Amazon or refer to the contact details provided in your product packaging.