
1. Introduction
This manual provides detailed instructions for the installation, operation, and maintenance of your Aquatic AV AQ-MP-5UBT-H AM/FM Radio with Bluetooth and MP3 Media Player. This unit is specifically designed as a factory replacement for Harley-Davidson touring motorcycles manufactured between 1998 and 2013. It offers advanced audio features, including Bluetooth connectivity, MP3 playback, and a 3-inch color LCD display, while integrating seamlessly with existing factory handlebar controls and wiring.
2. Safety Information
Please read all safety instructions carefully before installing and operating the AQ-MP-5UBT-H stereo. Failure to follow these instructions may result in injury or damage to the unit or motorcycle.
- Always disconnect the motorcycle's battery before beginning any electrical installation.
- Ensure all wiring connections are secure and properly insulated to prevent short circuits.
- Do not operate the stereo in a manner that distracts you from safe motorcycle operation.
- This unit is designed to be waterproof; however, avoid direct high-pressure water jets on the display or connections.
- Consult a qualified technician if you are unsure about any installation or wiring procedures.
3. Package Contents
Verify that all items are present in the package before proceeding with installation:
- Aquatic AV AQ-MP-5UBT-H Stereo Unit
- Wiring Harness (pre-attached or separate)
- Mounting Hardware (if applicable, typically uses existing Harley-Davidson bracket)
- User Manual (this document)
4. Installation
The AQ-MP-5UBT-H is designed for a direct factory replacement, utilizing the existing Harley-Davidson stereo mounting bracket and wiring connections for a plug-and-play installation. However, some modifications may be required for rear speaker wiring.
4.1. Preparation
- Park your motorcycle on a level surface and engage the parking brake.
- Disconnect the negative terminal of the motorcycle battery to prevent electrical shorts.
- Carefully remove the existing factory stereo unit from your Harley-Davidson touring motorcycle (1998-2013 model). Refer to your motorcycle's service manual for specific removal instructions.
4.2. Connecting the Stereo
- Connect the AQ-MP-5UBT-H wiring harness to the motorcycle's existing factory wiring harness. This is typically a direct plug-and-play connection.
- If your motorcycle has rear speakers, you may need to cut and wire the rear speaker wires from the new stereo's harness to the existing rear speaker wiring. Ensure proper polarity (+/-) for each speaker.
- Secure any loose wiring to prevent interference or damage.
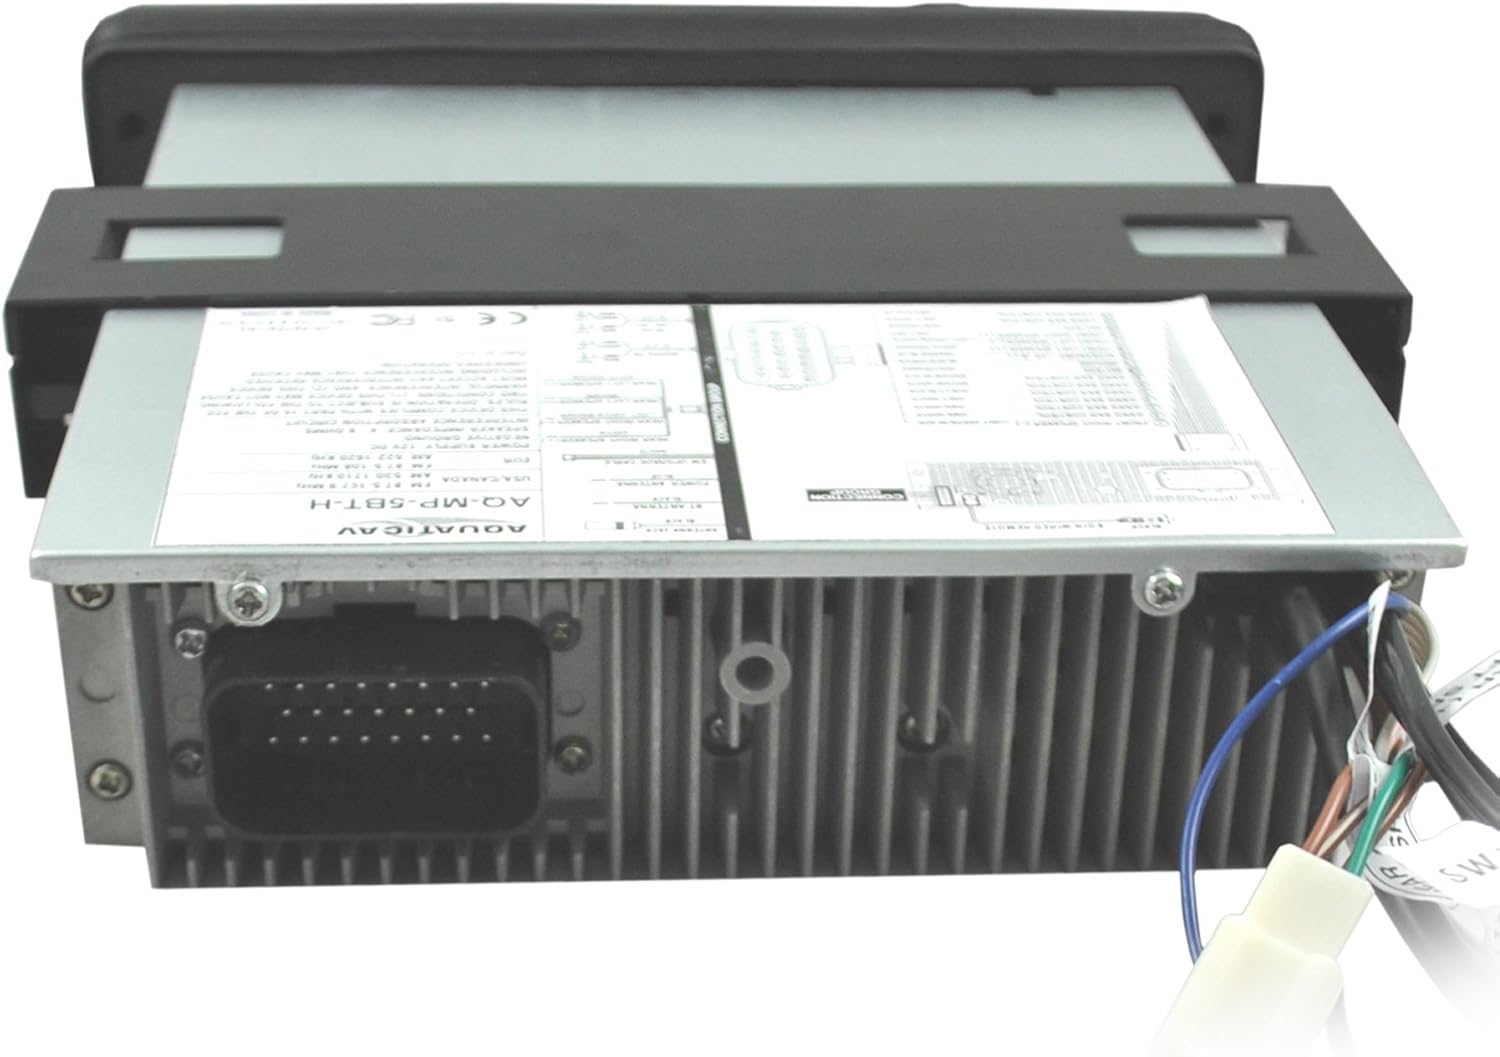
Image: Rear view of the AQ-MP-5UBT-H unit showing the main wiring harness connection.

Image: Side view of the AQ-MP-5UBT-H unit, illustrating the mounting bracket.
4.3. Mounting the Stereo
- Carefully slide the AQ-MP-5UBT-H unit into the dashboard opening, ensuring all wires are clear and not pinched.
- Secure the stereo using the existing factory mounting bracket and screws. Some users report difficulty with the inner left mounting screw; ensure proper alignment.
- Reconnect the motorcycle battery's negative terminal.
- Test the stereo's basic functions before fully reassembling the dashboard.
5. Initial Setup
After installation, perform the following initial setup steps:
- Power On: Turn the motorcycle ignition to the ACC or ON position. The stereo should power on.
- Language/Region: Follow any on-screen prompts to set the desired language and radio region (e.g., USA, Europe).
- Audio Settings: Access the menu to adjust basic audio settings such as Bass, Treble, Balance, and Fader to your preference.
6. Operating Instructions
The AQ-MP-5UBT-H stereo can be controlled via its front panel buttons, rotary knob, and your motorcycle's factory handlebar controls.
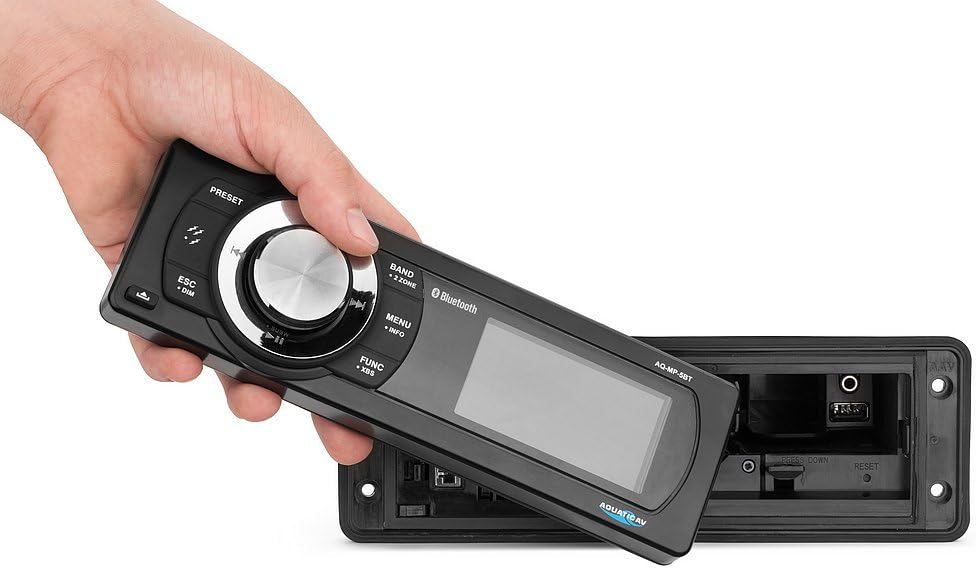
Image: The removable faceplate of the AQ-MP-5UBT-H, showing the main controls and display.
6.1. Front Panel Controls
| Control | Function |
|---|---|
| Power/Volume Knob | Press to turn unit ON/OFF. Rotate to adjust volume. |
| BAND Button | Switches between AM/FM radio bands or input sources. |
| MENU/INFO Button | Accesses system settings and displays track/station information. |
| FUNC/XBS Button | Accesses various functions; long press for XBS (eXtreme Bass System). |
| ESC/DIM Button | Exits current menu; long press to adjust display dimmer. |
| Preset Buttons (1-6) | Recall stored radio stations or perform other functions depending on mode. |
| Track/Tune Buttons | Skip tracks (Bluetooth/MP3) or tune radio stations. |
6.2. Radio Operation (AM/FM)
- Press the BAND button to select AM or FM.
- Use the Track/Tune buttons to manually tune or seek for stations.
- To store a preset: Tune to the desired station, then press and hold one of the Preset Buttons (1-6) until you hear a confirmation beep.
6.3. MP3 Playback (USB/Auxiliary)
The unit supports MP3 playback via a USB connection or a 3.5mm auxiliary input.

Image: The internal compartment of the stereo, revealing the USB port and 3.5mm auxiliary input.

Image: A smartphone being placed into the internal storage compartment, which houses the USB and auxiliary connections.
- USB: Insert a USB drive containing MP3 files into the USB port located within the internal compartment. The unit will automatically switch to USB mode and begin playback.
- Auxiliary: Connect an audio device (e.g., MP3 player, smartphone) to the 3.5mm auxiliary input jack. Press the BAND button to select AUX input.
- Use the Track/Tune buttons to navigate tracks (USB only) or the connected device's controls (Auxiliary).
7. Bluetooth Pairing
Pair your Bluetooth-enabled smartphone or MP3 device to the AQ-MP-5UBT-H for wireless audio streaming.
- Ensure Bluetooth is enabled on your mobile device.
- On the AQ-MP-5UBT-H, press the BAND button until "Bluetooth" mode is selected. The display will show "Pairing" or similar.
- On your mobile device, search for available Bluetooth devices. Select "Aquatic AV" or "AQ-MP-5UBT-H" from the list.
- Once paired, the stereo will confirm the connection. You can now stream audio wirelessly.
- For Apple devices, the 3-inch color LCD screen can display album artwork when paired via Bluetooth using IAP (Information Apple Protocol).
8. Maintenance
- Cleaning: Use a soft, damp cloth to clean the display and front panel. Avoid abrasive cleaners or solvents.
- Connections: Periodically check all wiring connections to ensure they are secure and free from corrosion.
- Software Updates: Check the Aquatic AV website for any available firmware updates for your model.
9. Troubleshooting
| Problem | Possible Cause / Solution |
|---|---|
| No Power |
|
| No Sound |
|
| Bluetooth Not Connecting |
|
| Stereo Reboots on Ignition Cycle | This unit may reboot when the motorcycle ignition is cycled (e.g., from ON to ACC and back). This is a characteristic of the unit's power management and not a fault. |
| No Clock Display | The AQ-MP-5UBT-H model does not feature a dedicated clock display. Time information is typically managed by connected devices or the motorcycle's own instrumentation. |
10. Specifications
| Feature | Detail |
|---|---|
| Model Number | AQ-MP-5UBT-H |
| Product Dimensions | 14 x 4 x 13 inches |
| Item Weight | 3.88 pounds |
| Connectivity Technologies | Bluetooth |
| Wireless Communication | Bluetooth |
| Display Features | 3-inch Color LCD |
| Color | Black |
| Controller Type | Android, iOS (via Bluetooth) |
| Compatible Devices | Speaker, Smartphone, MP3 Player |
| Connector Type | 3.5mm Jack, RCA |
| Audio Encoding | Stereo |
| Audio Output Mode | Stereo |
| Surround Sound Channel Config | 4 channel |
11. Warranty and Support
The Aquatic AV AQ-MP-5UBT-H stereo comes with a 1-Year Limited Warranty from the date of purchase when purchased from an authorized dealer. This warranty covers defects in materials and workmanship under normal use.
For technical support, warranty claims, or further assistance, please contact Aquatic AV customer service or visit their official website. Keep your proof of purchase for warranty validation.


