1. Introduction
The Ventev Global Charginghub 300 is a universal travel adapter designed to provide power and charging capabilities for your electronic devices in over 150 countries. It features multiple interchangeable AC prong configurations and two integrated USB ports, allowing for simultaneous charging of up to two USB devices alongside a standard AC appliance.
This manual provides essential information for the safe and effective use of your Ventev Global Charginghub 300. Please read it thoroughly before use and retain it for future reference.
2. Product Overview

Image 2.1: Front view of the Ventev Global Charginghub 300 with the US plug configuration extended.

Image 2.2: Rear view of the Ventev Global Charginghub 300, displaying technical specifications, the fuse compartment, and the universal AC outlet.
The Charginghub 300 features a compact design with retractable prongs for various international outlets. It includes:
- Universal AC outlet for two-prong and three-prong U.S. devices.
- Two USB charging ports (2.4A total output).
- Retractable prongs for EU, UK, US, and AU/NZ outlets.
3. Setup
3.1 Selecting the Correct Plug Configuration
The Ventev Global Charginghub 300 is equipped with four different AC prong configurations to accommodate various international outlets. To select the appropriate plug:
- Identify the type of electrical outlet available at your location.
- Locate the corresponding slider on the side of the Charginghub 300. Each slider corresponds to a specific plug type (e.g., US, EU, UK, AU/NZ).
- Gently slide the desired prong configuration outwards until it locks into place. Ensure only one set of prongs is extended at a time.

Image 3.1: The Charginghub 300 with the UK plug configuration extended.

Image 3.2: The Charginghub 300 with the EU plug configuration extended.

Image 3.3: The Charginghub 300 with the AU/NZ plug configuration extended.
Important: Ensure the selected prongs are fully extended and locked before inserting the adapter into a wall outlet. To retract, press the release button (if present) or gently push the slider back until the prongs are flush with the adapter body.
4. Operating Instructions
4.1 Connecting to a Power Outlet
- After selecting the correct plug configuration (refer to Section 3.1), firmly insert the Ventev Global Charginghub 300 into the wall outlet.
- Verify that the adapter is securely seated in the outlet.
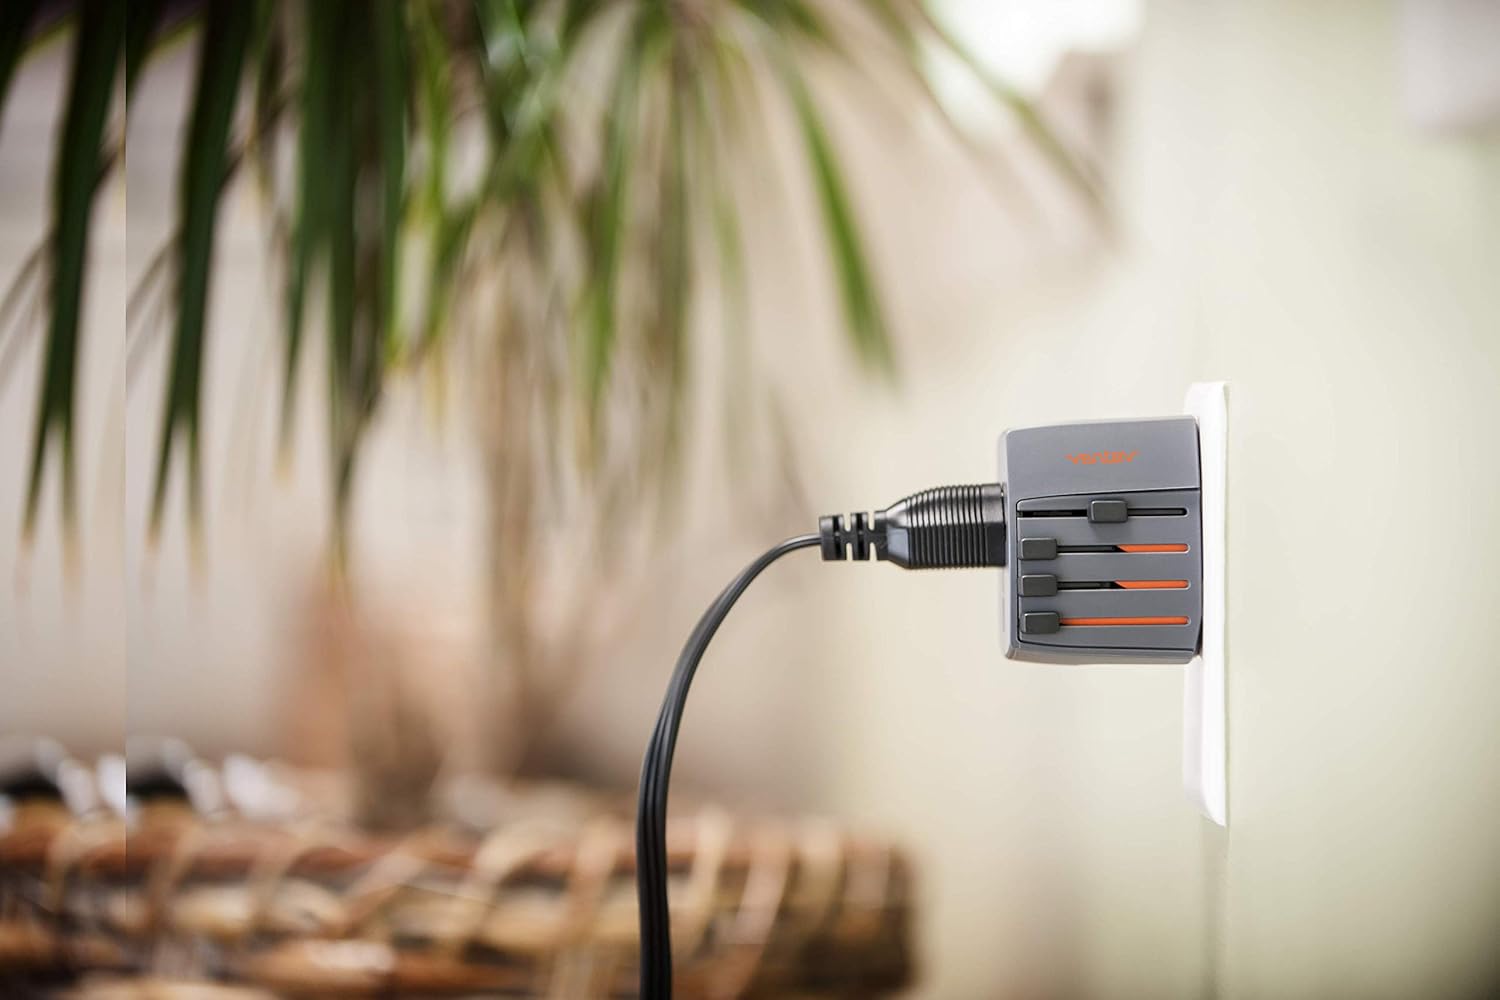
Image 4.1: The Charginghub 300 correctly plugged into a wall outlet, ready for use.
4.2 Charging Devices
The Charginghub 300 allows you to charge devices via its universal AC outlet and two USB ports simultaneously.
- For AC Devices: Plug your device's power cord (U.S. two-prong or three-prong) into the universal AC outlet on the front of the Charginghub 300.
- For USB Devices: Connect your USB charging cable to one of the two USB ports on the side of the adapter, then connect the other end to your device (e.g., smartphone, tablet). The USB ports provide a combined output of 2.4A for rapid charging.
Important Safety Note: This product is a travel adapter, not a voltage converter. It adapts the plug shape to fit different outlets but does not change the electrical voltage. Ensure your electronic devices are compatible with the local voltage (typically 110-240V) before plugging them into the AC outlet. Most modern electronic devices (laptops, phones, tablets) are dual voltage. However, high-power appliances like hair dryers, curling irons, or electric shavers often require a voltage converter in addition to an adapter. Using a non-compatible device with incorrect voltage can damage the device or the adapter.
5. Maintenance
- Cleaning: Disconnect the Charginghub 300 from the power outlet before cleaning. Use a dry, soft cloth to wipe the exterior. Do not use liquid cleaners or solvents.
- Storage: When not in use, retract all prongs and store the adapter in a cool, dry place away from direct sunlight and moisture.
- Fuse Replacement: The Charginghub 300 contains a replaceable fuse for protection against overcurrent. If the adapter stops functioning, check the fuse compartment (refer to Image 2.2 for location). Replace with a fuse of the same rating (2.5A 250V). Always unplug the adapter before attempting fuse replacement.
6. Troubleshooting
| Problem | Possible Cause | Solution |
|---|---|---|
| No power from AC outlet or USB ports. |
|
|
| Device not charging via USB. |
|
|
| Prongs do not extend or retract smoothly. |
|
|
7. Specifications
- Model Number: 509422
- Input Voltage: 100-250V AC, 50/60Hz
- AC Output: 100-250V AC, 2.5A Max
- USB Output: 5V DC, 2.4A Max (shared across two ports)
- Fuse Rating: 2.5A 250V
- Product Dimensions: Approximately 6 x 6 x 1.5 inches
- Item Weight: Approximately 6.9 ounces (0.43 lbs)
- Connectivity: USB
- Special Features: Travel adapter, dual USB charging
- What's in the Box: Charging hub
- Manufacturer: VENTEV
8. Warranty Information
Ventev products are designed and manufactured to high-quality standards. The manufacturer warrants this product to be free of defects in material and quality. If a product does not perform as specified, Ventev will replace it. This warranty covers defects in materials and workmanship under normal use. For warranty claims or further details, please contact Ventev customer support.
9. Customer Support
For technical assistance, troubleshooting not covered in this manual, or warranty inquiries, please contact Ventev customer support. Refer to the official Ventev website for the most current contact information.
Note: Product specifications and appearance are subject to change without notice.


