1. Introduction
This manual provides essential information for the safe and efficient operation of your Yamaha A-S1100 Integrated Amplifier. Please read these instructions thoroughly before using the unit to ensure proper setup, optimal performance, and to prevent damage. Keep this manual in a safe place for future reference.
The Yamaha A-S1100 is designed to deliver high-fidelity audio performance, featuring a unique floating and balanced power amplifier utilizing MOSFETs, a large capacity power supply, and a discretely configured Phono amplifier. It is engineered to reproduce sound with clarity and dynamics.
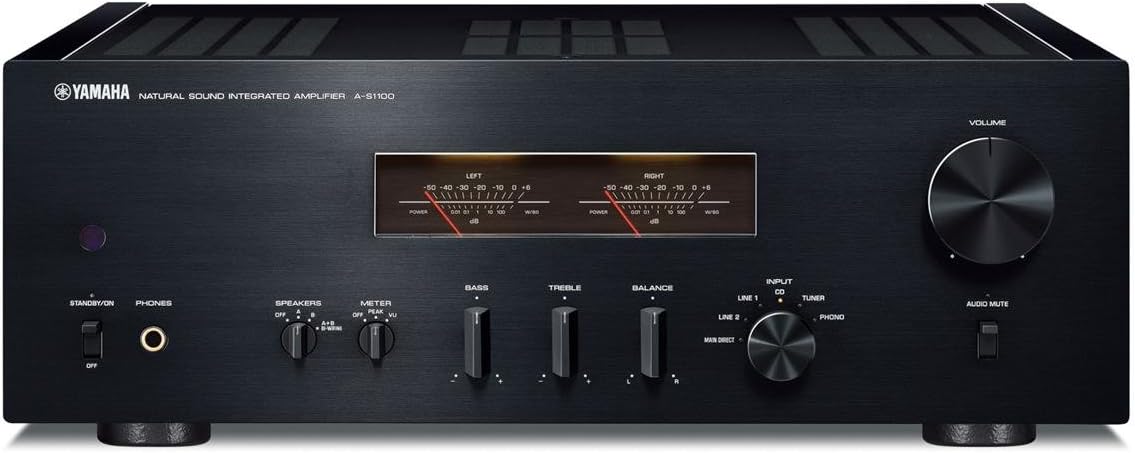
Figure 1: Front view of the Yamaha A-S1100 Integrated Amplifier. This image displays the amplifier's front panel, including the volume knob, input selector, tone controls, and level meters.
2. Safety Information
Observe the following precautions to ensure safe operation and to prevent damage to the unit or injury to yourself.
- Power Supply: Connect the unit only to an AC outlet of the voltage specified on the rear panel. Do not use extension cords or adapters that are not rated for the unit's power requirements.
- Ventilation: Ensure adequate ventilation by leaving sufficient space around the unit. Do not block ventilation openings with items such as newspapers, tablecloths, or curtains.
- Water and Moisture: Do not expose the unit to rain, moisture, dripping, or splashing. Do not place objects filled with liquids, such as vases, on the unit.
- Foreign Objects: Never insert any metal objects or flammable materials into the ventilation openings or other openings of the unit.
- Servicing: Do not attempt to repair or modify this unit yourself. Refer all servicing to qualified service personnel.
- Placement: Place the unit on a stable, level surface. Avoid placing it in direct sunlight, near heat sources, or in excessively dusty or humid environments.
3. Package Contents
Verify that your package contains the following items:
- Yamaha A-S1100 Integrated Amplifier
- Power Cord
- Remote Control Unit
- AAA Batteries (x2) for the remote control
- Owner's Manual (this document)
4. Setup
4.1 Placement
Place the amplifier on a sturdy, flat surface with adequate space around it for proper ventilation. Avoid enclosed cabinets or areas where heat can accumulate. Do not place other components directly on top of the amplifier's ventilation grilles.
4.2 Connections
Before making any connections, ensure the amplifier is turned off and unplugged from the AC power outlet. Use high-quality cables for optimal audio performance.

Figure 2: Rear panel of the Yamaha A-S1100 Integrated Amplifier. This image illustrates the various input and output terminals, including speaker terminals, RCA inputs, and power input.
4.2.1 Speaker Connections
- The A-S1100 features two sets of speaker terminals (A and B) for connecting up to two pairs of speakers.
- Connect your speakers to the SPEAKER A or SPEAKER B terminals. Ensure correct polarity (+ to + and - to -) for each speaker.
- The amplifier supports speaker impedances of 4 ohms or higher. When using both A and B speakers simultaneously, ensure each speaker has an impedance of 8 ohms or higher.
- Use banana plugs or bare wire for connections. Tighten the terminals securely.
4.2.2 Audio Input Connections
- CD, TUNER, LINE 1, LINE 2: Connect your audio sources (e.g., CD player, tuner, network player) to these RCA input jacks.
- PHONO (MM/MC): Connect a turntable to these inputs. Use the MM/MC selector switch to match your phono cartridge type (Moving Magnet or Moving Coil). Ensure the ground wire from your turntable is connected to the GND terminal on the amplifier to reduce hum.
- MAIN IN: These inputs bypass the preamplifier section, allowing you to connect an external preamplifier or processor.
4.2.3 Audio Output Connections
- REC OUT: Connect to the recording input of a recording device (e.g., tape deck).
- PRE OUT: Connect to a separate power amplifier or a subwoofer with built-in amplification.
4.2.4 Remote and Trigger Connections
- REMOTE IN/OUT: For connecting to other Yamaha components for synchronized operation.
- TRIGGER IN/OUT: For power synchronization with other compatible components.
4.2.5 AC Power Connection
After all other connections are made, connect the supplied power cord to the AC IN terminal on the rear panel and then to a wall outlet.
5. Operating
5.1 Basic Operation
- Power On/Off: Press the POWER switch on the front panel to turn the unit on or off.
- Input Selection: Use the INPUT selector knob on the front panel or the remote control to choose your desired audio source (CD, Tuner, Line 1, Line 2, Phono).
- Volume Control: Rotate the VOLUME knob on the front panel or use the remote control to adjust the listening level.
- Speaker Selection: Use the SPEAKER A/B buttons to select which pair of speakers (A, B, or A+B) is active.
- Audio Mute: Press the AUDIO MUTE button to temporarily silence the audio output. Press again to restore sound.
5.2 Tone Controls
The A-S1100 includes BASS, TREBLE, and BALANCE controls to fine-tune the sound to your preference and listening environment. For a pure, uncolored sound, set these controls to their center (flat) positions.
5.3 Special Features
5.3.1 Phono Amplifier (MM/MC)
The built-in phono stage supports both Moving Magnet (MM) and Moving Coil (MC) cartridges. Ensure the MM/MC switch on the rear panel is set correctly to match your turntable's cartridge type for optimal sound quality.
5.3.2 Level Meters
The front panel features analog level meters that visually reflect the dynamics of the music. You can switch between 'Peak' and 'VU' display modes using the meter selector button.

Figure 3: Close-up view of the Yamaha A-S1100's level meters. These meters provide a visual representation of the audio signal's output level.
5.3.3 Auto Power Standby
The amplifier includes an Auto Power Standby function. If no audio input is detected for a certain period, the unit will automatically switch to standby mode to conserve energy. This feature can typically be enabled or disabled via a switch on the rear panel or through menu settings (refer to the full owner's manual for details).
6. Maintenance
Proper maintenance ensures the longevity and performance of your amplifier.
- Cleaning: Disconnect the power cord before cleaning. Use a soft, dry cloth to wipe the exterior surfaces. For stubborn dirt, lightly dampen the cloth with water or a mild, non-abrasive cleaner. Do not use chemical solvents or abrasive cloths.
- Ventilation: Periodically check that the ventilation openings are free from dust and obstructions. Use a soft brush or vacuum cleaner with a brush attachment to gently remove dust.
- Storage: If storing the unit for an extended period, unplug the power cord and cover the unit to protect it from dust.
7. Troubleshooting
If you experience problems with your amplifier, consult the following common issues before seeking professional service.
| Problem | Possible Cause | Solution |
|---|---|---|
| No power | Power cord not connected; Power switch off; Blown fuse | Ensure power cord is securely connected. Turn power switch on. If fuse is suspected, contact service. |
| No sound | Incorrect input selected; Speakers not connected; Speaker selector off; Volume too low; Mute active | Select correct input. Check speaker connections. Ensure SPEAKER A/B is on. Increase volume. Deactivate Mute. |
| Distorted sound | Poor cable connections; Source device issue; Speaker impedance mismatch; Tone controls set incorrectly | Check all cable connections. Test with another source. Verify speaker impedance. Set tone controls to flat. |
| Remote control not working | Batteries depleted or inserted incorrectly; Obstruction between remote and unit; Remote sensor blocked | Replace batteries, ensuring correct polarity. Remove obstructions. Ensure remote sensor on unit is clear. |
If the problem persists after trying these solutions, please contact your Yamaha dealer or authorized service center.
8. Specifications
The following are key technical specifications for the Yamaha A-S1100 Integrated Amplifier:
- Power Output: 90 W + 90 W (8 ohms, 20 Hz - 20 kHz, 0.07% THD)
- Amplifier Type: Unique floating and balanced power amplifier utilizing MOSFETs
- Phono Input: Discretely configured Phono amp (MM/MC selectable)
- Power Supply: Large capacity power supply with symmetrical amplifier layout
- Visual Indicators: Level meters (peak / VU selectable)
- Product Dimensions (W x H x D): Approximately 17.13 x 6.13 x 18.25 inches (435 x 157 x 463 mm)
- Item Weight: Approximately 51.4 pounds (23.3 kg)
- Included Accessories: Remote control, 2 AAA batteries
Note: Specifications are subject to change without notice for product improvement.
9. Warranty and Support
Yamaha products are designed and manufactured to high quality standards. For information regarding warranty coverage, terms, and conditions, please refer to the warranty card included with your product or visit the official Yamaha website for your region. For technical support, service, or inquiries, please contact your authorized Yamaha dealer or the Yamaha customer support center.
Online Resources: For the most up-to-date information, FAQs, and additional support documents, please visit the official Yamaha website: www.yamaha.com