
1. Introduction
Thank you for choosing the A Forged Tool 2108020 Bicycle Computer. This device is designed to provide essential cycling data, including total distance, current speed, and trip distance. Please read this manual carefully before use to ensure proper installation and operation.
2. Safety Information
- Ensure the computer and sensor are securely mounted to prevent detachment during cycling.
- Do not attempt to disassemble or modify the device. This may void the warranty and cause damage.
- Keep batteries out of reach of children. If swallowed, seek immediate medical attention.
- Avoid exposing the device to extreme temperatures, direct sunlight for prolonged periods, or harsh chemicals.
- Always prioritize road safety. Do not operate the computer in a way that distracts you from cycling.
3. Package Contents
Verify that all items are present in the package:
- A Forged Tool 2108020 Bicycle Computer Unit
- Mounting Bracket
- Speed Sensor
- Magnet for Spokes
- Cable Ties for Installation
- 1 x LR44/AG13 Battery (pre-installed or separate)
- User Manual (this document)
4. Product Overview
The A Forged Tool 2108020 Bicycle Computer features a clear LCD display and simple button interface for easy operation.
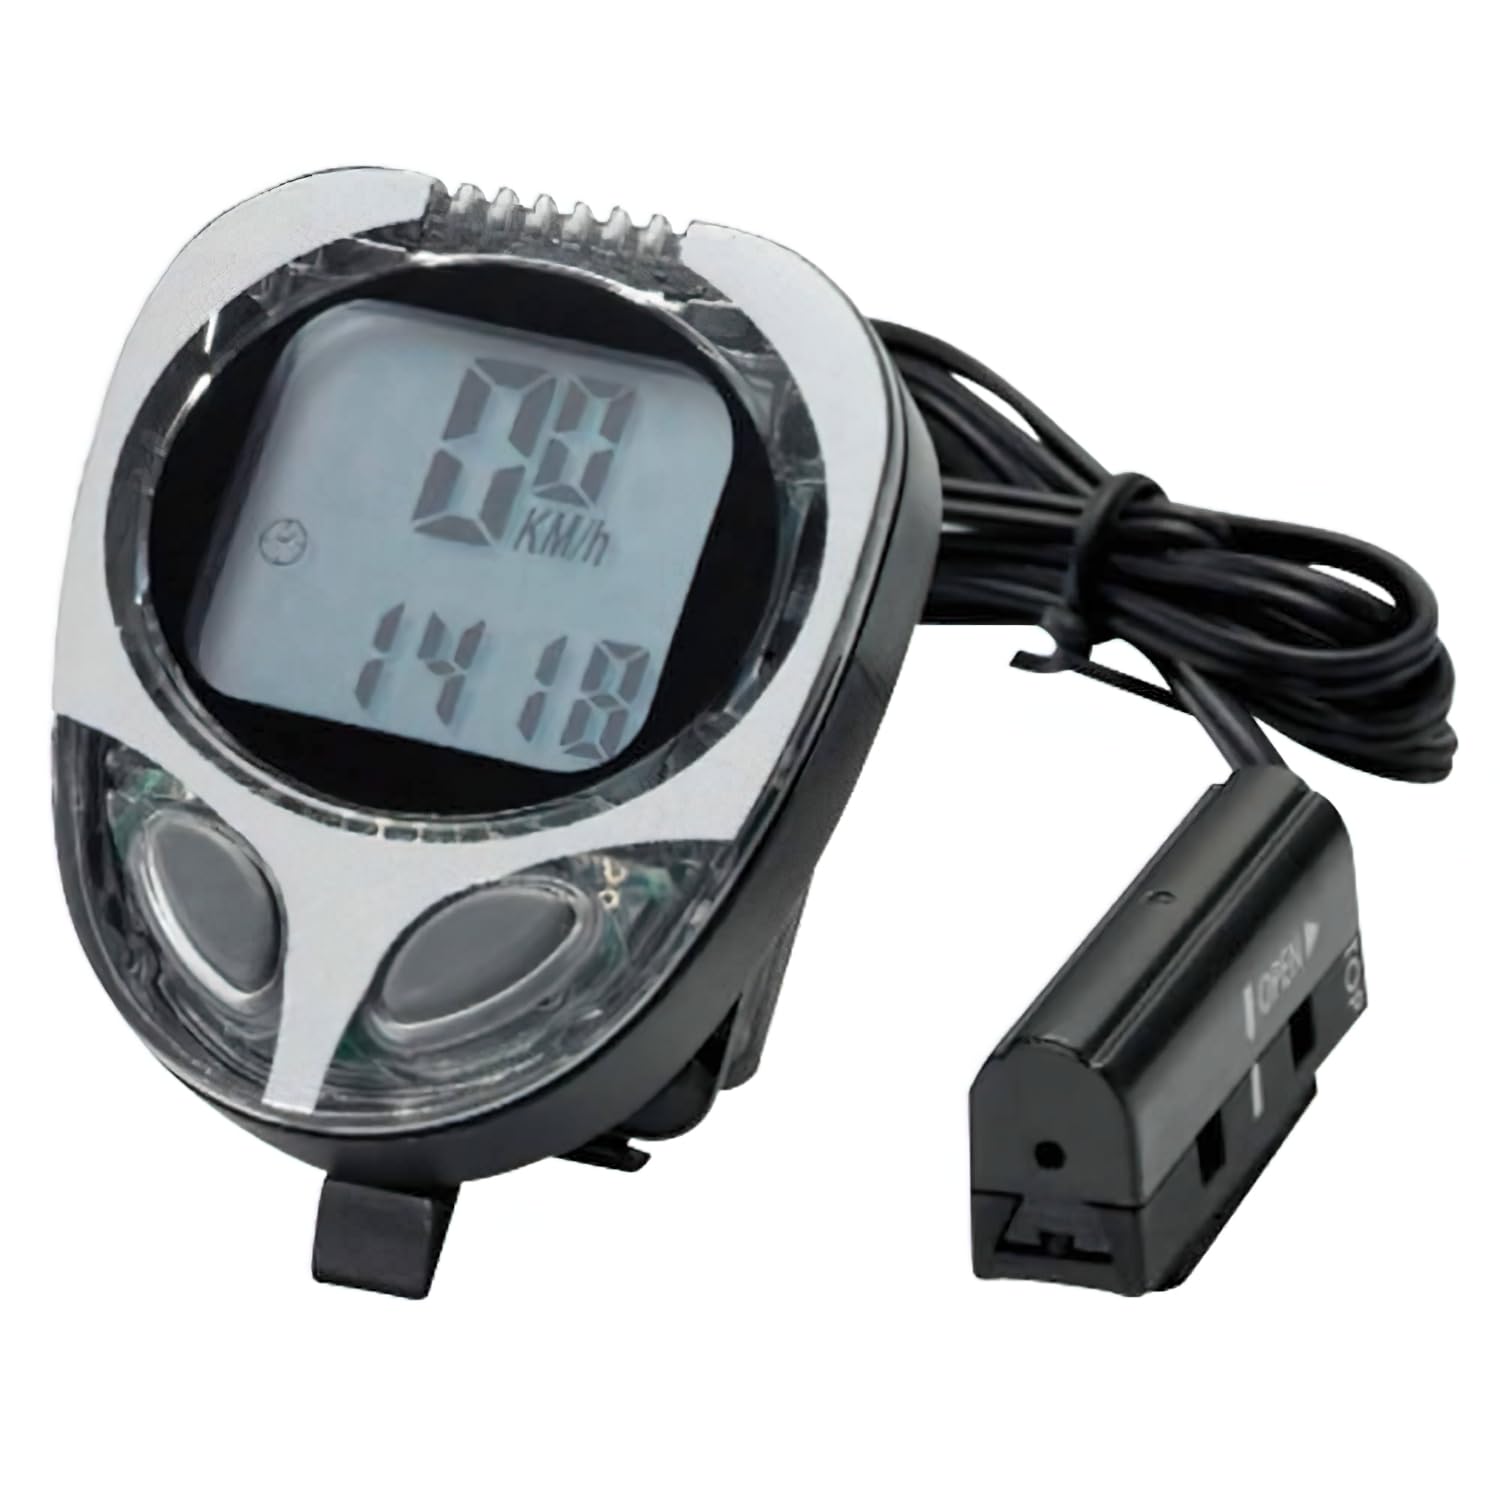
Image 1: A Forged Tool 2108020 Bicycle Computer. This image shows the main computer unit, the mounting bracket, the speed sensor, and the spoke magnet. The computer has a black casing with a silver trim and a clear LCD screen.
4.1. Components
- Computer Unit: Displays cycling data.
- LCD Display: Shows speed, distance, and other metrics.
- Mode Button: Used to switch between display modes and confirm settings.
- Set Button: Used for entering settings mode and adjusting values.
- Mounting Bracket: Secures the computer to the handlebar or stem.
- Speed Sensor: Detects wheel rotations.
- Spoke Magnet: Triggers the speed sensor with each wheel rotation.
5. Setup
5.1. Battery Installation
- Locate the battery compartment on the back of the computer unit.
- Use a small coin to twist open the battery cover.
- Insert one LR44/AG13 battery with the positive (+) side facing up.
- Replace the battery cover and twist to secure it.
5.2. Mounting the Computer
- Attach the mounting bracket to your bicycle's handlebar or stem using the provided cable ties. Ensure it is secure and positioned for easy viewing.
- Slide the computer unit onto the mounting bracket until it clicks into place.
5.3. Sensor and Magnet Installation
- Attach the speed sensor to the front fork of your bicycle using cable ties. Position it so that it aligns with the spokes.
- Attach the magnet to a spoke on the front wheel.
- Adjust the position of the sensor and magnet so that the gap between them is approximately 1-3 mm when the magnet passes the sensor. The magnet should pass the sensor's marked area.
- Rotate the wheel to confirm that the magnet triggers the sensor. The computer display should show a speed reading if correctly installed.
5.4. Setting Wheel Circumference
Accurate wheel circumference is crucial for precise speed and distance measurements.
- With the computer powered on, press and hold the SET button for a few seconds until the wheel circumference setting appears (e.g., "2060" for 2060mm).
- Press the MODE button to adjust the digits.
- Press the SET button to move to the next digit.
- Repeat until the correct circumference is entered. Common wheel sizes and their approximate circumferences in mm:
- 26 inch: 2050 mm
- 700C (28 inch): 2100-2155 mm
- 29 inch: 2280 mm
- Press and hold SET again to save the setting and exit.
6. Operating the Bicycle Computer
6.1. Basic Functions
- Current Speed: Displays your real-time cycling speed.
- Trip Distance (DST): Shows the distance covered during the current ride.
- Total Distance (ODO): Accumulates the total distance covered since the computer was first set up or last reset.
6.2. Mode Selection
Press the MODE button to cycle through the available display modes:
- Current Speed
- Trip Distance (DST)
- Total Distance (ODO)
- Other potential modes (if applicable, refer to display icons)
6.3. Resetting Trip Data
To reset the Trip Distance (DST) for a new ride:
- Navigate to the Trip Distance (DST) display mode using the MODE button.
- Press and hold the SET button for a few seconds until the DST value resets to zero.
Note: The Total Distance (ODO) cannot be reset through normal operation to maintain an accurate lifetime record.
7. Maintenance
7.1. Cleaning
Wipe the computer unit and sensor with a soft, damp cloth. Do not use abrasive cleaners or solvents, as these can damage the display or casing.
7.2. Battery Replacement
When the display becomes dim or unresponsive, it is time to replace the battery. Follow the steps in Section 5.1. Battery Installation. Dispose of old batteries responsibly according to local regulations.
8. Troubleshooting
| Problem | Possible Cause | Solution |
|---|---|---|
| No display or dim display | Dead or improperly installed battery. | Replace battery (LR44/AG13) or ensure it is correctly inserted. |
| No speed/distance reading | Sensor/magnet misalignment; sensor too far from magnet; loose connection; faulty sensor. | Check sensor and magnet alignment (1-3mm gap). Ensure computer is securely in its bracket. Check for damage to sensor cable (if wired). |
| Incorrect speed/distance | Incorrect wheel circumference setting. | Re-enter the correct wheel circumference (refer to Section 5.4). |
| Computer unit detaches from bracket | Improper installation of computer unit or bracket. | Ensure computer is fully clicked into the bracket. Re-secure bracket to handlebar/stem. |
9. Specifications
- Model: 2108020
- Brand: A Forged Tool (AFT)
- Display Type: LCD
- Sensor Type: Speed Sensor
- Input: Buttons
- Power Source: 1 x LR44/AG13 Battery
- Color: Black and Silver
- Functions: Current Speed, Trip Distance, Total Distance
10. Warranty and Support
For warranty information or technical support, please refer to the retailer where you purchased this product or visit the official A Forged Tool website. Keep your proof of purchase for warranty claims.
For further assistance, you may contact customer support via the contact information provided on the product packaging or the manufacturer's website.