1. Product Overview
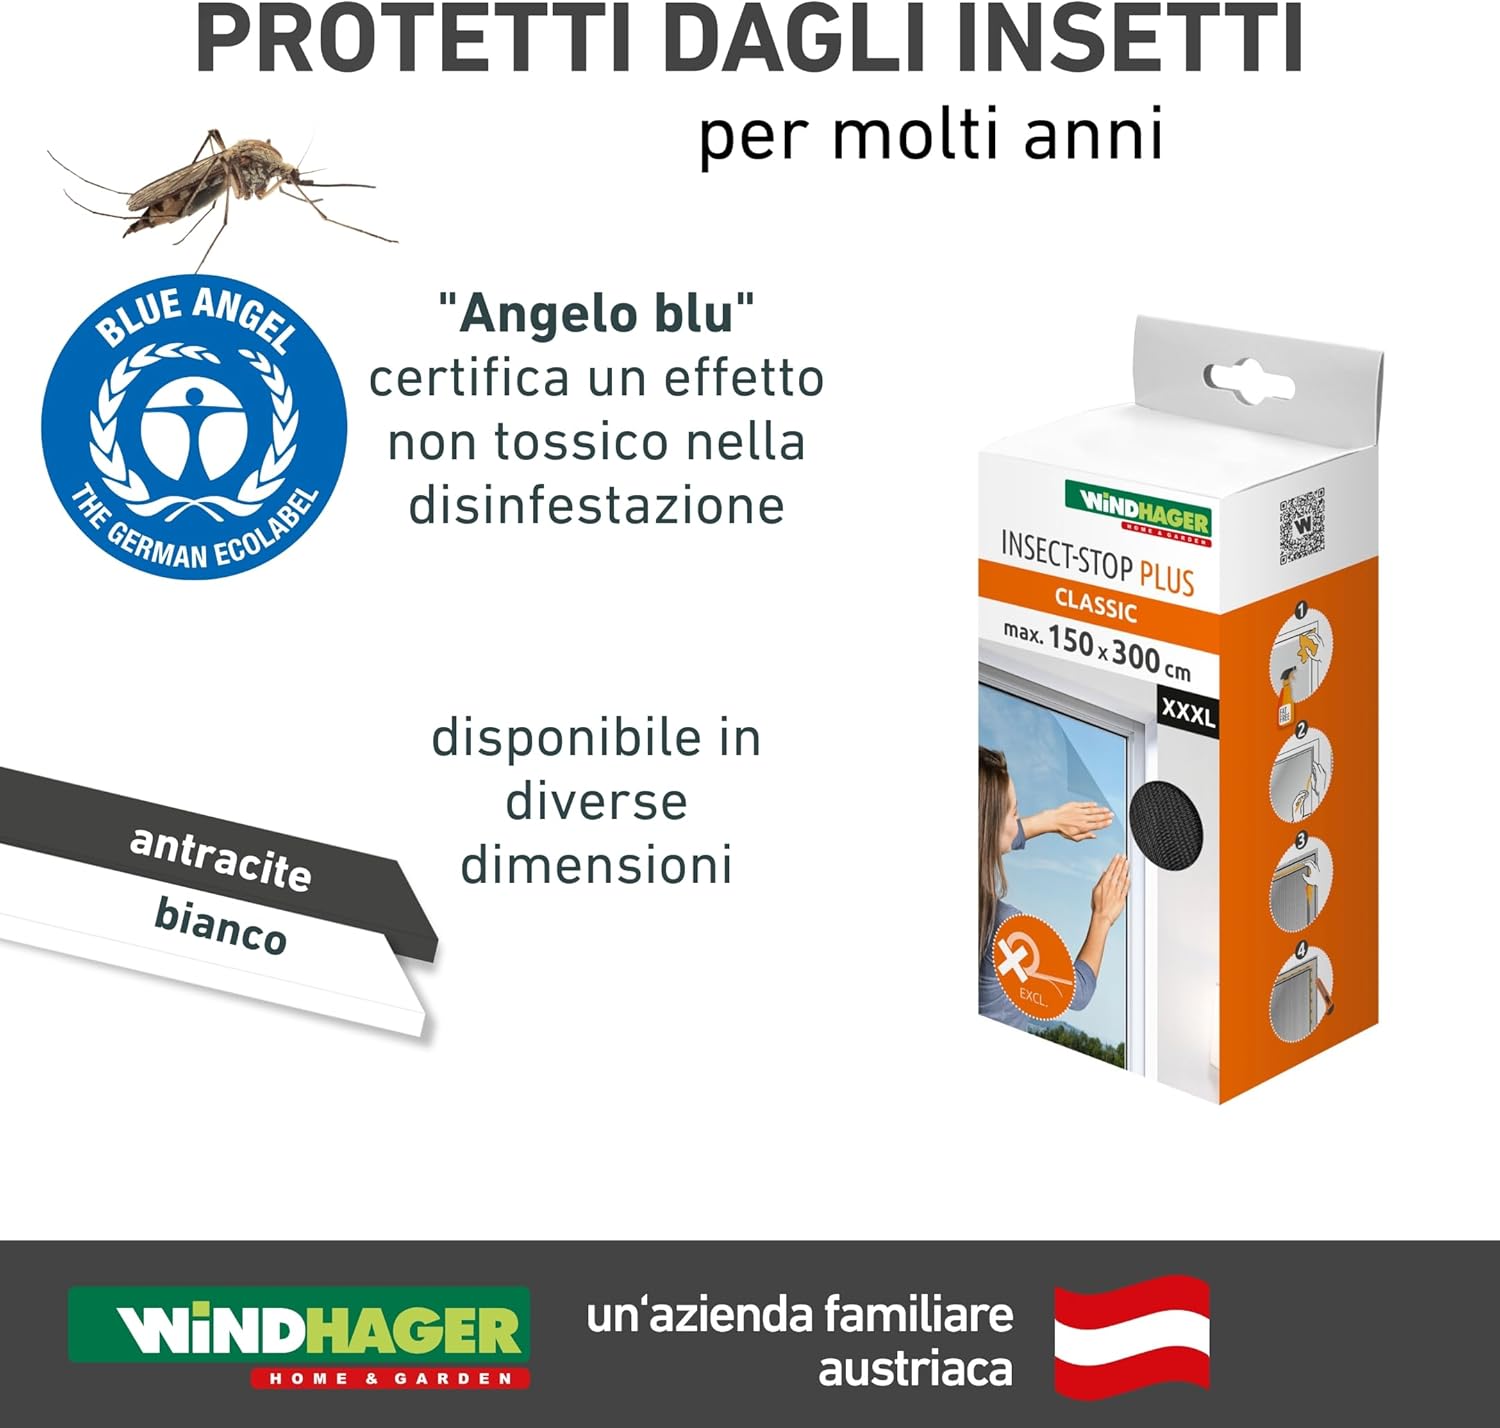
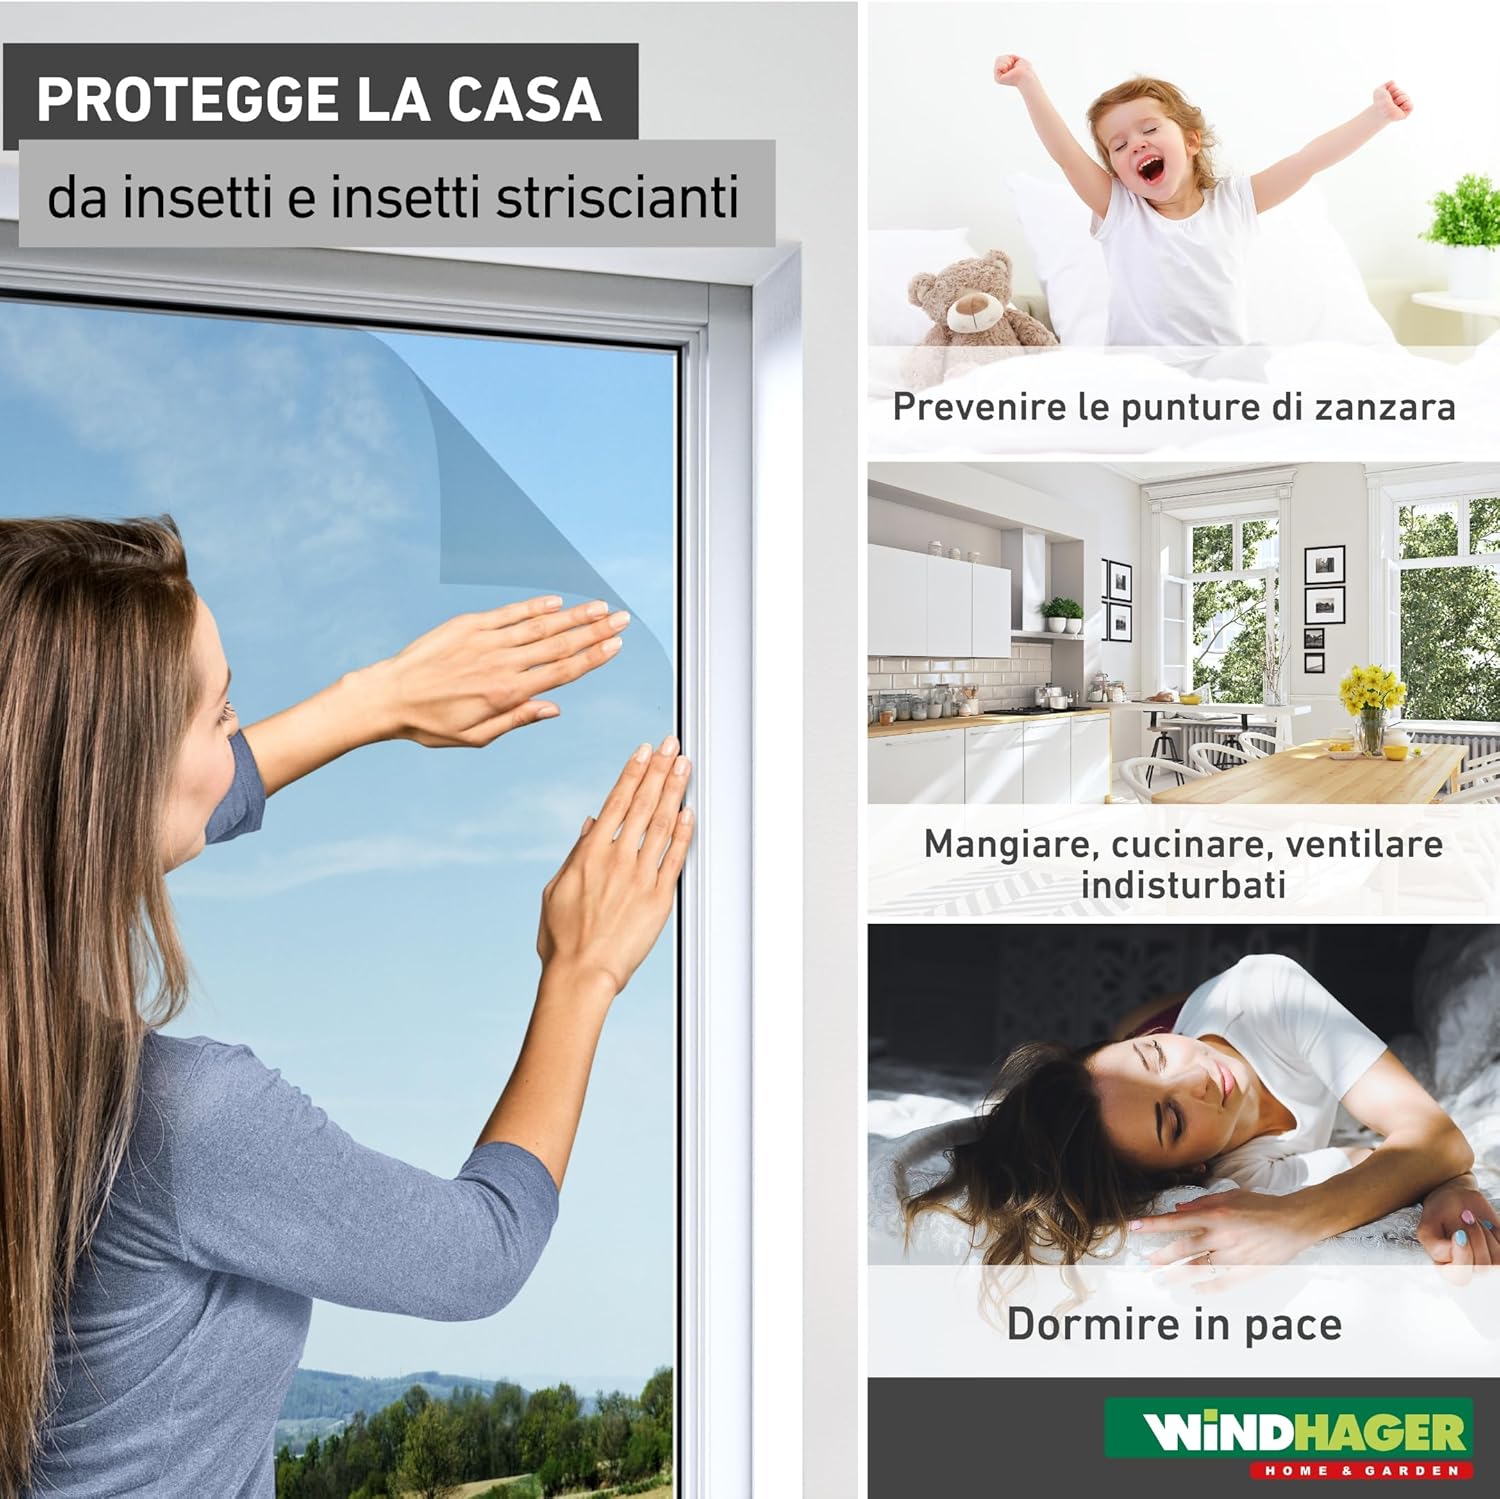
The Windhager Fiberglass Mosquito Net provides effective and reliable protection against insects for your home. Made from high-quality, UV-resistant fiberglass fabric with a welded mesh, it is designed for durability and long-term use. This mosquito net is suitable for various windows and can be easily installed and removed.
Key Features:
- High-quality fiberglass fabric: Ensures durability and tear resistance.
- Welded mesh: Provides robust and reliable insect protection.
- UV resistant: Designed for many years of outdoor use without degradation.
- Fine mesh size: 1.26 x 1.44 mm, effectively keeps out even small insects.
- Versatile: Suitable for both windows and doors.


2. Setup and Installation
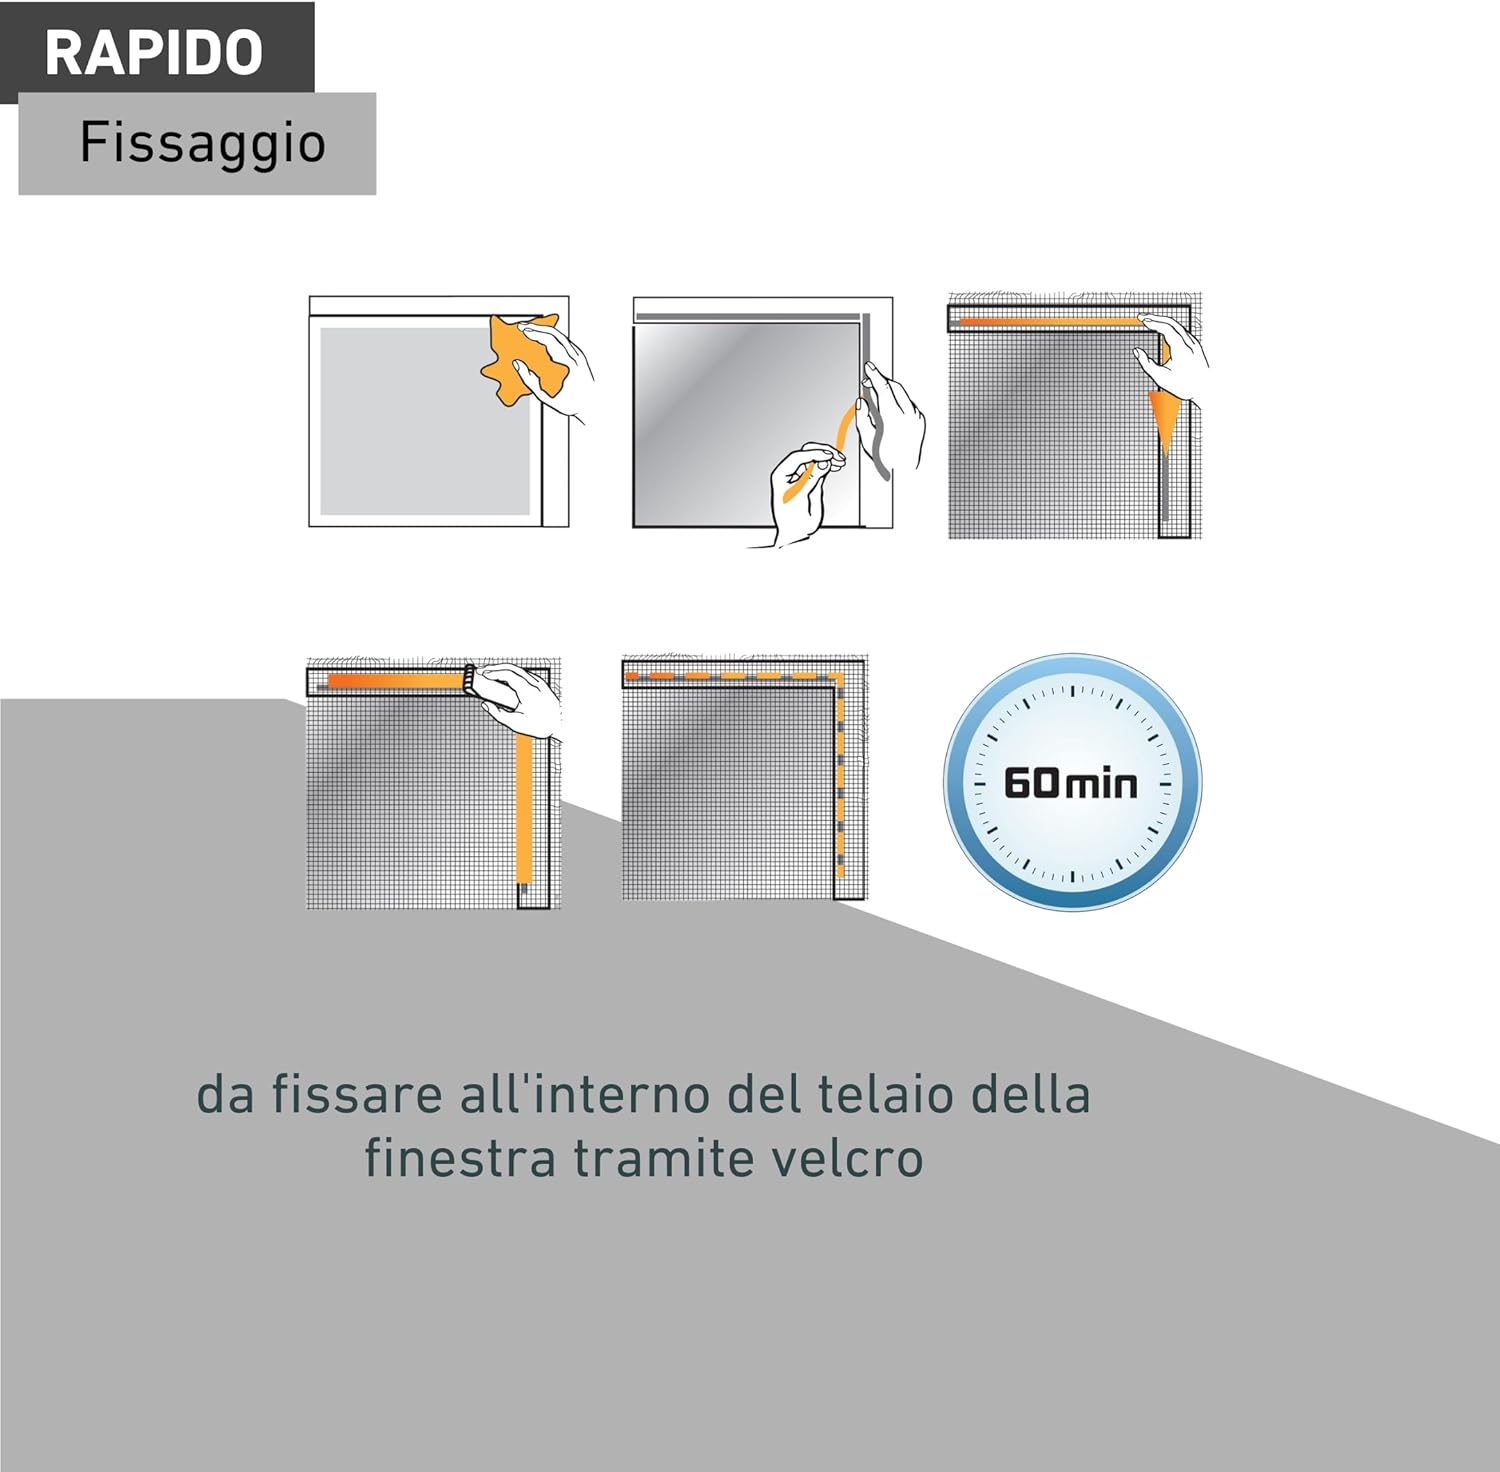
This mosquito net is designed for quick and easy installation without drilling. It is typically fixed to the inside of the window frame using adhesive hook-and-loop tape (Velcro). Note: Velcro tape is not included with this product and must be purchased separately.
Installation Steps:
- Clean the Frame: Ensure the window frame surface is clean, dry, and free of dust or grease.
- Apply Velcro Tape: Attach the adhesive hook-and-loop tape (soft side) around the perimeter of the inner window frame. Press firmly to ensure good adhesion.
- Measure and Cut Net: Unroll the mosquito net and measure it against your window opening, allowing for a slight overlap (approx. 2-3 cm) on all sides. Cut the net to the required size using scissors.
- Attach Net: Carefully press the mosquito net onto the hook-and-loop tape on the window frame, starting from one corner and working your way around. Ensure the net is taut and smooth, without wrinkles.
- Trim Excess: Trim any excess net material that extends beyond the hook-and-loop tape for a neat finish.
Installation Video:
3. Operating Instructions
Once installed, the Windhager Fiberglass Mosquito Net provides continuous protection against insects. The fine mesh allows for sufficient fresh air circulation and natural light to enter your living space, maintaining comfort without allowing pests inside.
Usage Tips:
- Ventilation: Keep windows open as desired for ventilation without worrying about insects.
- Visibility: The anthracite color and fine mesh are designed to be nearly invisible, preserving your view.
- Temporary Removal: The net can be easily removed from the hook-and-loop tape at any time, for example, during colder months or for cleaning. It is very space-saving when folded for storage.

4. Maintenance
To ensure the longevity and effectiveness of your Windhager Fiberglass Mosquito Net, regular maintenance is recommended.
Cleaning Instructions:
- Dust Removal: Gently brush off any accumulated dust or debris from the net using a soft brush or a vacuum cleaner with a brush attachment.
- Wipe Clean: For more thorough cleaning, wipe the net with a damp cloth. Use mild soap if necessary, then rinse with a clean damp cloth.
- Drying: Allow the net to air dry completely before reattaching it to the window frame or storing it.
- Avoid Harsh Chemicals: Do not use abrasive cleaners, strong detergents, or solvents, as these can damage the fiberglass material and its UV resistance.
5. Troubleshooting
Here are some common issues and their potential solutions:
- Net not adhering to frame: Ensure the window frame surface was thoroughly cleaned and dry before applying the hook-and-loop tape. Press the tape firmly for optimal adhesion. If the tape is old or worn, replace it.
- Gaps around the net: Ensure the net was cut with sufficient overlap and pressed firmly onto the hook-and-loop tape along all edges. Re-adjust if necessary to eliminate gaps.
- Net sagging or wrinkling: When attaching the net, pull it taut and smooth it out as you press it onto the hook-and-loop tape. If it sags, detach and re-apply, ensuring even tension.
- Tears or holes in the net: Small tears can often be repaired with a patch kit designed for mosquito nets or by carefully sewing with a fine thread. For larger damage, replacement of the net may be necessary.
6. Specifications
| Attribute | Detail |
|---|---|
| Brand | Windhager |
| Model Number | 03485 |
| Material | Fiberglass |
| Color | Anthracite (Grey) |
| Dimensions (L x W) | 100 cm x 100 cm |
| Mesh Size | 1.26 x 1.44 mm |
| Weight | 160 Grams |
| UV Resistance | Yes |
| Country of Origin | China |
7. Warranty and Support
Windhager products are manufactured to high-quality standards. For specific warranty information, please refer to the packaging or contact Windhager customer service directly. In case of any questions, issues, or for technical support, please reach out to the manufacturer's support channels.
Contact Information:
Please visit the official Windhager website for the most up-to-date contact details and support resources.