Introduction
The Rii Mini i8 Wireless AZERTY Mini Keyboard is a compact and ergonomic wireless keyboard with an integrated touchpad, designed for versatile use with Smart TVs, mini PCs, HTPCs, gaming consoles (PlayStation 3, PlayStation 4, Xbox 360, Xbox One), and computers (Windows, Mac, Linux). This 92-key 2.4 GHz wireless keyboard offers convenient control with adjustable touchpad DPI functions and multimedia keys.
Key features include a multi-touch touchpad with adjustable sensitivity, a rechargeable lithium battery, and a 2.4 GHz USB wireless receiver for reliable connectivity up to 15 meters. The keyboard also features an automatic sleep and wake-up mode to conserve battery life.

Image: Rii Mini i8 Wireless AZERTY Mini Keyboard showing its compact design and dimensions (146.8mm length, 97.5mm width, 19mm height).
Setup Instructions
Follow these steps to set up your Rii Mini i8 Wireless Keyboard:
- Charge the Keyboard: Before first use, ensure the keyboard is fully charged using the provided USB charging cable. The charging indicator LED will turn off when charging is complete.
- Locate the USB Receiver: Open the battery compartment on the back of the keyboard. The USB wireless receiver is stored inside.
- Connect the Receiver: Insert the USB receiver into an available USB port on your device (Smart TV, mini PC, console, or computer).
- Power On the Keyboard: Slide the ON/OFF switch, located on the side of the keyboard, to the "ON" position.
- Confirmation: A blue LED indicator will illuminate, confirming the keyboard is powered on and attempting to connect. No additional drivers are typically required for most compatible systems.

Image: Rear view of the Rii Mini i8 keyboard with the battery cover removed, showing the storage slot for the USB dongle.
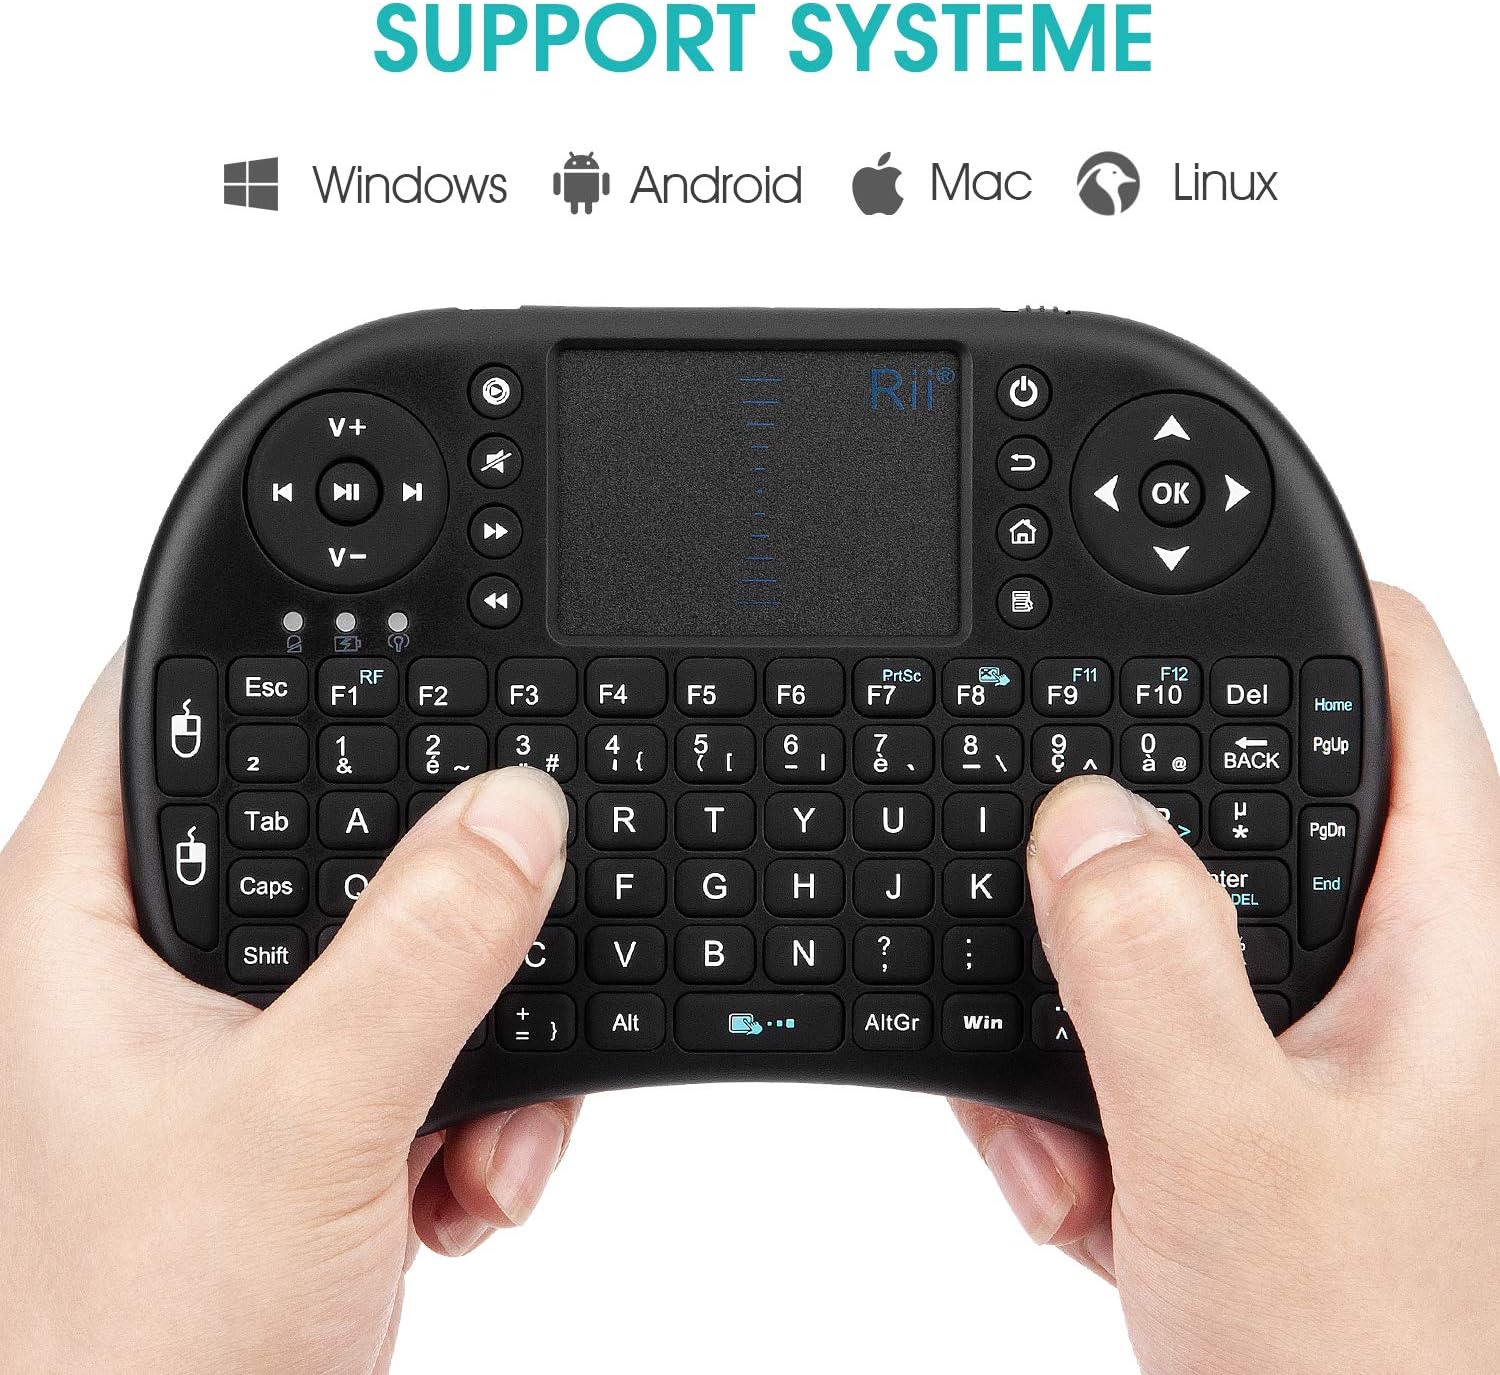
Image: Rii Mini i8 keyboard illustrating compatibility with Windows, Android, Mac, and Linux operating systems.
Operating Instructions
Touchpad Functions
- Single Finger Tap: Functions as a left mouse click.
- Two Finger Tap: Functions as a right mouse click.
- Two Finger Scroll: Slide two fingers along the touchpad surface to scroll through pages or documents.
- Adjust Touchpad Sensitivity (DPI): Press Fn + Spacebar to cycle through different DPI settings for the touchpad.
- Disable Touchpad Click: Press Fn + F8 to disable the tap-to-click function on the touchpad.
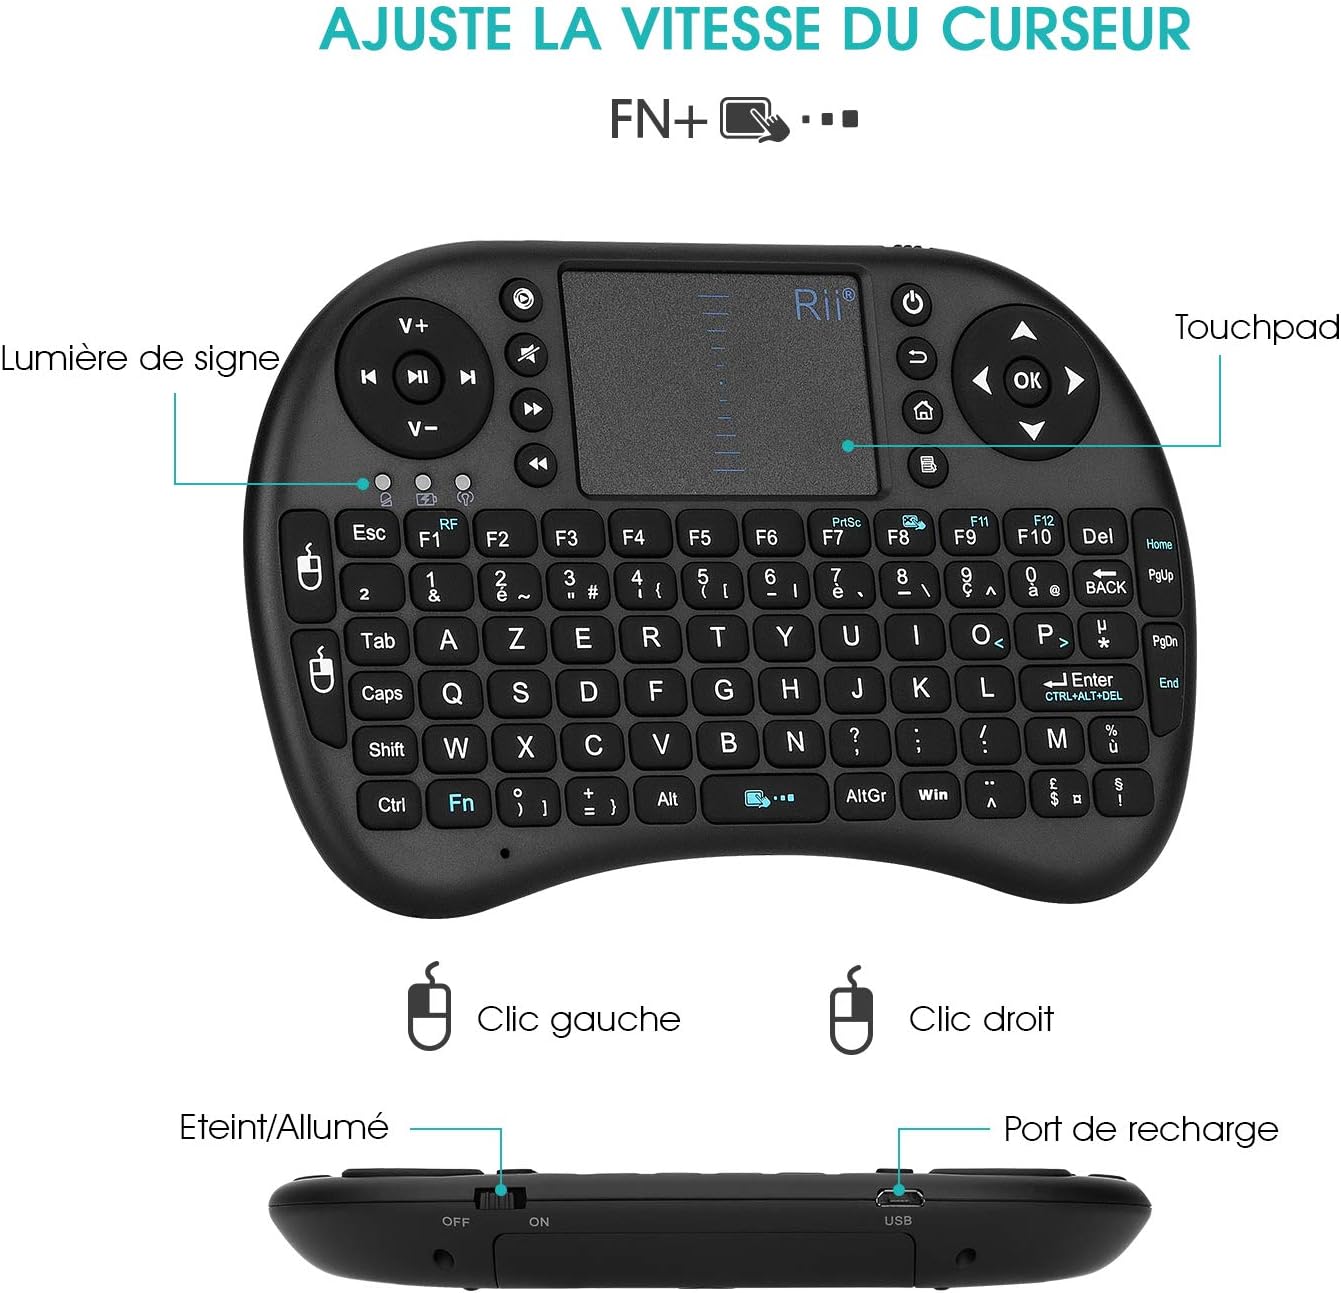
Image: Rii Mini i8 keyboard highlighting the touchpad, left/right click areas, and the indicator light. Text indicates "Adjust Cursor Speed FN+..."

Image: A user's hands demonstrating how to hold and operate the Rii Mini i8 keyboard, focusing on the keyboard and touchpad interaction.
Power Management
- Automatic Sleep Mode: The keyboard enters sleep mode after approximately 3 minutes of inactivity to conserve battery power.
- Waking Up the Keyboard: To wake the keyboard from sleep mode, press any key and hold it for about 1 second.
- Manual Power Off: Use the ON/OFF switch on the side of the keyboard to manually power it off when not in use for extended periods.
LED Indicators
- First LED (Battery Status):
- Solid Blue: Keyboard is on, and battery is sufficiently charged.
- Flashing Blue: Battery is low and needs recharging.
- Second LED (Charging Indicator):
- Solid Red: Battery is currently charging.
- Off: Battery is fully charged. You can disconnect the charging cable.
- Third LED (Connection Status): Illuminates when the keyboard is actively communicating with its USB receiver.
Maintenance
Charging the Battery
The Rii Mini i8 keyboard is equipped with a rechargeable Lithium-ion battery. Use the provided USB charging cable to charge the device. Connect the micro-USB end to the keyboard's charging port and the standard USB end to a power source (e.g., computer USB port, USB wall adapter). The charging indicator LED will be red during charging and turn off when fully charged.
It is recommended to charge the battery for at least 15 minutes if you experience issues like repeated characters or inaccurate touchpad response, even if the low battery indicator is not flashing.
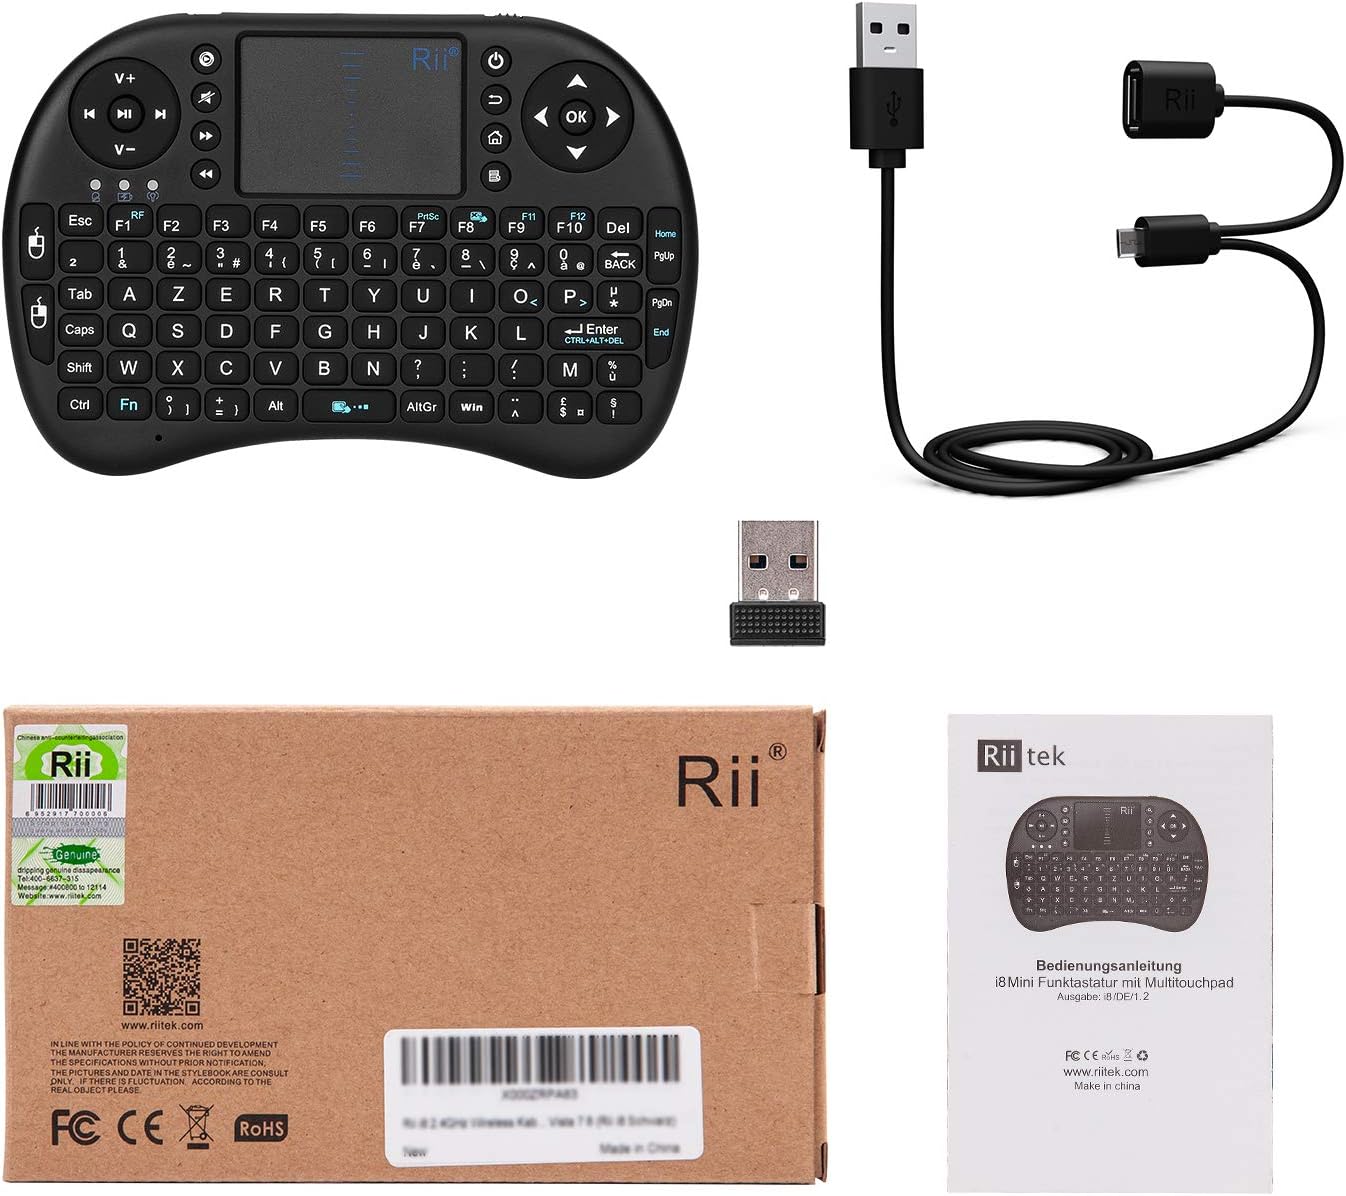
Image: Contents of the Rii Mini i8 package, showing the keyboard, USB receiver, and USB charging cable.
Cleaning
To clean the keyboard, use a soft, dry cloth. For stubborn dirt, a slightly damp cloth can be used, ensuring no liquid enters the device. Avoid using harsh chemicals or abrasive cleaners.
Troubleshooting
- Keyboard Not Responding:
- Ensure the keyboard is powered on (switch to "ON").
- Check if the USB receiver is securely plugged into the device.
- Verify the keyboard battery is charged. Recharge if the blue LED is flashing or if the keyboard has been inactive for a long time.
- Try plugging the USB receiver into a different USB port.
- If possible, use a USB extension cable between the USB port and the receiver to improve signal transmission and reception, especially if the receiver is far from the keyboard or obstructed.
- Incorrect Special Characters (AZERTY Layout Issues):
- If you are pressing special characters (e.g., ç, è, @) and incorrect symbols appear, you may need to configure the input language for the keyboard to French (AZERTY) on your operating system.
- For Android Devices: Some Android versions may not allow direct configuration of external keyboards. You might need to install a third-party application like "External Keyboard Helper Pro" from the Google Play Store.
- Download and install "External Keyboard Helper Pro".
- Go to "Settings > Language & Input" and check the box next to "External Keyboard Helper Pro". Confirm any warning messages.
- Access the settings for "External Keyboard Helper Pro".
- Select "Choose keyboard layout" and set French as the default language.
- Select "External Keyboard Helper" as the default keyboard.
- Repeated Characters or Inaccurate Touchpad:
- This often indicates a low battery. Charge the keyboard for at least 15 minutes, even if the low battery indicator is not yet flashing.
- Ensure the USB receiver is positioned optimally, ideally in front of the keyboard, or use a USB extension cable to reduce interference.
- Re-pairing the USB Receiver with the Keyboard:
- If the keyboard loses connection or you are using a new receiver, follow these steps to re-pair:
- Insert the USB receiver into an available USB port on your device.
- Turn on the keyboard while simultaneously pressing and holding the F1 key.
- The orange LED will flash rapidly, indicating the keyboard is searching for the receiver.
- Continue holding the F1 key for 3 seconds, then release. The blue LED will illuminate, confirming successful pairing.
- If the keyboard loses connection or you are using a new receiver, follow these steps to re-pair:
Product Specifications
| Brand | Rii |
| Model Number | K08 (i8) |
| Color | Black |
| Connectivity Technology | 2.4 GHz Wireless (USB Receiver) |
| Keyboard Description | AZERTY French Layout |
| Special Feature | Rechargeable, Integrated Touchpad |
| Compatible Devices | Computer, Smart TV, Mini PC, HTPC, Console |
| Operating System Compatibility | Windows, Android, Mac, Linux |
| Battery Type | Lithium-ion (1 Lithium-polymer battery required) |
| Dimensions (L x W x H) | 147 x 98 x 19 mm (approx. 5.79 x 3.86 x 0.75 inches) |
| Weight | 95 grams (approx. 3.35 ounces) |
| Transmission Range | Up to 15 meters (max.) |
| Frequency Range | 2.403 GHz ~ 2.480 GHz |
| Included Components | Wireless Keyboard, Wireless Receiver, Charging Cable |
Warranty Information
Specific warranty details for the Rii Mini i8 Wireless AZERTY Mini Keyboard are not provided in the available product information. Please refer to the retailer's return policy or contact the manufacturer directly for warranty terms and conditions.
Customer Support
For further assistance, technical support, or inquiries regarding your Rii Mini i8 Wireless AZERTY Mini Keyboard, please contact your point of purchase or visit the official Rii website. Contact information for direct manufacturer support is not available in the provided product details.


