Pioneer VSA-1130
Pioneer AV Amplifier VSA-1130 User Manual
Model: VSA-1130 | Brand: Pioneer
Introduction
This manual provides essential instructions for the safe and efficient operation of your Pioneer VSA-1130 AV Amplifier. Please read this manual thoroughly before using the product and retain it for future reference. The Pioneer VSA-1130 AV Amplifier features a high-quality 7-channel discrete amplifier design, incorporating advanced audio technologies for superior sound. It supports Dolby Atmos®, multi-channel high-resolution audio playback, Wi-Fi, and Bluetooth. Equipped with MCACC Pro for precise sound field correction, it delivers an immersive audio experience. This amplifier supports DSD direct playback and WAV 5.0ch/5.1ch 192kHz/24bit, along with wireless playback via Wi-Fi and Bluetooth.
Important Safety Information
- Power Source: Connect the unit only to an AC outlet of the voltage specified on the rear panel.
- Ventilation: Ensure adequate ventilation. Do not block ventilation openings. Maintain a minimum distance of 10 cm (4 inches) around the unit for proper airflow.
- Water and Moisture: Do not expose the unit to rain or moisture. Do not place objects filled with liquids, such as vases, on the unit.
- Foreign Objects: Do not insert any foreign objects into the unit's openings.
- Cleaning: Unplug the unit from the wall outlet before cleaning. Use a dry cloth only.
- Servicing: Do not attempt to service the unit yourself. Refer all servicing to qualified service personnel.
Package Contents
Please check that all items listed below are included in the package:
- Pioneer VSA-1130 AV Amplifier Unit
- Remote Control Unit
- Power Cord
- MCACC Setup Microphone
- FM/AM Antennas
- Wireless LAN Antennas (2)
- Quick Start Guide
- Warranty Card
Setup Guide
1. Connecting Speakers
Connect your speakers to the corresponding speaker terminals on the rear panel of the amplifier. Ensure correct polarity (+ to + and - to -) for each speaker. The VSA-1130 supports 7.2 channel configurations.
- Front Speakers: Connect to FRONT L/R terminals.
- Center Speaker: Connect to CENTER terminal.
- Surround Speakers: Connect to SURROUND L/R terminals.
- Surround Back/Height Speakers: Connect to SURROUND BACK L/R or TOP MIDDLE L/R terminals depending on your setup (e.g., Dolby Atmos height speakers).
- Subwoofers: Connect to SUBWOOFER PRE OUT 1 and 2.
2. Connecting Audio/Video Devices
Use HDMI cables for connecting most modern audio/video sources (Blu-ray players, game consoles, streaming devices) to the HDMI IN ports. Connect your TV to the HDMI OUT (MAIN) port. The VSA-1130 has 7 HDMI inputs and 2 HDMI outputs.
- HDMI Connections: Connect source devices to HDMI IN 1-7. Connect your TV to HDMI OUT (MAIN).
- Digital Audio: For devices without HDMI, use OPTICAL or COAXIAL digital audio inputs.
- Analog Audio/Video: For older devices, use the VIDEO IN and AUDIO IN (L/R) ports.
- USB: Connect USB storage devices for audio playback.

Figure 1: Rear panel connections of the Pioneer VSA-1130. This image displays the HDMI inputs and outputs, speaker terminals for 7.2 channels, digital audio inputs (optical and coaxial), analog audio/video inputs, network port, and power input.
3. Network and Wireless Connections
Connect the amplifier to your home network for internet radio, firmware updates, and network audio streaming.
- Wired Network: Connect an Ethernet cable from your router to the NETWORK port.
- Wireless Network (Wi-Fi): Attach the two provided wireless LAN antennas to the ANTENNA terminals. Follow the on-screen instructions for Wi-Fi setup. The unit supports 2.4GHz and 5GHz dual-band Wi-Fi.
- Bluetooth: The unit has built-in Bluetooth. Ensure the antennas are connected for optimal performance. Pair your Bluetooth device (e.g., smartphone) with the amplifier.
4. Power Connection
After all other connections are made, connect the power cord to the AC IN terminal on the amplifier and then to a wall outlet.
5. Initial Setup and MCACC Calibration
Turn on the amplifier and your TV. Follow the on-screen setup wizard. Use the supplied MCACC setup microphone to perform automatic speaker calibration. Place the microphone at your primary listening position and follow the prompts. This optimizes sound settings for your room.
Operating Instructions
Power On/Off
Press the ON/STANDBY button on the front panel or the remote control to turn the unit on or off.
Input Selection
Use the INPUT SELECTOR knob on the front panel or the dedicated input buttons on the remote control (e.g., BD, DVD, SAT/CBL) to switch between connected devices.
Volume Control
Adjust the volume using the large MASTER VOLUME knob on the front panel or the VOLUME +/- buttons on the remote control.

Figure 2: Front panel of the Pioneer VSA-1130, showing the display, input selector, master volume knob, and various control buttons.
Sound Modes
Press the LISTENING MODE button on the remote control to cycle through various sound modes (e.g., Stereo, Direct, Dolby Surround, DTS Neural:X, THX). Refer to the on-screen display for current mode information.
Using the Remote Control
The supplied remote control provides full functionality for the amplifier. Ensure batteries are correctly inserted.
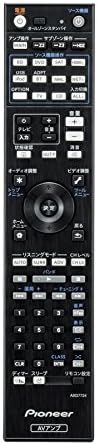
Figure 3: Remote control unit for the Pioneer VSA-1130, featuring dedicated buttons for input selection, volume, sound modes, and menu navigation.
Network Features
Access internet radio, network streaming services, and play high-resolution audio files from your network-attached storage (NAS) via the network connection. Use the HOME MENU button on the remote to navigate network features.
Bluetooth Playback
To play audio from a Bluetooth device:
- Select the Bluetooth input on the amplifier.
- Enable Bluetooth on your mobile device and search for available devices.
- Select "Pioneer VSA-1130" from the list to pair.
- Once paired, you can stream audio from your device to the amplifier.
Key Features
- 7.2 Channel Discrete Amplifier: Delivers powerful and clear audio across all channels.
- Dolby Atmos® and DTS-HD Master Audio Support: Provides immersive, object-based surround sound experiences.
- MCACC Pro Room Calibration: Advanced automatic sound field correction system for optimal audio performance tailored to your listening environment.
- High-Resolution Audio Playback: Supports DSD direct playback (5.6MHz/2.8MHz) and WAV 5.0ch/5.1ch (192kHz/24bit) via USB/network. Also supports FLAC, AIFF, and Apple Lossless.
- Built-in Wi-Fi and Bluetooth: Seamless wireless connectivity for network audio streaming and direct audio playback from mobile devices. Supports dual-band (2.4GHz/5GHz) Wi-Fi.
- 4K Ultra HD Pass-through: Supports 4K/60p/4:4:4 video signals for high-quality video passthrough.
- HDMI Connectivity: 7 HDMI inputs and 2 HDMI outputs, with support for HDMI Link (CEC).
- ESS SABRE Premier Audio DAC (ES9006S): High-performance digital-to-analog converter for superior sound quality.
- Direct Energy Design: Incorporates advanced power amplifier design for efficient and dynamic sound reproduction.
- App Control: Compatible with Android and iOS control applications for convenient operation.
Maintenance
Cleaning the Unit
To maintain the appearance and performance of your amplifier, follow these cleaning guidelines:
- Always disconnect the power cord from the wall outlet before cleaning.
- Use a soft, dry cloth to wipe the exterior surfaces.
- For stubborn dirt, lightly dampen the cloth with water or a mild, non-abrasive cleaner. Avoid using harsh chemicals, solvents, or abrasive cleaning pads, as these can damage the finish.
- Do not spray cleaning liquids directly onto the unit.
- Regularly dust the ventilation openings to prevent dust buildup, which can affect performance and lead to overheating.
Internal Components
The internal components of the amplifier do not require user maintenance. Opening the casing may expose you to dangerous voltages and will void your warranty. If internal cleaning or servicing is required, contact qualified service personnel.

Figure 4: Internal view of the Pioneer VSA-1130, illustrating the complex circuit boards, heat sinks, and other electronic components. This view emphasizes the sophisticated engineering within the unit.
Troubleshooting
Before contacting customer support, please refer to the following common issues and solutions:
No Power
- Ensure the power cord is securely connected to both the amplifier and the wall outlet.
- Check if the wall outlet is functioning by plugging in another device.
- If the unit is in standby mode, press the ON/STANDBY button.
No Sound
- Verify that the correct input source is selected.
- Check speaker connections for correct polarity and secure fit.
- Ensure the volume is not set to minimum or muted.
- Confirm that your speakers are enabled in the amplifier's setup menu.
- If using HDMI, ensure the audio output settings on your source device are correctly configured.
No Video
- Ensure HDMI cables are securely connected to both the source device, amplifier (HDMI IN), and TV (HDMI OUT).
- Select the correct input on your TV for the amplifier's HDMI output.
- Try connecting the source device directly to the TV to rule out a cable or source issue.
Network Connection Issues
- For wired connections, ensure the Ethernet cable is properly connected to both the amplifier and your router.
- For Wi-Fi, ensure the wireless antennas are securely attached. Check your Wi-Fi network name (SSID) and password.
- Restart your router and the amplifier.
- If network playback is unstable, try moving the amplifier closer to your Wi-Fi router or using a wired connection.
HDMI CEC (Control) Problems
- Ensure HDMI Control (CEC) is enabled on both the amplifier and your connected devices (TV, Blu-ray player).
- CEC functionality can vary between brands. If issues persist, try disabling CEC on one or more devices and controlling them manually.
- Sometimes, a firmware update for your TV or source device can resolve CEC compatibility issues.
Unit Not Responding / Resetting
- Unplug the power cord from the wall outlet, wait for at least 5 seconds, then plug it back in. This can resolve minor operational glitches.
- A factory reset may be necessary for persistent issues. Refer to the full user manual for instructions on performing a factory reset (this typically involves holding specific buttons while powering on). Note: A factory reset will erase all custom settings.
Specifications
| Model | VSA-1130 |
| Channels | 7.2 Channel |
| Rated Output Power | 100 W per channel (8 ohms, 20 Hz - 20 kHz, 0.08% THD, 2-ch driven) |
| Maximum Output Power | 180 W per channel (6 ohms, 1 kHz, 1% THD, 1-ch driven) |
| HDMI Inputs | 7 |
| HDMI Outputs | 2 |
| Digital Audio Inputs | Optical x1, Coaxial x1 |
| USB Port | 1 (Front) |
| Network Connectivity | Ethernet, Wi-Fi (2.4GHz/5GHz), Bluetooth |
| Supported Audio Formats (Hi-Res) | DSD (5.6MHz/2.8MHz), WAV (up to 192kHz/24bit, 5.0ch/5.1ch), FLAC, AIFF, Apple Lossless |
| Video Support | 4K/60p/4:4:4 Pass-through |
| Dimensions (W x H x D) | 435 x 173 x 370.5 mm (approximate) |
| Weight | 9.8 kg |
| Power Consumption | 250 W (Operating), 0.1 W (Standby) |
Warranty and Support
Warranty Information
Pioneer products are covered by a limited warranty. The specific terms and duration of your warranty may vary by region and purchase date. Please refer to the warranty card included in your product package for detailed information. Keep your proof of purchase for warranty claims.
Customer Support
If you encounter issues that cannot be resolved using the troubleshooting guide, or if you require further assistance, please contact Pioneer customer support. You can find contact information, FAQs, and additional resources on the official Pioneer website for your region.
Online Resources: Visit the official Pioneer website for the latest firmware updates, detailed manuals, and support articles.
Service Centers: For repairs, locate an authorized Pioneer service center through the official website.
Ask a question about this manual
Ask about setup, troubleshooting, compatibility, parts, safety, or missing instructions. Manuals+ will review the question and use this page’s manual context to help answer it.