Introduction
Welcome to the instruction manual for your Janome Cover Pro 2000 CPX coverstitch machine. This guide provides detailed information on the machine's features, setup, operation, and maintenance to ensure optimal performance and longevity. Please read this manual thoroughly before using the machine.
Safety Instructions
Always follow basic safety precautions when using electrical appliances to reduce the risk of fire, electric shock, or injury.
- Ensure the machine is unplugged before cleaning, oiling, or removing any covers.
- Keep fingers away from all moving parts, especially the needle and looper area.
- Use only the recommended needles and accessories specified for this machine.
- Do not operate the machine if it has a damaged cord or plug, or if it is not working properly.
- Keep the machine dry and do not operate it in damp or wet conditions.
- Always turn off the machine and unplug it when leaving it unattended.
Setup
Proper setup is crucial for the best sewing results.
Unpacking and Placement
Carefully remove the machine from its packaging. Place it on a stable, flat surface with adequate lighting. Ensure there is enough space around the machine for comfortable operation.

Image: Front view of the Janome Cover Pro 2000 CPX, showing the main body and threading guides.
Power Connection
Connect the power cord to the machine and then to a suitable electrical outlet. Ensure the power switch, located at the rear of the machine, is in the "OFF" position before connecting.

Image: Rear view of the machine, illustrating the power switch and ventilation grille.
Threading the Machine
The Janome Cover Pro 2000 CPX features integrated thread tensions for simplified threading. The tensions are designed to open when the presser foot is raised, making it easier to insert the threads correctly. Follow the color-coded threading paths indicated on the machine.

Image: Close-up view of the threading area, showing the integrated thread tensions and guides.
Needle Installation
The machine uses a high-quality, straight needle system to ensure correct stitching without fabric pushing. Refer to the machine's markings for correct needle type and orientation.

Image: Detailed view of the needle area, presser foot, and feed dogs.
Operating Instructions
Familiarize yourself with the machine's controls and features for efficient operation.
TLC System (Tension Level Control)
The new TLC system assists in adjusting the looper thread tension. This system allows for easy tension adjustment, optimizing stitches for various fabrics. Simply switch the tension to optimize for fine fabrics.
External Controls
All controls for stitch length and differential feed are conveniently located on the right side of the machine, ensuring they are always accessible. This design allows for adjustments without removing the fabric.

Image: Side view of the machine, highlighting the external dials for stitch length and differential feed.
Differential Feed and Stitch Length Regulator
These regulators are located under the handwheel and are easily adjustable. Stepped circuits maintain consistent settings. Both regulators lock into basic settings. The differential feed range has been optimized for modern fabrics, allowing settings between 0.5 and 2.25 to compensate for fabric stretching or puckering.
Presser Foot Pressure Adjustment
The presser foot pressure adjustment helps optimize sewing conditions, allowing the machine to handle elastic fabrics from fine to thick consistently.
Free Arm Functionality
By removing the cover, the Cover Pro 2000 CPX transforms into a free-arm machine. This feature is ideal for sewing sleeves, cuffs, and other inaccessible parts with precision.
Built-in Thread Cutter
A convenient one-hand thread cutter is integrated, eliminating the need for separate scissors.
Working Space
The machine offers a generous working space with a width of 143 mm and a height of 100 mm, providing ample room for sewing projects and hands.
Maintenance
Regular maintenance ensures your machine operates smoothly and extends its lifespan.
- Cleaning: Regularly clean lint and dust from the feed dogs, needle plate, and looper area using a soft brush.
- Needle Replacement: Replace needles frequently, especially when working on new projects or if you notice skipped stitches or fabric damage.
- Oiling: Refer to your machine's specific oiling points in the detailed manual for proper lubrication.
- Storage: When not in use, cover the machine with the provided soft cover to protect it from dust.
Troubleshooting
Here are solutions to common issues you might encounter.
- Skipped Stitches:
- Check if the needle is inserted correctly and is not bent or dull.
- Ensure the machine is properly threaded.
- Adjust thread tension.
- Thread Breakage:
- Verify correct threading path and tension settings.
- Check for burrs on the needle plate or looper.
- Use good quality thread.
- Fabric Puckering/Stretching:
- Adjust the differential feed setting.
- Ensure presser foot pressure is appropriate for the fabric.
Specifications
| Feature | Detail |
|---|---|
| Brand | Janome |
| Model | Cover Pro 2000 CPX |
| Color | White |
| Material | Metal, Plastic |
| Product Dimensions (D x W x H) | 23.5 cm x 41 cm x 36.5 cm |
| Item Weight | 8 Kilograms |
| Power Source | Corded Electric |
| Electric | Yes |
| EU Spare Parts Availability | 10 Years |
| Number of Items | 1 |
| UPC | 787269073609 |
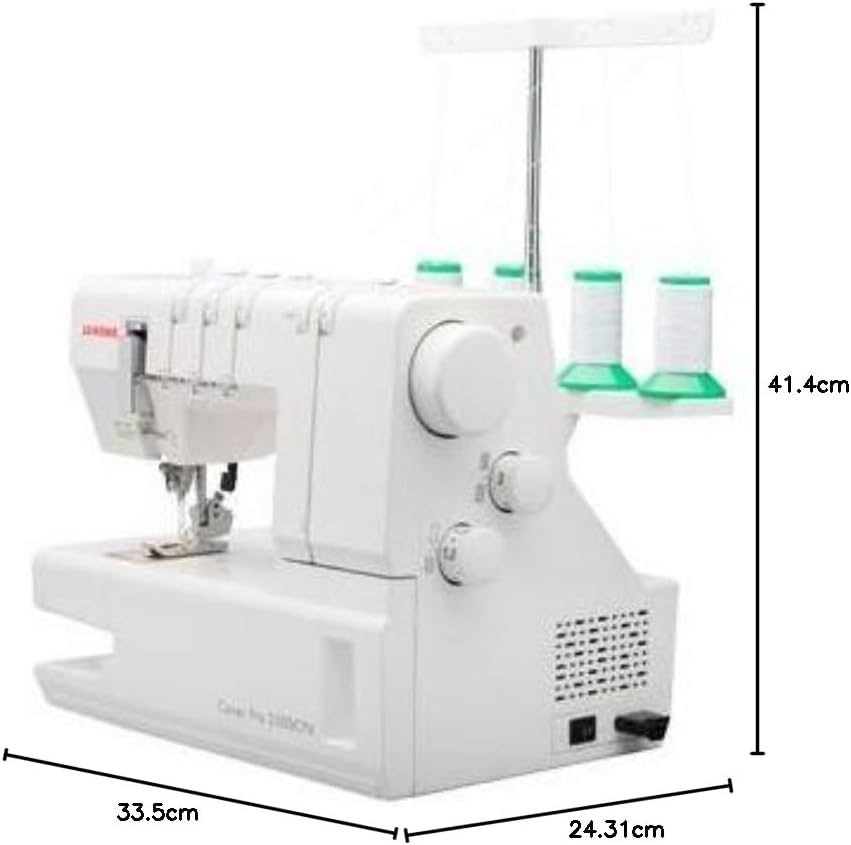
Image: The Janome Cover Pro 2000 CPX with its key dimensions (depth, width, height) labeled.
Warranty and Support
The Janome Cover Pro 2000 CPX comes with a 5-year warranty. For warranty claims, technical assistance, or spare parts, please contact your authorized Janome dealer or the customer support service. Ensure you have your purchase receipt and model number available.
Spare parts for this model are available in the EU for a duration of 10 years.