Introduction
This manual provides essential information for the proper setup, operation, and maintenance of your Denon AVR-X520BT AV Receiver. Please read this manual thoroughly before using the unit to ensure correct and safe operation. Keep this manual for future reference.
The Denon AVR-X520BT is designed to deliver a high-quality audio and video experience, featuring 5.2 channel surround sound, 4K Ultra HD video pass-through, and integrated Bluetooth for wireless audio streaming.
Key Features
- High quality sound with discrete circuit technology, providing identical quality for all 5-channels (90 Watts x 5-channels).
- Built-in Wireless Bluetooth Streaming for easy connection to compatible devices.
- High performance and user-friendly operation.
- 4K Ultra HD/60 Hz Video Pass-through; HDCP 2.2 and Discrete Power Output Stage for future-proof connectivity.
- USB Connectivity on the front panel for audio playback and device charging.
Setup
Unpacking
Carefully remove the receiver and all accessories from the packaging. Ensure all items listed below are present:
- Denon AVR-X520BT AV Receiver
- Remote Control Unit (RC-1189)
- Setup Microphone
- FM Indoor Antenna
- AM Loop Antenna
- Power Cord
- Quick Start Guide
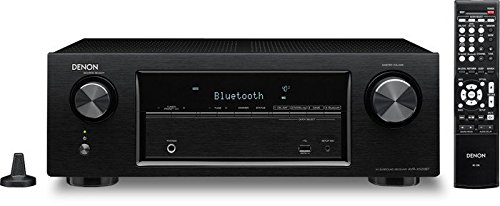
Image: Denon AVR-X520BT receiver shown with its included remote control and setup microphone.
Speaker Connection
Connect your speakers to the appropriate terminals on the rear panel of the receiver. Ensure correct polarity (+ to + and - to -) for optimal sound performance. The AVR-X520BT supports a 5.2 channel configuration.
- Front Speakers (L/R): Connect your main left and right speakers.
- Center Speaker: Connect your center channel speaker for clear dialogue.
- Surround Speakers (L/R): Connect your left and right surround speakers for immersive sound.
- Subwoofer (PRE OUT 1/2): Connect up to two powered subwoofers using RCA cables.
Ensure your speakers have an impedance rating between 6 and 16 ohms.
HDMI Connections
Connect your video sources (e.g., Blu-ray player, game console, cable/satellite box) to the HDMI INPUT terminals on the rear panel. Connect your TV or projector to the HDMI OUT MONITOR terminal.
- HDMI IN (1-5): For connecting source devices. HDMI 1, 2, and 3 support 4K Ultra HD/60Hz and HDCP 2.2.
- HDMI OUT (MONITOR): For connecting to your display device.

Image: Rear panel connections of the Denon AVR-X520BT, illustrating HDMI, speaker, and other audio/video ports.
Power On and Initial Configuration
After all connections are made, plug the power cord into an AC outlet. Press the power button on the front panel or remote control to turn on the receiver. The Denon Setup Assistant will guide you through the initial configuration, including speaker calibration using the supplied microphone.

Image: Front view of the Denon AVR-X520BT, highlighting the display and control knobs.
Operation Guide
Basic Playback
- Selecting an Input: Use the SOURCE SELECT knob on the front panel or the input selector buttons on the remote control to choose your desired source (e.g., Blu-ray, Game, CBL/SAT).
- Adjusting Volume: Use the MASTER VOLUME knob on the front panel or the VOLUME +/- buttons on the remote control.
Bluetooth Streaming
The AVR-X520BT features built-in Bluetooth for wireless audio streaming from compatible devices.
- Select the Bluetooth input on the receiver.
- Enable Bluetooth on your mobile device (smartphone, tablet, etc.).
- Select "Denon AVR-X520BT" from the list of available devices on your mobile device to pair.
- Once paired, you can play audio from your device through the receiver.
USB Playback
Connect a USB storage device to the USB port on the front panel to play audio files.
- Connect your USB device to the front USB port.
- Select the USB input on the receiver.
- Use the navigation buttons on the remote control to browse and select audio files.
Sound Modes
The receiver offers various sound modes to optimize your listening experience. Use the SOUND MODE buttons on the remote control to switch between modes such as Stereo, Multi-Channel Stereo, Dolby Digital, DTS, and more.
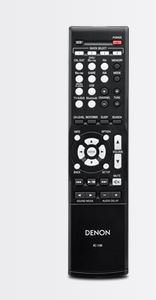
Image: The remote control unit for the Denon AVR-X520BT, showing its array of control buttons.
Maintenance
- Cleaning: Wipe the unit with a soft, dry cloth. Do not use abrasive cleaners or solvents.
- Ventilation: Ensure adequate ventilation around the receiver. Do not block ventilation openings.
- Power: Disconnect the power cord from the wall outlet if the unit will not be used for an extended period.
Troubleshooting
| Problem | Probable Cause | Solution |
|---|---|---|
| No power | Power cord not connected; Power outage; Protection circuit activated. | Check power cord connection; Check household circuit breaker; Disconnect power, wait 30 minutes, then reconnect. |
| No sound | Volume too low; Mute is on; Incorrect input selected; Speaker cables disconnected. | Increase volume; Press MUTE button; Select correct input; Check speaker cable connections. |
| No video | Incorrect input selected; HDMI cable disconnected; TV input not set correctly. | Select correct input; Check HDMI cable connections; Set TV to correct HDMI input. |
| Bluetooth connection fails | Device not in pairing mode; Receiver too far from device; Interference. | Ensure device Bluetooth is on and discoverable; Move device closer to receiver; Avoid obstacles or other wireless devices. |
Technical Specifications
| Feature | Specification |
|---|---|
| Brand | Denon |
| Model | AVR-X520BT |
| Dimensions (W x H x D) | 43.4 x 15.1 x 31.9 cm |
| Weight | 7.5 kg |
| Speaker Channels | 5.2 |
| Power Output (2ch Drive, 8 ohm, 20 Hz - 20 kHz, 0.08%) | 70 Watts per channel |
| HDMI Inputs | 5 (3 x 4K/HDCP 2.2 compatible) |
| HDMI Output | 1 (Monitor) |
| Bluetooth | Built-in (A2DP support) |
| USB Port | 1 (Front) |
| Audio Encoding | DTS, Dolby Digital |
| Signal-to-noise ratio (dB) | 98 dB |
Warranty and Support
Denon products are manufactured to the highest quality standards. For information regarding warranty coverage and terms, please refer to the warranty card included with your product or visit the official Denon website for your region.
For technical support, troubleshooting assistance, or service inquiries, please contact Denon customer support or an authorized service center. Contact information can typically be found on the Denon website or in your product's packaging.


