1. Product Overview
This manual provides instructions for installing and using your A-Tech 8GB (2x4GB) DDR3 SO-DIMM RAM kit. This memory kit is designed to enhance the performance of compatible Toshiba Satellite C650 series laptops by providing additional memory capacity and speed.
The kit includes two 4GB DDR3 SO-DIMM modules, operating at 1066MHz (PC3-8500) with NON-ECC technology. These modules are specifically engineered for compatibility with the listed Toshiba Satellite C650 models.
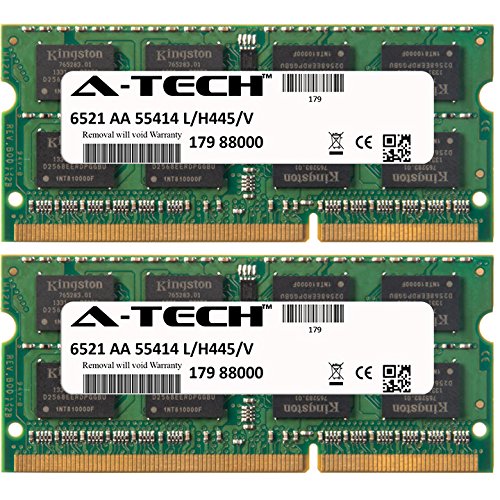
Image 1.1: Two A-Tech 4GB DDR3 SO-DIMM memory modules, showing the product labels and form factor.
2. Safety Information
WARNING: Always disconnect power and remove the battery before opening your laptop to install or remove components. Failure to do so can result in electric shock, damage to your system, or personal injury.
- Electrostatic Discharge (ESD) Precautions: Electronic components are sensitive to static electricity. Before handling the RAM modules, discharge any static electricity from your body by touching a grounded metal object (e.g., an unpainted metal surface on your computer chassis). Consider using an anti-static wrist strap.
- Handle with Care: Hold the memory modules by their edges. Avoid touching the gold connector pins or the integrated circuits (chips) on the module.
- Consult Your Laptop Manual: Refer to your specific Toshiba Satellite C650 laptop's service manual for detailed instructions on how to open the chassis and locate the memory slots. Procedures may vary slightly between models.
- Proper Tools: Use appropriate tools, such as a small Phillips head screwdriver, for opening your laptop.
3. Package Contents
Your A-Tech 8GB DDR3 SO-DIMM RAM kit package should contain the following items:
- Two (2) A-Tech 4GB DDR3 SO-DIMM PC3-8500 1066MHz NON-ECC Memory Modules
If any items are missing or damaged, please contact A-Tech support immediately.
4. Setup and Installation
This section outlines the general steps for installing the A-Tech RAM modules into your Toshiba Satellite C650 series laptop. Specific steps for opening your laptop may vary; always consult your laptop's official service manual for precise instructions.
4.1. Preparation
- Power Down: Shut down your laptop completely. Do not just put it to sleep or hibernate.
- Disconnect Power: Unplug the AC adapter from the laptop.
- Remove Battery: Carefully remove the laptop's battery.
- Discharge Static: Touch a grounded metal object to discharge any static electricity from your body.
- Prepare Workspace: Work on a clean, flat, and well-lit surface.
4.2. Accessing Memory Slots
- Locate Memory Compartment: Turn your laptop over. Identify the memory compartment cover, usually secured by one or more screws. Refer to your laptop's manual if unsure.
- Remove Cover: Use a Phillips head screwdriver to carefully remove the screws securing the memory compartment cover. Set the screws aside in a safe place.
- Open Compartment: Gently lift and remove the cover to expose the memory slots.
4.3. Installing RAM Modules
- Identify Slots: Your laptop may have one or two SO-DIMM slots. If replacing existing modules, gently push apart the small metal clips on either side of the module to release it. The module will pop up at an angle. Pull it out carefully.
- Insert New Module: Hold the A-Tech SO-DIMM module by its edges. Align the notch on the module with the key in the memory slot.
- Push and Click: Insert the module firmly into the slot at a 45-degree angle. Once fully seated, push the module down until the metal clips on both sides snap into place, securing the module horizontally.
- Repeat for Second Module: If installing a second module, repeat steps 10 and 11 for the other memory slot.


Image 4.1: Examples of devices that use SO-DIMM memory, such as laptops and All-in-One PCs. Installation procedures vary by device.
4.4. Reassembly
- Replace Cover: Place the memory compartment cover back into position and secure it with the screws removed earlier.
- Reinstall Battery: Reinsert the laptop battery.
- Reconnect Power: Plug the AC adapter back into the laptop.
5. Operating and Verification
After installation, power on your laptop. The system should automatically detect the new memory. To verify the installation:
- Boot Up: Start your laptop normally.
- Check System Information:
- Windows: Right-click on "This PC" or "My Computer" and select "Properties." The installed RAM amount will be displayed. Alternatively, open Task Manager (Ctrl+Shift+Esc), go to the "Performance" tab, and select "Memory."
- Linux: Open a terminal and type
free -horcat /proc/meminfo.
- BIOS/UEFI: You can also check the installed memory in your laptop's BIOS/UEFI settings during startup. Consult your laptop's manual for how to access these settings.
The system should now report 8GB of installed memory.
6. Maintenance
A-Tech RAM modules are designed for long-term reliability and generally require no specific maintenance once installed. However, consider the following:
- Keep Laptop Clean: Regularly clean your laptop's cooling vents to prevent dust buildup, which can lead to overheating and potentially affect component longevity.
- Avoid Physical Damage: Protect your laptop from drops or impacts that could dislodge or damage internal components, including RAM.
- Software Updates: Keep your operating system and drivers updated to ensure optimal system performance and compatibility with hardware.
7. Troubleshooting
If you encounter issues after installing your A-Tech RAM, refer to the following common problems and solutions:
7.1. Laptop Does Not Boot or Displays Black Screen
- Re-seat Modules: Power down the laptop, disconnect power, remove the battery, and carefully re-seat both RAM modules. Ensure they are fully clicked into place.
- Check Compatibility: Double-check that the RAM modules are correctly specified for your exact Toshiba Satellite C650 model. While this kit is designed for the series, specific sub-models might have nuances.
- Test Individually: If you installed two modules, try booting the laptop with only one new module at a time in each slot to identify if one module or slot is faulty.
- Original RAM Test: Reinstall your original RAM modules to confirm that the laptop functions correctly with them. This helps isolate the issue to the new RAM.
7.2. System Reports Incorrect RAM Amount
- Check All Slots: Ensure both modules are properly seated and detected.
- BIOS/UEFI Update: In rare cases, an outdated BIOS/UEFI firmware might not correctly recognize new memory. Check Toshiba's support website for BIOS updates for your specific C650 model.
7.3. Frequent System Crashes or Blue Screens (BSOD)
- Memory Diagnostic: Run a memory diagnostic tool (e.g., Windows Memory Diagnostic or MemTest86) to check for errors in the RAM modules.
- Re-seat Modules: As with boot issues, re-seating the modules can resolve intermittent contact problems.
If troubleshooting steps do not resolve the issue, please contact A-Tech customer support.
8. Product Specifications
| Feature | Specification |
|---|---|
| Brand | A-Tech |
| Memory Type | DDR3 SO-DIMM |
| Capacity | 8GB Kit (2 x 4GB Modules) |
| Speed | 1066MHz (PC3-8500) |
| Error Correction | NON-ECC |
| Form Factor | 204-Pin SO-DIMM |
| Voltage | 1.5V (Standard for DDR3) |
| CAS Latency (CL) | 15 (as per product data, though typically lower for 1066MHz DDR3, this is the provided value) |
| Compatible Devices | Toshiba Satellite C650 Series Laptops (e.g., C650-01L, C650-01M, C650-01T, C650-01U, C650-01V, C650-01W, C650-020, C650-025, C650-028, C650-02S, C650-031, C650-034, C650-035, C650-03R, C650-054, C650-05N, C650-05P, C650-06E, C650-100, C650-107, C650-111, C650-11X, C650-122, C650-124, C650-128, C650-129, C650-12E, C650-12J, C650-142, C650-14F, C650-14W, C650-152, C650-154, C650-16W, C650-177, C650-179, C650-17T, C650-17X) |
9. Warranty Information
A-Tech memory products are backed by a Limited Lifetime Warranty. This warranty covers defects in materials and workmanship for the lifetime of the product. For detailed terms and conditions, including how to make a warranty claim, please refer to the official A-Tech website or contact A-Tech customer support.
10. Customer Support
For further assistance, technical support, or warranty inquiries, please visit the official A-Tech website or contact their customer service department.
A-Tech Official Website: https://atechmemory.com/
Please have your product model number (8GB KIT (2 x 4GB) SO-DIMM DDR3 NON-ECC PC3-8500 1066MHz RAM) and purchase information ready when contacting support.