1. Introduction
The BrandTech Transferpette is a high-precision, single-channel adjustable volume pipette designed for accurate and reproducible liquid handling in laboratory settings. This instrument features an ergonomic design to minimize strain during prolonged use, utilizing a natural thumb sweep for operation. It is built with corrosion-resistant materials and is autoclavable for sterilization. This manual provides essential information for the proper setup, operation, maintenance, and troubleshooting of your Transferpette pipette.
2. Safety Information
Always adhere to standard laboratory safety practices when using this pipette. Failure to follow safety guidelines may result in injury or damage to the instrument.
- Wear appropriate personal protective equipment (PPE), including lab coats, safety glasses, and gloves, when handling chemicals or biological samples.
- Never pipette by mouth.
- Ensure proper disposal of contaminated tips and samples according to laboratory protocols and local regulations.
- Do not use the pipette for purposes other than its intended use of liquid transfer.
- Avoid dropping the pipette or subjecting it to mechanical shock, which can affect its calibration and performance.
- Only use tips recommended by the manufacturer or those known to be compatible to ensure accuracy and prevent damage.
3. Product Overview
The image below illustrates the BrandTech Transferpette, highlighting its design and key components.
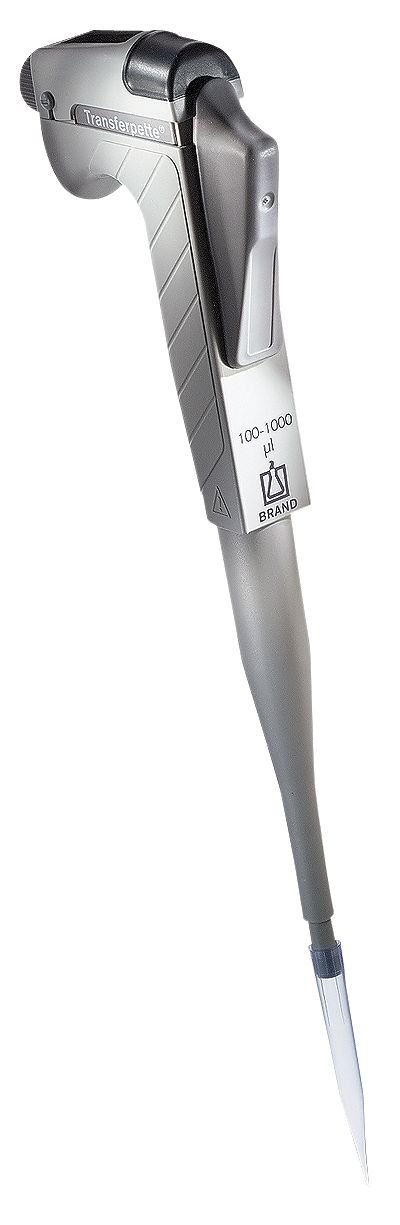
Figure 1: BrandTech Transferpette Single Channel Adjustable Volume Pipette, Model 704174. This image displays the ergonomic design of the pipette, featuring the volume adjustment knob, tip ejector button, and plunger button, all designed for comfortable and efficient liquid handling.
4. Setup
4.1 Unpacking
- Carefully remove the pipette from its packaging.
- Retain the packaging for future storage or transport.
4.2 Initial Inspection
- Inspect the pipette for any visible damage that may have occurred during shipping.
- Ensure all components are securely attached.
4.3 Attaching a Tip
- Select a high-quality, compatible pipette tip.
- Firmly press the pipette shaft into the tip with a slight twisting motion to ensure an airtight seal. Do not overtighten.
5. Operating Instructions
5.1 Setting the Volume
- Turn the volume adjustment knob (typically located at the top of the pipette) to set the desired volume.
- Ensure the volume display clearly shows the intended volume.
- Always adjust the volume from a higher setting down to the desired volume to minimize mechanical stress and ensure accuracy.
5.2 Aspiration (Forward Pipetting)
- Press the plunger button down to the first stop.
- Immerse the tip into the liquid to the appropriate depth (typically 1-2 mm for small volumes, 3-6 mm for larger volumes).
- Slowly release the plunger button to aspirate the liquid. Wait 1-2 seconds to ensure the full volume is drawn into the tip.
- Withdraw the tip from the liquid, touching it against the edge of the reservoir to remove any excess droplets.
5.3 Dispensing (Forward Pipetting)
- Place the tip against the inner wall of the receiving vessel at a slight angle.
- Press the plunger button down slowly to the first stop to dispense the liquid.
- Continue pressing the plunger button to the second stop (blow-out) to expel any remaining liquid from the tip.
- While holding the plunger at the second stop, withdraw the pipette from the vessel.
- Release the plunger button.
- Press the tip ejector button to discard the used tip into an appropriate waste container.
5.4 Reverse Pipetting (for viscous or volatile liquids)
- Press the plunger button down to the second stop.
- Immerse the tip into the liquid.
- Slowly release the plunger button to aspirate the liquid. This will draw in slightly more than the set volume.
- Withdraw the tip from the liquid.
- Place the tip against the inner wall of the receiving vessel.
- Slowly press the plunger button down to the first stop to dispense the set volume. A small amount of liquid will remain in the tip.
- Withdraw the pipette.
- Discard the remaining liquid and the tip into an appropriate waste container.
6. Calibration
The BrandTech Transferpette allows for calibration adjustments to be made quickly, ensuring continued accuracy over time. Regular calibration checks are recommended, especially after maintenance, significant temperature changes, or if accuracy is critical for your application.
- Refer to your laboratory's standard operating procedures (SOPs) for pipette calibration.
- Typically, calibration involves gravimetric testing using distilled water at a controlled temperature.
- The pipette features dedicated controls for making calibration adjustments. Consult the detailed technical manual (if provided separately) or BrandTech's official resources for specific adjustment procedures.
7. Maintenance and Care
7.1 Cleaning
- Regularly clean the exterior of the pipette with a mild detergent solution and a lint-free cloth.
- For internal cleaning or decontamination, disassemble the lower part of the pipette according to manufacturer guidelines (refer to a more detailed service manual if available).
- Rinse components with distilled water and allow them to air dry completely before reassembly.
7.2 Autoclaving
The BrandTech Transferpette is designed to be corrosion-resistant and autoclavable. This allows for effective sterilization to prevent contamination.
- Autoclave the pipette at 121 °C (250 °F) for 20 minutes at 1 bar (15 psi) pressure.
- Ensure the pipette is disassembled (lower part) before autoclaving if specified by the manufacturer to prevent damage.
- Allow the pipette to cool down completely and dry before reassembly and use.
7.3 Storage
- Store the pipette vertically in a pipette stand when not in use to prevent contamination and maintain calibration.
- Store in a clean, dry environment away from direct sunlight and extreme temperatures.
8. Troubleshooting
This section addresses common issues you might encounter with your pipette.
| Problem | Possible Cause | Solution |
|---|---|---|
| Inaccurate pipetting / Inconsistent volumes | Loose or incompatible tip Damaged O-ring/seal Improper pipetting technique Pipette out of calibration | Ensure tip is securely attached and compatible Inspect and replace O-ring/seal if damaged Review operating instructions for proper technique Perform calibration check and adjust if necessary |
| Liquid dripping from tip | Loose or incompatible tip Damaged O-ring/seal Rapid plunger release Temperature difference between pipette and liquid | Ensure tip is securely attached and compatible Inspect and replace O-ring/seal if damaged Release plunger slowly and smoothly Allow pipette and liquid to equilibrate to room temperature |
| Plunger movement is stiff or sticky | Contamination in piston assembly Lack of lubrication | Disassemble and clean piston assembly Apply a thin layer of silicone grease (manufacturer-approved) to the piston |
| Tip ejector not working properly | Bent tip ejector arm Debris obstructing mechanism | Inspect tip ejector arm for damage and straighten if possible Clean any debris from the ejector mechanism |
9. Specifications
Key technical specifications for the BrandTech Transferpette Single Channel Adjustable Volume Pipette, Model 704174.
| Specification | Value |
|---|---|
| Manufacturer | BrandTech |
| Item Model Number | 704174 |
| Volume Range | 10-100 µL |
| Length | Approximately 10 inches |
| Package Dimensions | 33.02 x 15.24 x 7.62 cm |
| Item Weight | 136.08 g |
| Material | Plastic, Corrosion-Resistant |
| Autoclavable | Yes |
10. Warranty and Support
BrandTech products are manufactured to high standards and are typically covered by a manufacturer's warranty against defects in materials and workmanship. The specific terms and duration of the warranty may vary by region and product.
- For detailed warranty information, please refer to the warranty card included with your product or visit the official BrandTech website.
- For technical support, service, or to inquire about replacement parts, please contact your local BrandTech distributor or BrandTech customer service directly.
- When contacting support, please have your pipette's model number (704174) and serial number (if applicable) readily available.