
Product Overview
The Homewell Walk-in Greenhouse Kit is designed to create an ideal environment for plants and seedlings, protecting them from adverse weather conditions. This greenhouse is suitable for year-round use, accommodating fresh flowers and vegetables. Its compact design makes it versatile for balconies, decks, patios, lawns, and indoor spaces.
The greenhouse features a sturdy frame made from heavy-duty, powder-coated steel. It includes four wire shelves, with two on each side, providing ample space for plants and gardening supplies. Each shelf is designed to hold up to 15 lbs. The clear Polyvinyl Chloride plastic cover helps retain heat and protects plants from frost. The cover is designed to resist fading or cracking under sun exposure.
Access is provided by a roll-up door with a zipper, allowing for easy entry and removal of plants. The walk-in design offers sufficient growing space and ventilation for larger plants. The entire unit is portable and requires no tools for assembly, making it easy to set up, disassemble, move, or store as seasons change.
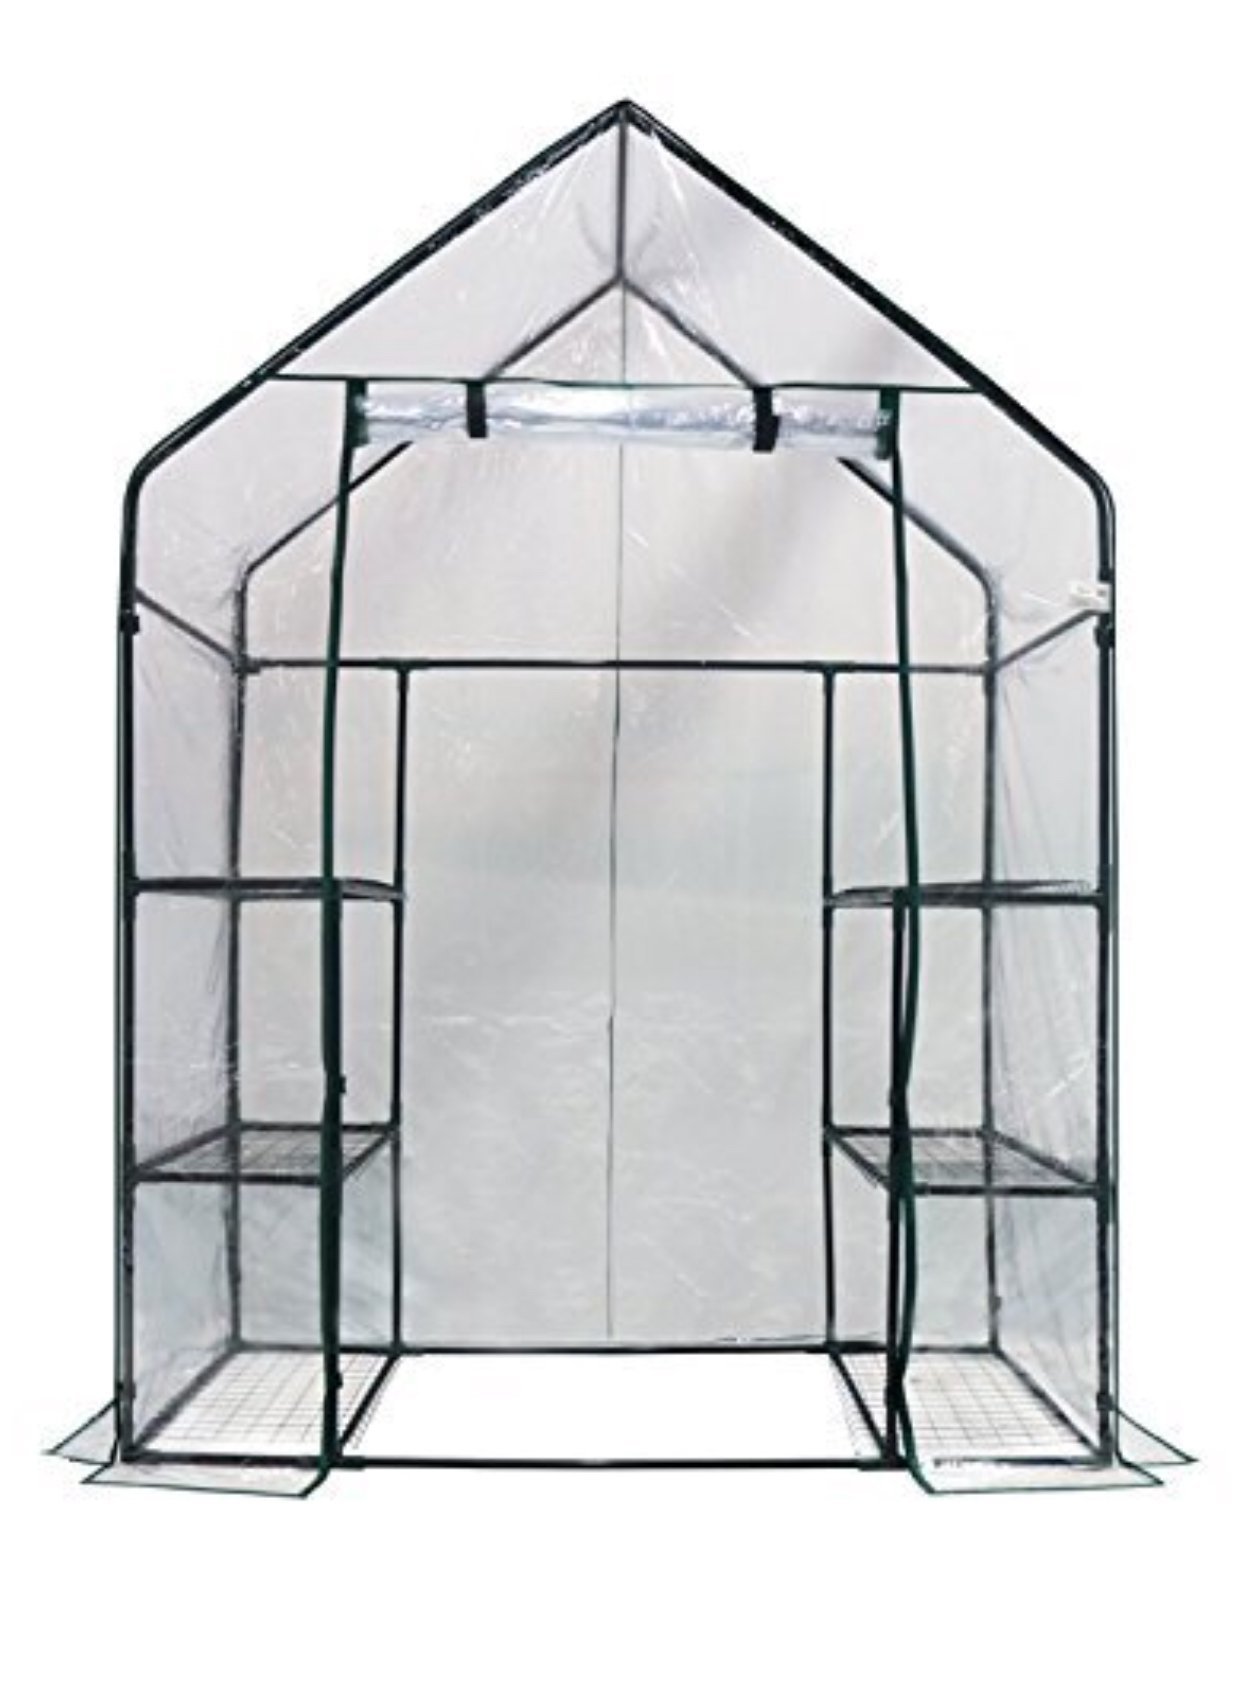
Image: The Homewell Walk-in Greenhouse Kit, fully assembled and containing various plants, positioned on a wooden deck in an outdoor garden setting.
Included Components
Before beginning assembly, ensure all components listed below are present and undamaged. Refer to the diagram for visual identification of parts.

Image: A detailed diagram illustrating all individual components of the greenhouse kit, including various metal tubes, plastic connectors, wire shelves, and the PVC cover.
| Component | Description | Quantity |
|---|---|---|
| Metal Tube 1 | Short straight tube | 3 |
| Metal Tube 2 | Medium straight tube | 15 |
| Metal Tube 3 | Long straight tube | 22 |
| Metal Tube 4 | Short curved tube | 14 |
| Metal Tube 5 | Long curved tube | 4 |
| Plastic Connector A | 3-way corner connector | 6 |
| Plastic Connector B | Straight 3-way connector | 4 |
| Plastic Connector D | 4-way cross connector | 20 |
| Plastic Connector F | 3-way T-connector | 2 |
| Shelf | Wire mesh shelf | 4 |
| Cover | Polyvinyl Chloride cover | 1 |
Assembly Guide
Assembly of the Homewell Walk-in Greenhouse Kit is straightforward and requires no tools. Follow these steps carefully:
- Prepare the Area: Choose a flat, stable surface for assembly. Ensure adequate space around the greenhouse footprint (56" W x 29" D x 77" H).
- Assemble the Base Frame: Connect the appropriate metal tubes using the plastic connectors to form the rectangular base of the greenhouse. Ensure all connections are secure.
- Build Vertical Supports: Insert longer metal tubes into the base connectors to create the vertical supports.
- Install Shelf Supports: Attach the necessary connectors and tubes for the shelf levels.
- Place Shelves: Carefully place the wire shelves onto their designated supports. Ensure they sit securely.
- Construct Roof Frame: Assemble the curved metal tubes and connectors to form the peaked roof structure.
- Attach Roof to Vertical Supports: Connect the completed roof frame to the top of the vertical supports.
- Drape the Cover: Carefully unfold the Polyvinyl Chloride cover and drape it over the assembled frame. Ensure the zipper door is correctly positioned at the front.
- Secure the Cover: Adjust the cover to fit snugly over the frame. Use any integrated ties or fasteners to secure the cover to the frame, especially at the base to prevent wind uplift.

Image: Hands demonstrating how to connect the metal tubes using a plastic connector, highlighting the tool-free assembly process.

Image: A close-up of hands carefully positioning a wire shelf onto the horizontal support bars of the greenhouse frame.
Operation Guidelines
- Ventilation: Utilize the roll-up zippered door to control airflow and temperature within the greenhouse. Open the door partially or fully during warmer periods to prevent overheating and ensure adequate air circulation for plant health.
- Temperature Management: Monitor the internal temperature, especially on sunny days. The clear PVC cover helps retain heat, which is beneficial in cooler climates, but can lead to high temperatures in direct sun. Adjust ventilation as needed.
- Plant Placement: Arrange plants on the shelves according to their light and temperature requirements. Taller plants can be placed on the floor space. Ensure plants do not obstruct the zipper door.
- Watering: Water plants as needed. Be mindful of humidity levels inside the greenhouse, which can be higher than ambient conditions.
Care and Maintenance
- Cleaning the Cover: Periodically clean the Polyvinyl Chloride cover with a soft cloth and mild soapy water to remove dirt and maintain light transmission. Avoid abrasive cleaners or brushes that could scratch or damage the material.
- Frame Inspection: Regularly check the steel frame and plastic connectors for any signs of damage, rust, or loosening. Tighten connections if necessary to maintain structural integrity.
- Shelf Capacity: Do not exceed the maximum weight capacity of 15 lbs per shelf to prevent bending or collapse. Distribute weight evenly.
- Weather Protection: During periods of strong winds or heavy snow, consider temporarily relocating the greenhouse to a more sheltered area or securing it firmly to the ground using stakes or weights. The cover should be secured at all times.
- Zipper Care: Keep the zipper clean and free of debris to ensure smooth operation. Avoid forcing the zipper if it snags.

Image: Illustration of two available cover styles for the Homewell greenhouse: a clear Polyvinyl Chloride cover and a green mesh cover.
Troubleshooting Common Issues
- Greenhouse Instability: Ensure the frame is fully assembled and all connectors are pushed in completely. For outdoor use, anchor the greenhouse to the ground using stakes or place heavy objects (e.g., bricks, sandbags) around the base of the cover to prevent it from being lifted by wind.
- Cover Damage: Small tears in the PVC cover can often be repaired with clear greenhouse repair tape. For significant damage, replacement covers may be available from the manufacturer.
- Zipper Malfunction: If the zipper snags, gently try to free any caught fabric. Avoid excessive force. Ensure the zipper is clean. If the zipper pull detaches, it may be possible to re-thread it carefully.
- Excessive Heat/Humidity: Increase ventilation by rolling up the door. Consider adding a small fan for air circulation if needed.
Product Specifications
| Feature | Detail |
|---|---|
| Dimensions (L x W x H) | 56" x 29" x 77" |
| Zipper Door Entrance (W x H) | 30" x 64" |
| Shelf Dimensions (L x D) | 22-1/2" x 13-1/2" |
| Number of Shelves | 4 |
| Shelf Capacity | 15 lbs per shelf |
| Frame Material | Powder-coated Steel |
| Cover Material | Polyvinyl Chloride (PVC) |
| Color | Silver (frame) / Clear (cover) |
| Closure Type | Zipper |
| Number of Doors | 1 |
Safety Precautions
- Always follow manufacturer's instructions for assembly, use, and maintenance.
- Keep the greenhouse away from direct heat sources, open flames, or extreme temperatures.
- Ensure proper ventilation to prevent excessive heat buildup and maintain air quality for plants.
- Secure the greenhouse during high winds or severe weather conditions to prevent damage or injury. Do not leave it unattended during such conditions.
- Do not allow children or pets to play unsupervised near or inside the greenhouse.
- Avoid placing heavy objects on the roof or frame that could compromise its structural integrity.
Warranty and Customer Support
For specific warranty information regarding your Homewell Walk-in Greenhouse Kit, please refer to the documentation included with your purchase or contact Homewell customer support directly. Keep your purchase receipt as proof of purchase.
If you encounter any issues or have questions not covered in this manual, please reach out to Homewell customer service for assistance.