Product Overview
This manual provides comprehensive instructions for the GOOFIT Fuel Gas Petcock Valve Switch Pump, model M088-023. This component is designed for precise control of fuel flow in various small engine vehicles. It features a durable copper construction and a manual three-position switch for reliable operation.
Key Features
- Gravity Feed System: Provides consistent fuel delivery.
- Integrated Filter Screens: Primary and reserve gas pipes include filters to help prevent debris from entering the fuel system.
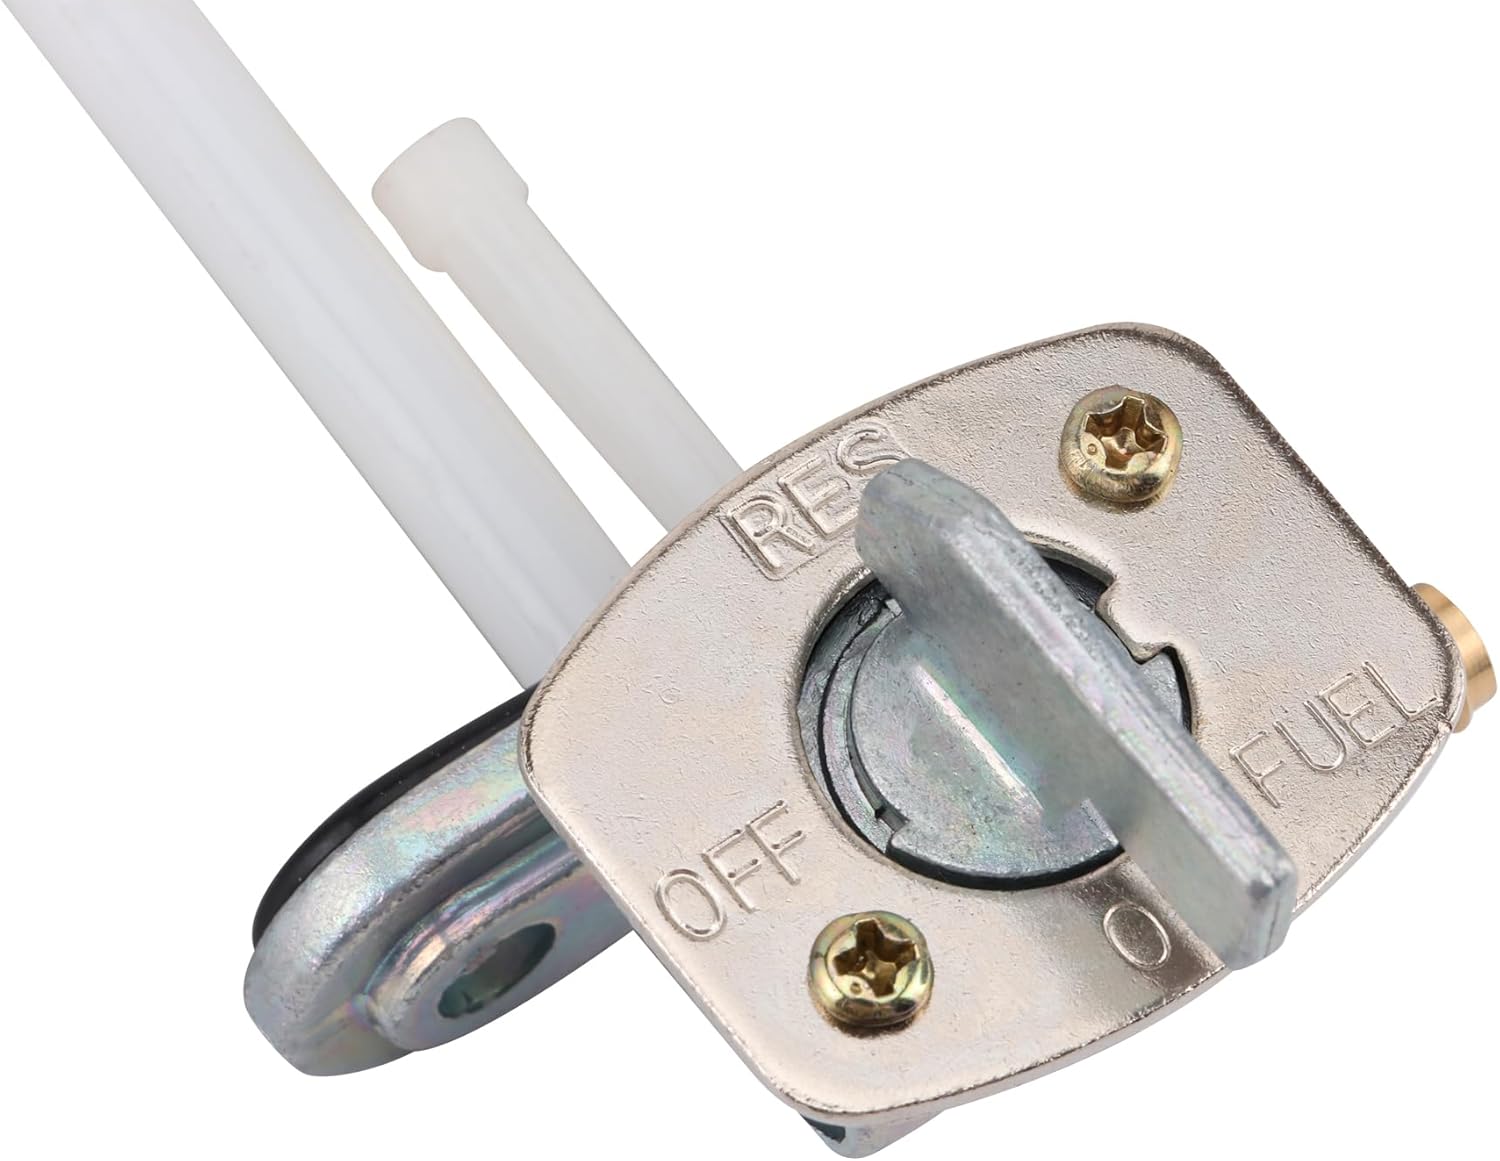
- Three-Position Switch: Offers ON, OFF, and RESERVE settings for complete fuel flow control.
- Direct Fit Design: Engineered for straightforward installation as a replacement part.
- Durable Construction: Made from copper for longevity and resistance to fuel corrosion.
Vehicle Compatibility
The GOOFIT Fuel Gas Petcock Valve Switch Pump is a replacement part suitable for a wide range of small engine vehicles. It is compatible with 50cc, 110cc, 150cc, 200cc, and 250cc ATVs, Go Karts, Motorcycles, and Dirt Bikes.
Specific compatible models include, but are not limited to: TTR125, TTR 230, YFM250, XT350, WR450F, KLF 300, Suzuki DRZ400, and LTZ400.

Product Specifications
| Specification | Detail |
|---|---|
| Model Number | M088-023 |
| Total Length | 96mm (3.77 inches) |
| Installation Hole Distance | 34mm (1.34 inches) |
| Material | Copper |
| Operation Mode | Manual |
| Fuel Type | Gasoline |
| Switch Positions | ON, OFF, RESERVE |
| Item Weight | 0.352 ounces |
| Package Dimensions | 3.1 x 2.9 x 1.9 inches |

Installation Instructions
Safety Precautions
- Ensure the vehicle's engine is off and has cooled down completely before beginning installation.
- Disconnect the vehicle's battery if working near any electrical components.
- Perform installation in a well-ventilated area to avoid inhaling fuel fumes.
- Keep a fire extinguisher readily available.
- Wear appropriate personal protective equipment, including safety glasses and fuel-resistant gloves.
Installation Steps
- Locate Existing Petcock: Identify the current fuel petcock valve on your vehicle's fuel tank.
- Turn Off Fuel: Rotate the existing petcock valve to the OFF position to prevent fuel flow.
- Prepare for Fuel Drainage: Place a suitable, clean container beneath the fuel tank to collect any residual fuel that may spill during removal.
- Disconnect Fuel Lines: Carefully detach all fuel lines connected to the old petcock. Be prepared for minor fuel leakage.
- Remove Old Petcock: Unbolt and remove the old fuel petcock from the fuel tank.
- Clean Mounting Surface: Ensure the mounting surface on the fuel tank is clean and free of any debris or old gasket material.
- Install New Petcock: Position the new GOOFIT fuel petcock valve, ensuring the new gasket is correctly seated to create a leak-proof seal.
- Secure Petcock: Fasten the new petcock to the fuel tank using the appropriate bolts. Tighten securely, but do not overtighten, to prevent damage.
- Reconnect Fuel Lines: Reattach all fuel lines to the new petcock, ensuring all connections are tight and secure.
- Leak Check: After installation, turn the petcock to the ON position and visually inspect all connections for any signs of fuel leaks. Address any leaks immediately.

Operating the Fuel Petcock Valve
The GOOFIT fuel petcock is equipped with a three-position switch to manage fuel flow effectively:
- ON: This is the standard operating position. Fuel flows from the main fuel supply in the tank to the carburetor or fuel injection system. Use this position for normal vehicle operation.
- OFF: This position completely stops the flow of fuel from the tank. Always switch the petcock to OFF when the vehicle is not in use, during maintenance, or for transport to prevent fuel leaks, evaporation, and potential carburetor flooding.
- RESERVE (RES): When the main fuel supply runs low, switch to the RESERVE position. This accesses a small, emergency fuel supply located lower in the tank. It is crucial to refuel your vehicle as soon as possible after switching to RESERVE.
Maintenance
Regular maintenance of your fuel petcock valve is essential for optimal performance and to ensure the longevity of your fuel system:
- Regular Inspection: Periodically inspect the petcock valve, its mounting, and all connected fuel lines for any signs of wear, cracks, damage, or fuel leakage. Address any issues promptly.
- Filter Screens: The petcock is equipped with internal filter screens. If you notice a reduction in fuel flow or engine performance issues related to fuel delivery, these filters may be clogged. They can be cleaned or replaced by a qualified mechanic.
- Gasket Integrity: Ensure the mounting gasket between the petcock and the fuel tank remains in good condition. A worn or damaged gasket can lead to fuel leaks and should be replaced.
- Proper Storage: When storing your vehicle for an extended period, always turn the fuel petcock to the OFF position. This prevents fuel from continuously flowing into the carburetor, which can lead to fuel degradation, gumming, and potential starting issues.

Troubleshooting
This section addresses common issues you might encounter with your fuel petcock valve:
| Problem | Possible Cause | Solution |
|---|---|---|
| Fuel Leakage | Improper installation, damaged mounting gasket, faulty internal valve seal. | Re-check installation and tighten connections. Replace the mounting gasket if damaged. If leakage persists, the internal valve seal may be faulty, requiring petcock replacement. |
| No Fuel Flow or Restricted Flow | Petcock in OFF position, clogged internal fuel filter screens, clogged fuel line. | Ensure petcock is in ON or RESERVE position. Inspect and clean/replace fuel filter screens. Check fuel lines for kinks or blockages. |
| Engine Stalling Due to Low Fuel | Main fuel supply depleted. | Switch the petcock to the RESERVE position to access emergency fuel. Refuel the vehicle immediately. |
Note: Some users have reported instances of fuel leakage shortly after installation, often attributed to internal seal issues. If leakage occurs, carefully inspect the seals and consider replacing the petcock if the seals are compromised.
Warranty and Customer Support
GOOFIT is committed to providing quality products and excellent customer service. If you encounter any issues with your Fuel Gas Petcock Valve Switch Pump or are not satisfied with your order, please contact GOOFIT customer service directly.
For specific warranty details, terms, and conditions, please refer to the product packaging or visit the official GOOFIT website for the most current information. Your satisfaction is important to us, and we are available to assist with any concerns.


