Introduction
Thank you for purchasing the Regal Kitchen Pro 2 Pound Breadmaker, Model K6761. This manual provides essential information for the safe and efficient operation of your new appliance. Please read all instructions carefully before first use and retain this manual for future reference.
Important Safety Instructions
- Always unplug the breadmaker from the power outlet before cleaning or when not in use.
- Do not immerse the appliance, cord, or plug in water or other liquids.
- Keep hands and utensils away from the moving kneading paddle during operation to prevent injury.
- Do not operate any appliance with a damaged cord or plug, or after the appliance malfunctions or has been damaged in any manner.
- Ensure the breadmaker is placed on a stable, heat-resistant surface, away from walls or cabinets, to allow for proper ventilation.
- This appliance is for household use only.
Setup
Before using your Regal Kitchen Pro Breadmaker for the first time, follow these steps:
- Unpack: Carefully remove the breadmaker and all accessories from the packaging. Retain packaging materials for future storage or transport.
- Clean: Wash the bread pan and kneading paddle with warm, soapy water. Rinse thoroughly and dry completely. Wipe the exterior of the breadmaker with a damp cloth. Do not use abrasive cleaners.
- Placement: Place the breadmaker on a dry, stable, heat-resistant countertop or table. Ensure there is adequate space around the unit for ventilation, especially above the lid.
- First Use Cycle: It is recommended to run a "Bake" cycle for 10 minutes without ingredients to burn off any manufacturing residues. Ensure the area is well-ventilated during this process. Allow the unit to cool completely afterward.
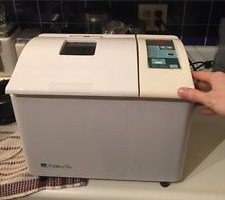
Image: The Regal Kitchen Pro 2 Pound Breadmaker, Model K6761, showing its compact design and control panel.
Operating Instructions
Follow these steps for basic bread making:
- Insert Kneading Paddle: Place the kneading paddle onto the shaft inside the bread pan.
- Add Ingredients: Add ingredients to the bread pan in the order specified by your recipe (typically liquids first, then dry ingredients, with yeast last). Ensure ingredients are at room temperature.
- Place Bread Pan: Insert the bread pan into the breadmaker, pressing down firmly until it clicks into place. Close the lid.
- Plug In: Connect the power cord to a grounded electrical outlet. The display will illuminate.
- Select Program: Use the "Menu" button to cycle through the available programs:
- Bake: Standard cycle for most bread types.
- French: For lighter, crispier crusts.
- Rapid: Faster baking cycle.
- Whole Wheat: Optimized for whole wheat flour.
- Dough: Prepares dough for baking in a conventional oven.
- Pasta: Mixes and kneads pasta dough.
- Select Loaf Size: Use the "Loaf Size" button to choose between 1, 1.5, or 2-pound loaves.
- Select Crust Control: Use the "Crust" button to select Light, Medium, or Dark crust.
- Start: Press the "Start/Stop" button to begin the selected program. The machine will beep, and the timer will start counting down.
- End of Cycle: Once the cycle is complete, the breadmaker will beep multiple times. Unplug the unit and carefully remove the bread pan using oven mitts.
- Remove Bread: Invert the bread pan onto a wire rack and shake gently to release the bread. If the kneading paddle remains in the bread, carefully remove it with a non-metallic utensil after the bread has cooled slightly.
Care and Maintenance
Proper care ensures the longevity and performance of your breadmaker.
- Cleaning the Bread Pan and Kneading Paddle: After each use, remove the bread pan and kneading paddle. Fill the pan with warm, soapy water and let it soak for 10-15 minutes to loosen any stuck-on dough. Wash with a soft sponge, rinse, and dry thoroughly. Do not use metal utensils or abrasive cleaners that could scratch the non-stick coating.
- Cleaning the Exterior: Wipe the exterior of the breadmaker with a soft, damp cloth. Do not use harsh chemicals or abrasive pads. Ensure no water enters the ventilation openings.
- Storage: Ensure the breadmaker is clean and completely dry before storing. Store in a cool, dry place. Do not place heavy objects on top of the breadmaker.
- Product Care Instructions: As per manufacturer recommendations, wipe with a dry cloth for general cleaning of the exterior.
Troubleshooting
If you encounter issues with your breadmaker, refer to the following common problems and solutions:
| Problem | Possible Cause | Solution |
|---|---|---|
| Bread does not rise or rises too much. | Incorrect yeast amount, old yeast, incorrect water temperature, or wrong flour type. | Ensure yeast is fresh and active. Use correct measurements for yeast and water. Water should be lukewarm (105-115°F / 40-46°C). Use appropriate flour for the selected program. |
| Bread is dense or heavy. | Too much flour, too little liquid, or insufficient kneading. | Measure ingredients precisely. Ensure the dough forms a soft, pliable ball during kneading; add a teaspoon of water if too dry, or a teaspoon of flour if too wet. |
| Machine does not start. | Not plugged in, power outage, or "Start/Stop" button not pressed. | Check power connection. Ensure the "Start/Stop" button is pressed firmly. If power was interrupted, restart the cycle. |
| Kneading paddle stuck in bread. | Common occurrence. | Allow bread to cool slightly, then carefully remove the paddle using a non-metallic utensil. |
Specifications
- Model Number: K6761
- Brand: Regal
- Capacity: 2 Pounds (accommodates 1, 1-1/2, or 2 pound loaves)
- Material: Stainless Steel (housing)
- Color: White
- Number of Programs: 6 (Bake, French, Rapid, Whole Wheat, Dough, Pasta)
- Crust Control: Yes (Light, Medium, Dark options)
- Product Care Instructions: Wipe with Dry Cloth
Warranty Information
This Regal Kitchen Pro Breadmaker is covered by a limited manufacturer's warranty. Please refer to the warranty card included with your purchase for specific terms, conditions, and duration. Keep your proof of purchase for warranty claims.
Customer Support
For technical assistance, troubleshooting not covered in this manual, or warranty inquiries, please contact Regal customer support. Contact information can typically be found on the manufacturer's website or on the warranty card.
Please visit www.regalware.com for more information and support.