Introduction
Thank you for choosing the Janome Jem Gold 660 Sewing Machine. This compact and lightweight machine is designed for ease of use, making it suitable for both beginners and experienced sewists. This instruction manual provides comprehensive guidance on setting up, operating, maintaining, and troubleshooting your sewing machine to ensure optimal performance and longevity.
Important Safety Instructions
- Always unplug the machine from the electrical outlet immediately after using, before cleaning, or when making any user servicing adjustments.
- Do not operate the machine with a damaged cord or plug. If the machine is not working properly, has been dropped, damaged, or dropped into water, return it to the nearest authorized dealer for examination, repair, or electrical or mechanical adjustment.
- Always keep fingers away from all moving parts. Special care is required around the sewing machine needle.
- Use the correct needle plate. The wrong plate can cause the needle to break.
- Do not pull or push fabric while stitching. This may deflect the needle, causing it to break.
- Turn the sewing machine off when making any adjustments in the needle area, such as threading the needle, changing the needle, threading the bobbin, or changing the presser foot.
- Never drop or insert any object into any opening.
- Do not use outdoors.
- Do not operate where aerosol (spray) products are being used or where oxygen is being administered.
Product Overview
Key Features
- 8 Built-In Sewing Stitches: Includes 2 stretch stitches, utility stitches, and a 4-step buttonhole.
- Automatic Needle Threader: Simplifies threading and reduces eye strain.
- Compact and Lightweight Design: Ideal for portability and small workspaces.
- Jam-Proof Drop-In Bobbin: Ensures smooth operation and easy bobbin management.
- Easy Stitch Selection: Turn the dial to choose your desired stitch.
Included Accessories
The Janome Jem Gold 660 comes with a range of accessories to support various sewing tasks:
- Bobbins
- Needles
- Seam Ripper
- Screwdriver
- Overedge Foot C
- Transparent Buttonhole Foot B
- Zigzag Foot A
- Spool Holder (Large and Small)
- Spool Pin
- Foot Control
- Power Cord
- Instruction Manual (this document)
Machine Components
Familiarize yourself with the main parts of your sewing machine:
- Spool Pin Settling Hole
- Bobbin Winder Spindle
- Thread Take-up Lever
- Thread Tension Dial
- Needle Threader
- Needle Plate
- Hook Cover Plate
- Hook Cover Plate Release Button
- Reverse Stitch Lever
- Pattern Indication Window
- Handwheel
- Pattern Selector Dial
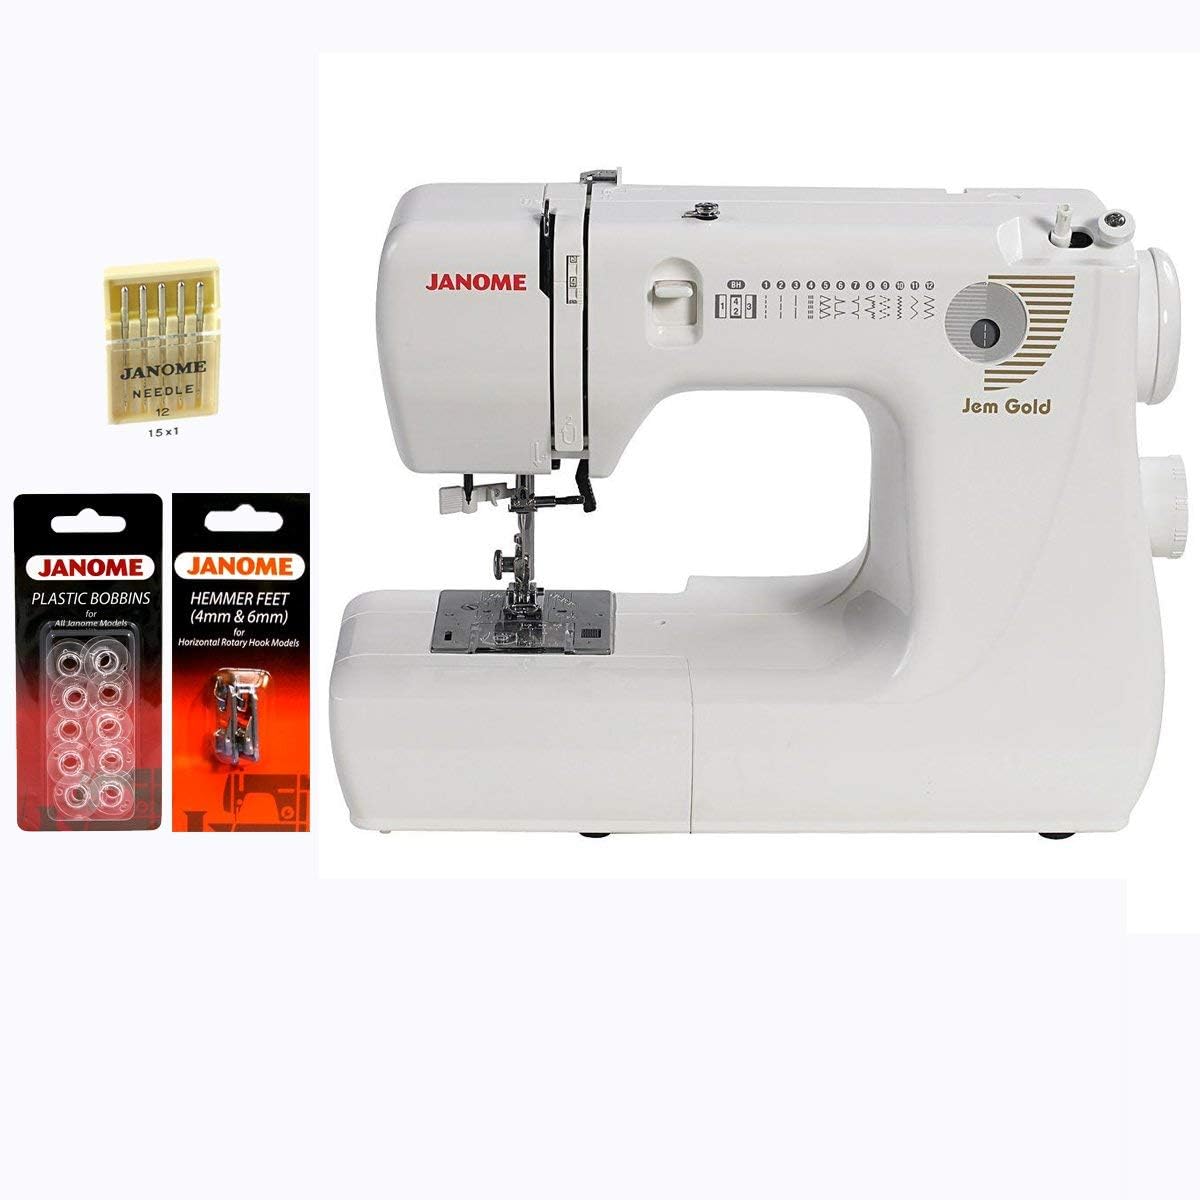
Figure 1: Janome Jem Gold 660 Sewing Machine with included bonus accessories.

Figure 2: Front view of the Janome Jem Gold 660 Sewing Machine, highlighting the stitch selector and Janome branding.

Figure 3: Detailed view of the needle, presser foot, and needle plate on the Janome Jem Gold 660.
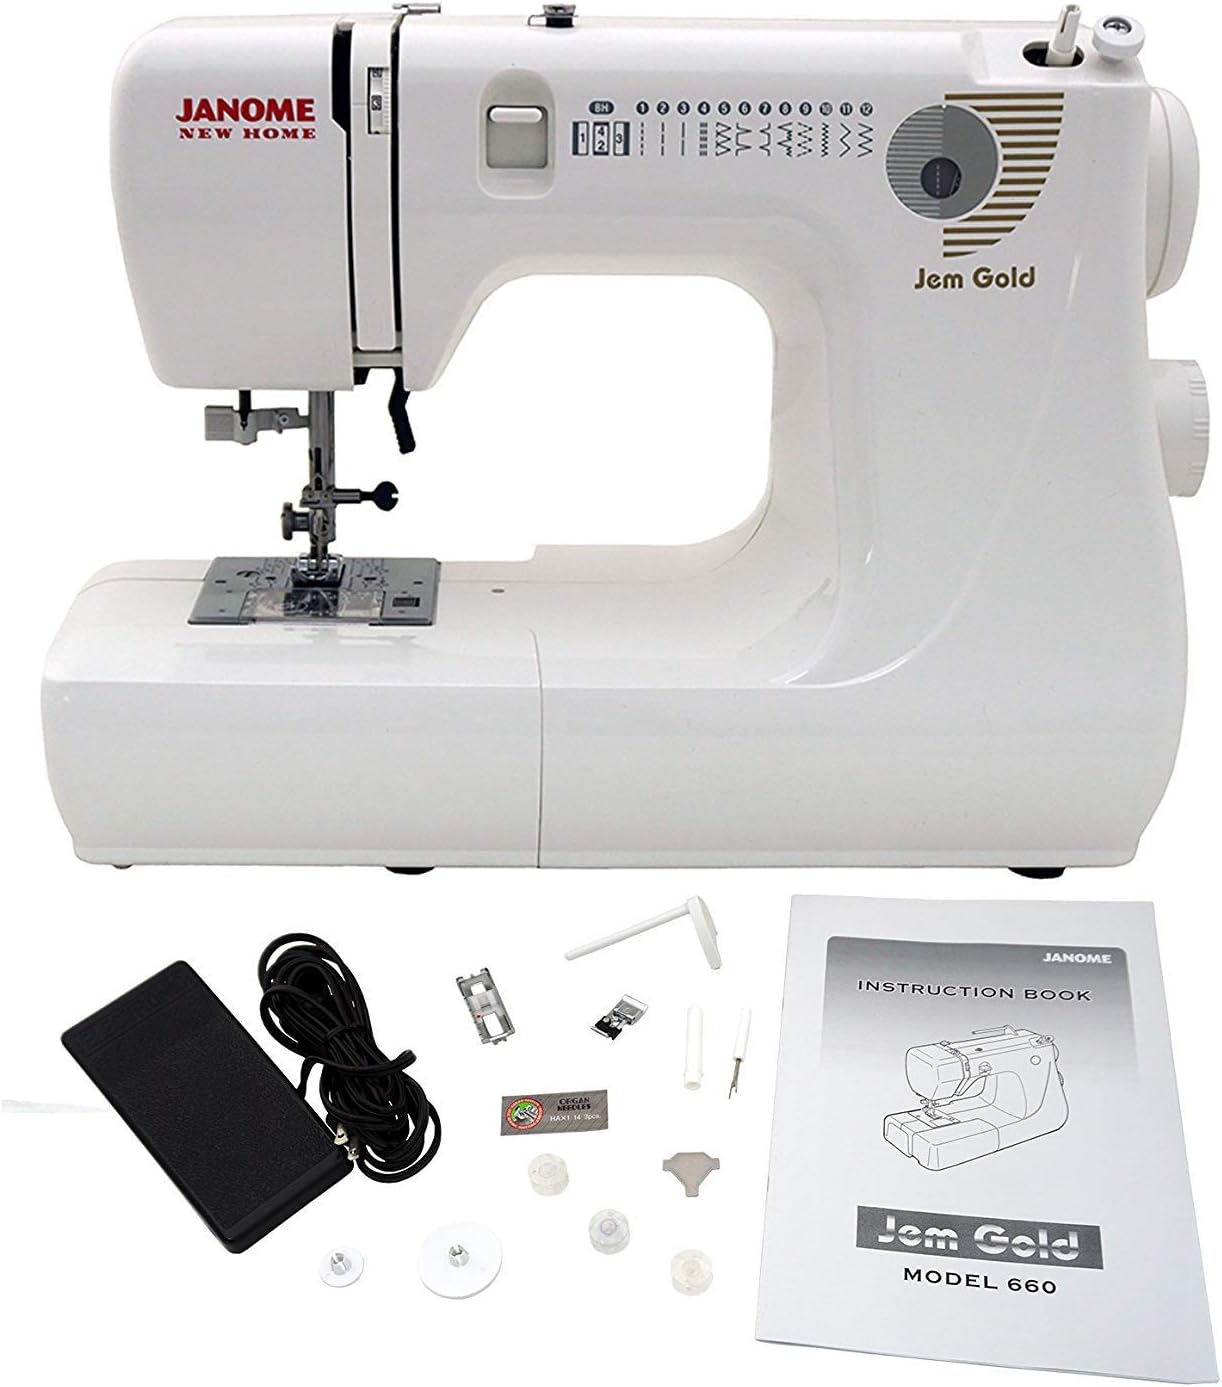
Figure 4: The Janome Jem Gold 660 Sewing Machine displayed with its complete set of accessories, including foot pedal and instruction book.
Setup
1. Unpacking and Placement
- Carefully remove the machine from its packaging.
- Place the machine on a stable, flat surface.
- Ensure there is adequate lighting and space for comfortable operation.
2. Power Connection
- Connect the foot control plug to the machine's foot control jack.
- Insert the power supply plug into the machine's power socket.
- Plug the power cord into a suitable electrical outlet.
- Turn on the power switch, usually located on the side of the machine.
3. Installing the Needle
- Ensure the power is off.
- Raise the needle to its highest position by turning the handwheel towards you.
- Loosen the needle clamp screw.
- Insert a new needle with the flat side facing the back of the machine, pushing it up as far as it will go.
- Tighten the needle clamp screw securely.
4. Winding the Bobbin
- Place a spool of thread on the spool pin.
- Guide the thread through the bobbin winding tension disc.
- Place an empty bobbin onto the bobbin winder spindle.
- Wind the thread a few times manually around the bobbin.
- Push the bobbin winder spindle to the right.
- Press the foot control to start winding. The machine will stop automatically when the bobbin is full.
- Cut the thread and push the bobbin winder spindle back to the left.
5. Inserting the Bobbin
- Ensure the power is off.
- Open the hook cover plate by sliding the release button.
- Insert the full bobbin into the bobbin case with the thread unwinding counter-clockwise.
- Guide the thread into the tension spring slot.
- Pull the thread to the left, ensuring it slides smoothly under the tension spring.
- Replace the hook cover plate.
Operating Instructions
1. Threading the Upper Thread
- Raise the presser foot lever.
- Place a spool of thread on the spool pin.
- Guide the thread through the upper thread guide.
- Draw the thread down the right channel, up the left channel, and through the take-up lever from right to left.
- Continue guiding the thread down to the needle area.
- Use the automatic needle threader or manually thread the needle from front to back.
2. Bringing Up the Bobbin Thread
- Hold the upper thread lightly with your left hand.
- Turn the handwheel towards you to lower the needle, then raise it again.
- The upper thread will catch the bobbin thread, forming a loop.
- Pull the loop to bring the bobbin thread up through the needle plate hole.
- Pull both threads under the presser foot and towards the back of the machine.
3. Selecting a Stitch
- Turn the Pattern Selector Dial, located on the front of the machine, to choose one of the 8 built-in stitches.
- The selected stitch will be indicated in the Pattern Indication Window.
- Adjust the Thread Tension Dial as needed for your fabric and thread type.
4. Basic Sewing
- Place the fabric under the presser foot.
- Lower the presser foot lever.
- Gently press the foot control to start sewing.
- To reinforce a stitch, press the Reverse Stitch Lever.
- When finished, raise the needle to its highest position, lift the presser foot, and pull the fabric away from the machine.
- Cut the threads using the thread cutter on the machine or scissors.
Maintenance
1. Cleaning the Bobbin Area
- Turn off the power and unplug the machine.
- Remove the needle and presser foot.
- Open the hook cover plate and remove the bobbin.
- Use the small brush provided (or a soft brush) to remove lint and dust from the bobbin case and feed dog area.
- Reassemble the components.
2. General Cleaning
- Wipe the exterior of the machine with a soft, dry cloth.
- Avoid using harsh chemicals or abrasive cleaners.
3. Oiling (If Applicable)
Refer to the original Janome instruction manual for specific oiling points and frequency. Many modern machines are self-lubricating in key areas, but some may require occasional oiling.
Troubleshooting
| Problem | Possible Cause | Solution |
|---|---|---|
| Machine not starting | Power cord not plugged in; power switch off; foot control not connected. | Check power connections; ensure power switch is on; connect foot control securely. |
| Upper thread breaking | Incorrect threading; needle bent or dull; thread tension too high; poor quality thread. | Re-thread the machine correctly; replace needle; adjust tension dial; use good quality thread. |
| Bobbin thread breaking | Bobbin incorrectly wound or inserted; lint in bobbin case; bobbin tension too high. | Re-wind and re-insert bobbin; clean bobbin case; adjust bobbin tension (if adjustable). |
| Skipped stitches | Incorrect needle size/type for fabric; bent or dull needle; needle inserted incorrectly. | Change needle to appropriate size/type; replace needle; ensure needle is fully inserted with flat side to the back. |
| Fabric not feeding smoothly | Feed dogs clogged with lint; presser foot pressure incorrect (if adjustable); wrong presser foot. | Clean feed dogs; adjust presser foot pressure; use appropriate presser foot. |
Specifications
| Feature | Detail |
|---|---|
| Model Number | Jem Gold 660 |
| Product Dimensions | 6.4"D x 15.4"W x 12.2"H (16.26 cm D x 39.12 cm W x 30.99 cm H) |
| Item Weight | 15.77 pounds (7.15 kg) |
| Manufacturer | Janome |
| Stitch Count | 8 built-in stitches, including 2 stretch stitches and a 4-step buttonhole |
| Needle Threader | Automatic |
| Bobbin Type | Jam-proof drop-in bobbin |
| Power Source | Electric |
| UPC | 713382038607 |

Figure 5: Dimensions of the Janome Jem Gold 660 Sewing Machine.
Warranty and Support
Warranty Information
The Janome Jem Gold 660 Sewing Machine comes with the following manufacturer's warranty:
- 25 Years on Mechanical Parts
- 2 Years on Electrical Parts
- 1 Year on Labor
Please retain your proof of purchase for warranty claims. For detailed warranty terms and conditions, refer to the official Janome warranty documentation included with your product or visit the official Janome website.
Customer Support
For further assistance, technical support, or service inquiries, please contact Janome customer support. Contact information can typically be found on the official Janome website or in the original packaging.