1. Important Safety Information
Please read all instructions carefully before assembly and use. Keep this manual for future reference.
- Anti-Tip Mechanism: This product is designed to be leaned against a wall. For enhanced stability and safety, it must be secured to the wall using the included anti-tip screws. Failure to do so may result in the shelf tipping over, causing injury or damage.
- Load Capacity: Do not exceed the maximum load capacity of 2 kg (4.4 lbs) per shelf and 2 kg (4.4 lbs) for the hanger bar. Overloading can compromise stability and lead to collapse.
- Product Authenticity: Be aware that if the seller or delivery source is outside of Japan, there may be a risk of receiving counterfeit products. Ensure you purchase from authorized retailers.
- Assembly: Assembly requires careful attention. If you encounter difficulties, seek assistance.

2. Product Overview
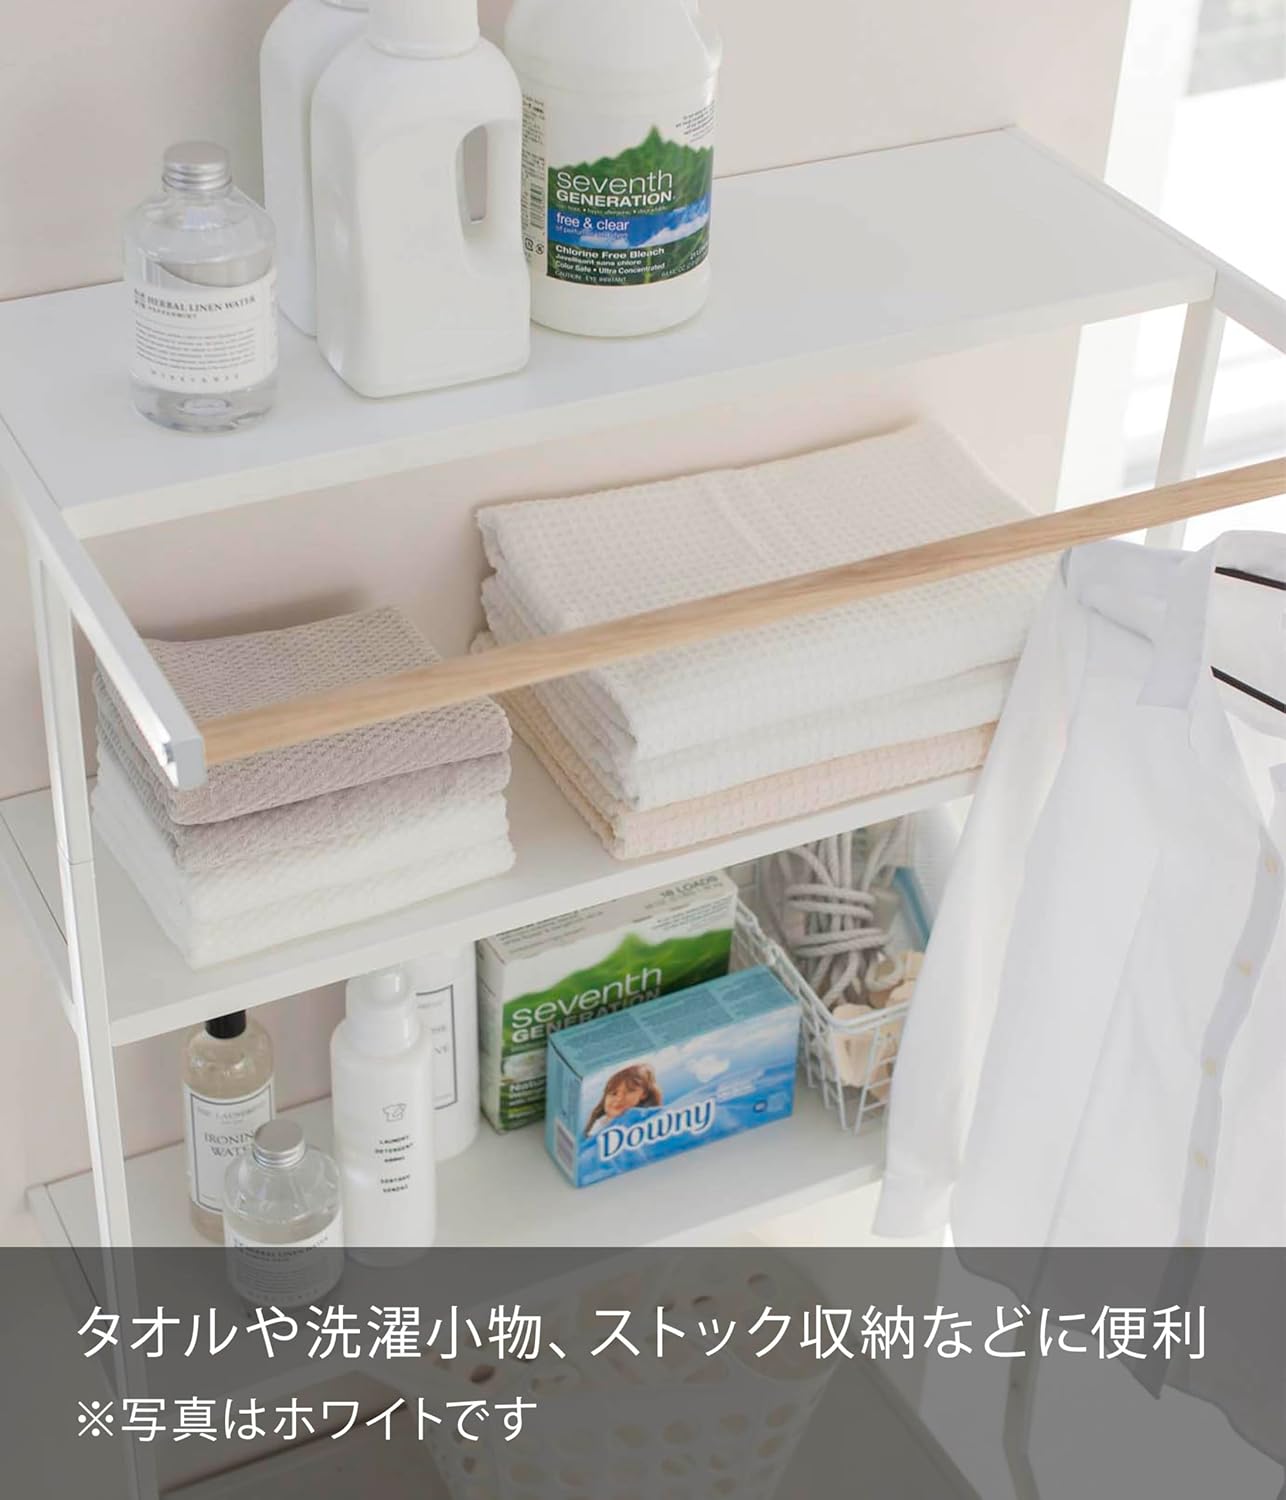
The YAMAZAKI 2483 Standing Laundry Shelf is designed to efficiently utilize vertical space, particularly above washing machines, for organized storage of laundry essentials. It features multiple shelves and a convenient hanger bar.

3. Included Components
Before beginning assembly, ensure all parts are present and undamaged. If any parts are missing or damaged, do not proceed with assembly and contact customer support.
- Main Frame Components (Steel)
- 3 x Shelf Panels (Steel)
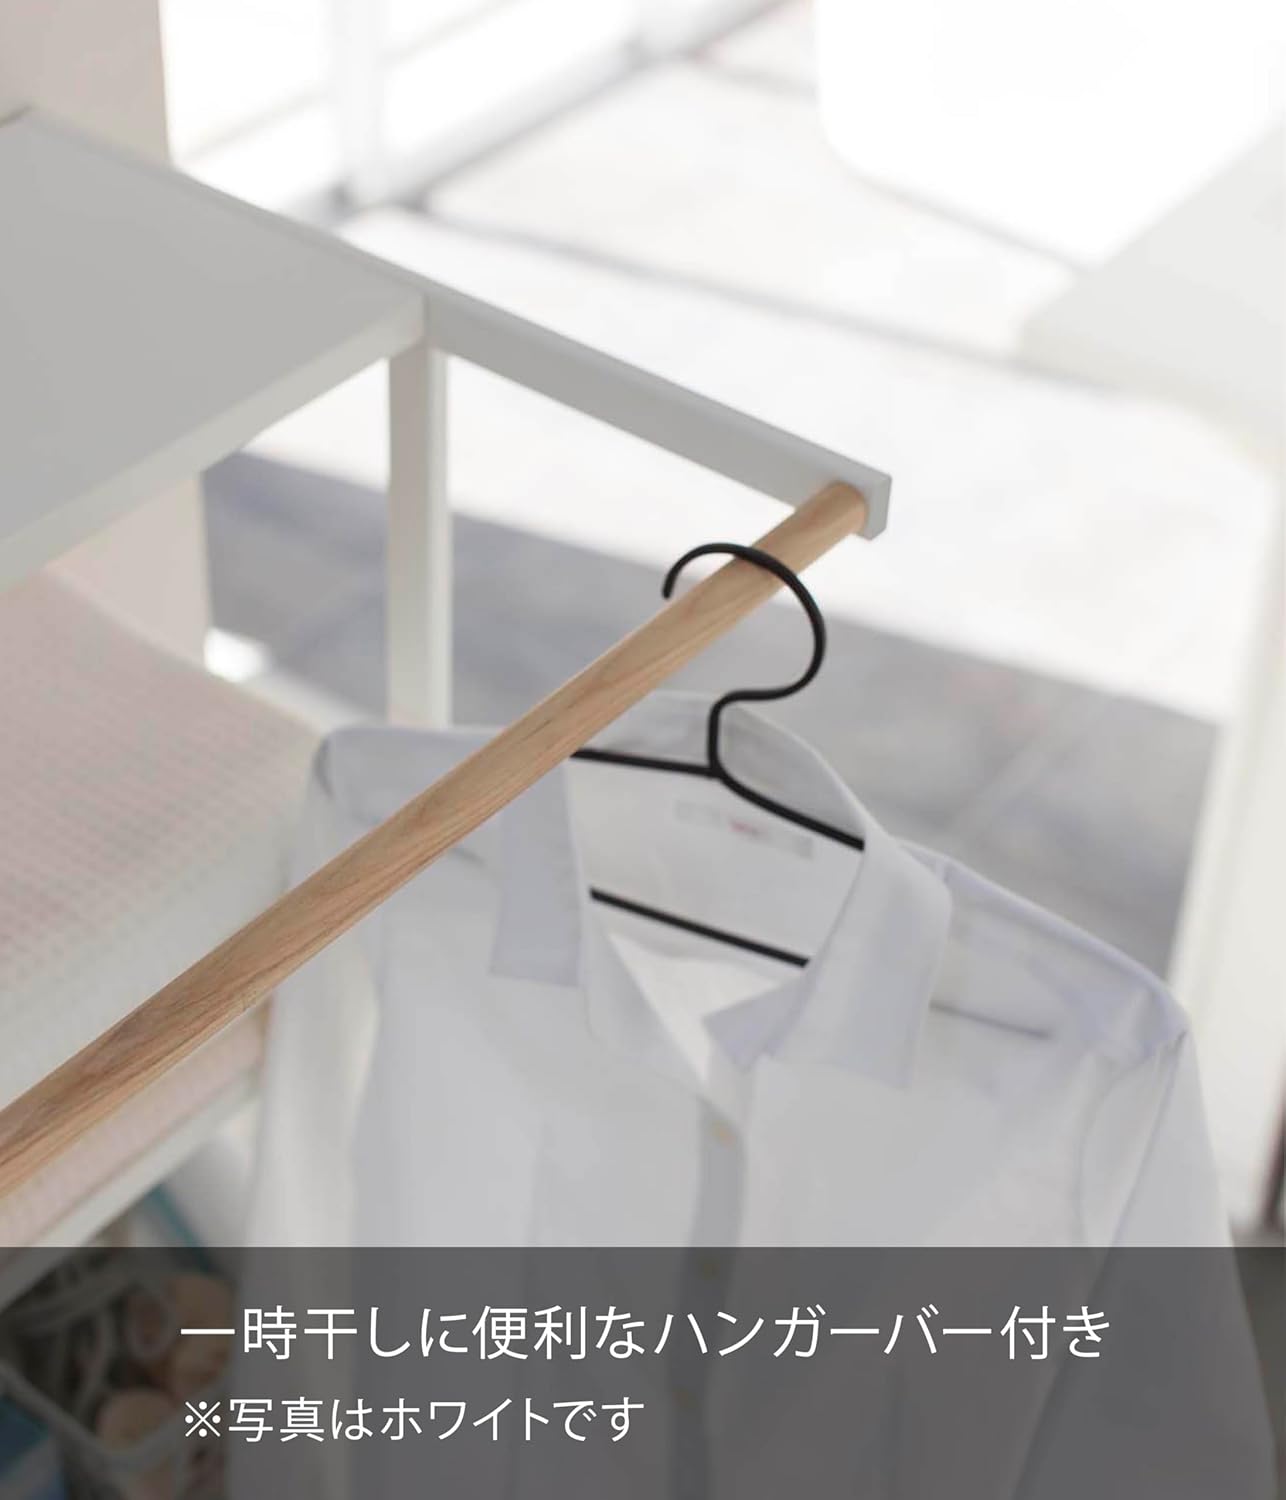
- 1 x Hanger Bar (Natural Wood)
- Silicone Caps (for feet)
- 6 x Anti-Tip Screws (for wall mounting)
- Assembly Tool (Hex key)
4. Assembly Instructions
Assembly is required for this product. It is recommended to have two people for easier and safer assembly. Please follow these steps carefully:
- Unpack Components: Carefully remove all parts from the packaging and lay them out on a clean, soft surface to prevent scratches. Verify all components listed in Section 3 are present.
- Assemble the Main Frame: Connect the vertical frame pieces according to the diagram. Ensure all connections are secure but do not fully tighten screws until all parts are aligned.
- Attach Shelf Panels: Insert the three shelf panels into the designated slots on the frame. The shelves are designed to fit snugly.
- Install Hanger Bar: Secure the natural wood hanger bar to the top section of the frame.
- Tighten All Screws: Once all components are in place and aligned, systematically tighten all screws using the provided hex key. Ensure all connections are firm and stable.
- Attach Silicone Caps: Place the silicone caps on the bottom ends of the frame to protect your floor and provide additional grip.
- Position and Secure to Wall:
- Place the assembled laundry shelf against the desired wall, ideally above your washing machine.
- Ensure the shelf is level and stable.
- Using the 6 included anti-tip screws, secure the top rear section of the frame to the wall. It is recommended to use appropriate wall anchors if securing into drywall (anchors not included).
- Confirm the shelf is firmly attached to the wall and does not wobble.

5. Usage Guidelines
This laundry shelf is designed for convenient storage and organization in your laundry area.
- Placement: The shelf is designed to stand over a washing machine. It is compatible with washing machines up to approximately 72 cm (28.3 inches) in width and 120 cm (47.2 inches) in height (when the lid is opened).
- Storage: Use the three shelves to store laundry detergents, fabric softeners, towels, and other laundry accessories.
- Hanger Bar: The natural wood hanger bar is ideal for temporary drying of clothes or hanging items like shirts immediately after ironing. Remember the 2 kg (4.4 lbs) load limit.
- Even Weight Distribution: Distribute items evenly across the shelves and hanger bar to maintain stability.
6. Care and Maintenance
To ensure the longevity and appearance of your Yamazaki Laundry Shelf, follow these care instructions:
- Cleaning: Wipe the steel frame and shelves with a soft, damp cloth. For stubborn marks, a mild soap solution can be used, followed by drying with a clean cloth. Avoid abrasive cleaners or harsh chemicals.
- Wood Hanger Bar: The natural wood hanger bar can be wiped with a dry or slightly damp cloth. Avoid excessive moisture to prevent warping or damage to the wood.
- Inspection: Periodically check all screws and connections to ensure they remain tight. Retighten if necessary.
- Environment: While designed for laundry areas, avoid prolonged exposure to excessive humidity or direct water spray to prevent potential rust or damage to the powder coating and wood.
7. Troubleshooting
If you encounter issues with your laundry shelf, consider the following:
- Shelf Wobbles:
- Ensure all assembly screws are fully tightened.
- Verify the shelf is placed on a flat, level surface.
- Confirm the anti-tip screws are securely fastened to the wall.
- Check that the weight on the shelves is evenly distributed and does not exceed the maximum load capacity.
- Difficulty Assembling:
- Review the assembly instructions carefully, paying attention to diagrams.
- Ensure you are using the correct screws for each step.
- Do not overtighten screws until all parts are loosely fitted, then tighten them progressively.
8. Specifications
| Brand | YAMAZAKI |
|---|---|
| Model Number | 2483 |
| Product Dimensions (W x D x H) | Approx. 75 x 48 x 190 cm (29.5 x 18.9 x 74.8 inches) |
| Item Weight | Approx. 7.4 kg (16.4 lbs) |
| Material | Body: Steel (Powder Coated); Hanger Bar: Natural Wood; Caps: Silicone Resin |
| Number of Shelves | 3 |
| Maximum Load Capacity | Each Shelf: 2 kg (4.4 lbs); Hanger Bar: 2 kg (4.4 lbs) |
| Compatible Washing Machine Size | Max. Width: Approx. 72 cm (28.3 inches); Max. Height: Approx. 120 cm (47.2 inches) (when lid is opened) |
| Assembly Required | Yes |
| Mounting Type | Wall Mount (with included anti-tip screws) |
| Country of Origin | China |
9. Warranty Information
Specific warranty information for the YAMAZAKI 2483 Standing Laundry Shelf is not provided in this manual. Please refer to the product packaging or contact your retailer for details regarding warranty coverage and terms.
10. Customer Support
For further assistance, missing parts, or inquiries not covered in this manual, please contact the retailer where you purchased the product or visit the official YAMAZAKI website for support contact information.


