1. Introduction
This manual provides comprehensive instructions for the assembly, operation, maintenance, and troubleshooting of your TOOLPORT 3x6 m Party Tent Marquee, PRO Smart model. Please read these instructions carefully before setting up and using the tent to ensure safe and correct usage. Keep this manual for future reference.
The TOOLPORT PRO Smart Party Tent is designed to provide a reliable and spacious shelter for various outdoor events and social gatherings. Its robust construction and high-quality materials ensure durability and protection.
2. Safety Instructions
- Anchoring: Always ensure the tent is securely anchored to the ground using the provided stakes and guy ropes. Failure to do so can result in the tent being lifted by wind, causing damage or injury.
- Wind Conditions: Do not set up or use the tent in strong winds or stormy weather. Disassemble the tent immediately if adverse weather conditions are expected.
- Fire Hazard: Keep all heat sources, open flames, and flammable materials away from the tent fabric. The PVC material is not fireproof.
- Snow Load: The tent is not designed for heavy snow loads. Remove any accumulated snow promptly to prevent structural collapse.
- Assembly: Assembly should ideally be performed by at least two to four adults. Follow the assembly steps carefully to prevent injury.
- Ventilation: Ensure adequate ventilation, especially if using heating or cooking equipment inside the tent.
- Site Selection: Choose a level, clear area for setup, free from sharp objects, overhead power lines, or other hazards.
3. Package Contents
Before beginning assembly, verify that all components are present and undamaged. If any parts are missing or damaged, please contact customer support.
- Galvanized Steel Frame (tubes and connectors)
- Roof Tarpaulin (PVC 700 N, one piece)
- Side Panels (multiple sections, with wind deflectors and windows)
- Gable Panels (end walls, one with zippered entrance)
- Elastic Tensioners
- Ground Stakes/Pegs
- Guy Ropes
- Assembly Instructions
- Assembly Tools (if included)
4. Setup and Assembly
Follow these steps for a safe and efficient assembly of your TOOLPORT Party Tent. Refer to the included detailed assembly instructions for numbered parts and specific diagrams.
4.1 Prepare the Site
- Choose a flat, clear area of 3x6 meters, plus additional space for anchoring.
- Clear the area of any debris, sharp objects, or obstacles.
4.2 Assemble the Frame
- Lay out all frame components (tubes and connectors) according to the assembly diagram. Tubes are approximately 38mm in diameter, and connectors are approximately 42mm.
- Connect the horizontal and vertical tubes using the galvanized steel connectors. The bolted assembly with wing screws ensures strong resistance and ease of installation.
- Gradually build the base frame, then add the vertical support poles.
- Attach the roof frame structure. Ensure all connections are securely bolted.

Figure 1: Tent frame structure with dimensions (3.0m width, 6.0m length, 2.0m side height, 2.90m peak height).

Figure 2: Detail of the bolted connection for the galvanized steel frame.
4.3 Install the Tarpaulins
- Carefully unfold the one-piece PVC roof tarpaulin and drape it over the assembled roof frame. Ensure it is centered and evenly distributed.
- Secure the roof tarpaulin to the frame using the elastic tensioners.
- Attach the side panels. These panels feature wind deflectors and can be mounted/dismounted every two meters.
- Install the gable panels (end walls). One gable panel includes a solid zippered entrance.
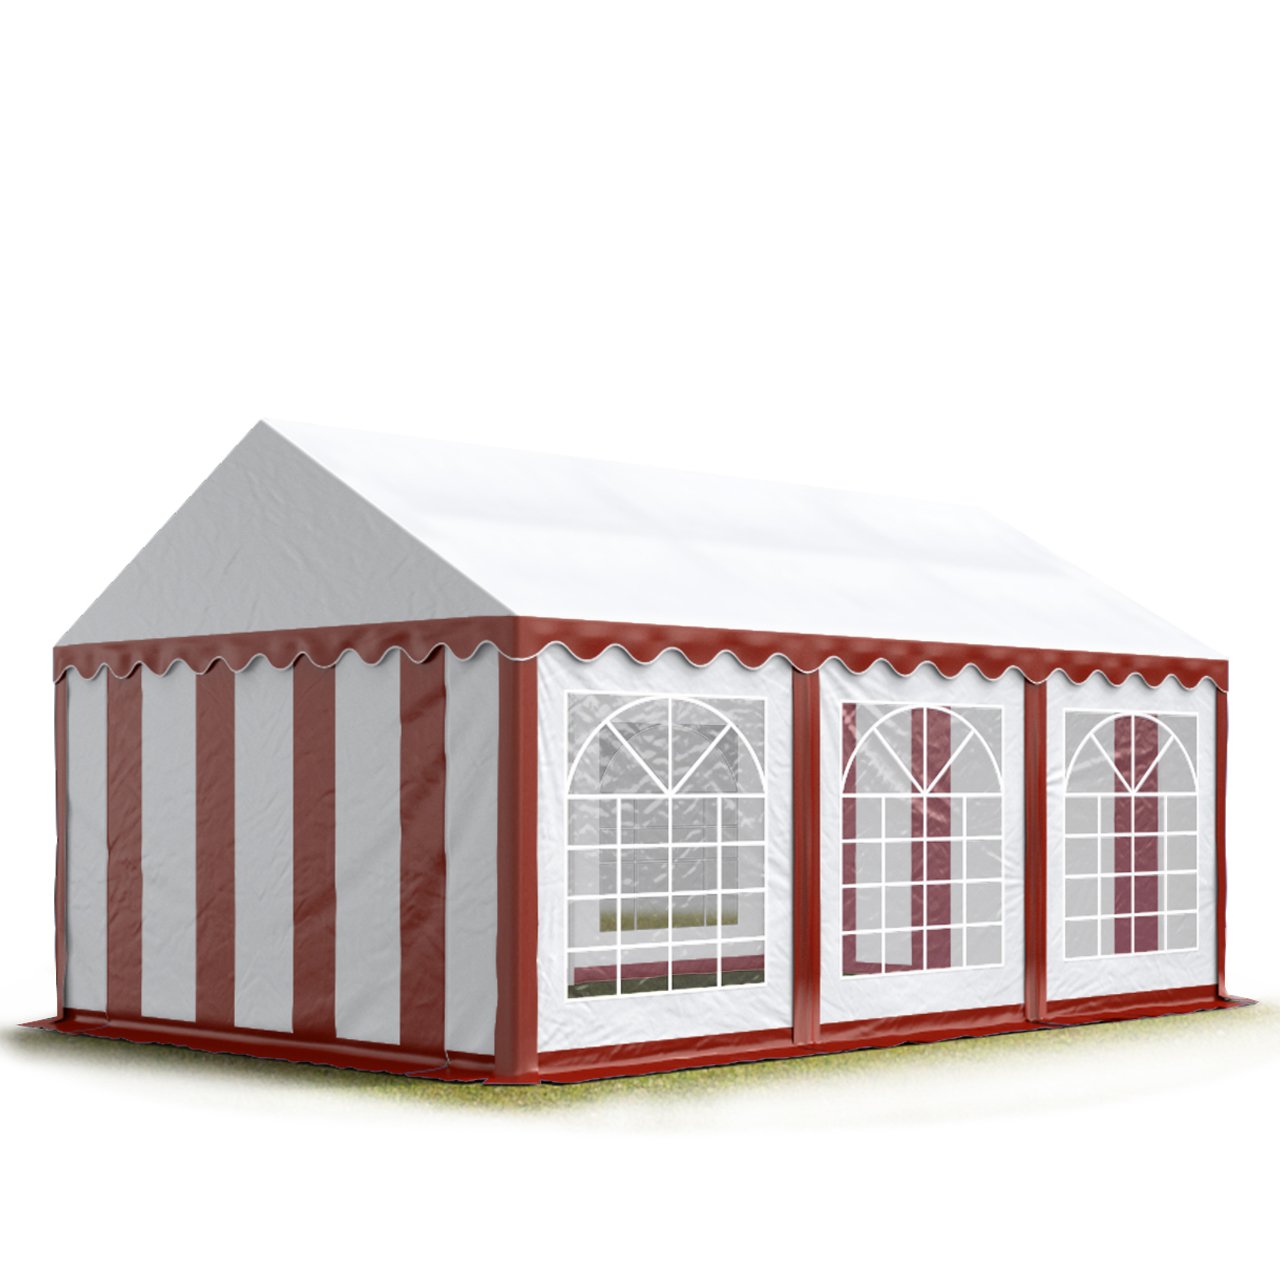
Figure 3: Fully assembled TOOLPORT 3x6m Party Tent.
4.4 Secure the Tent
- Use the provided ground stakes/pegs to firmly anchor the tent legs to the ground.
- Attach and tension the guy ropes to provide additional stability, especially in moderate wind conditions.
5. Operating Instructions
Your TOOLPORT Party Tent is designed for temporary outdoor use, ideal for events, parties, and social gatherings. The high-quality PVC 700 N tarpaulin provides excellent protection against sun and rain, while the wind deflectors and optimal air circulation help regulate internal temperature.
- Entry/Exit: Utilize the zippered entrance on the gable panel for easy access.
- Ventilation: The side panels are equipped with wind deflectors and can be adjusted or removed to optimize air circulation and temperature regulation within the tent.
- UV Protection: The PVC tarpaulin offers UV protection, making it suitable for sunny conditions.
- Water Resistance: The tent is waterproof, providing shelter during light to moderate rain.

Figure 4: Interior view of the tent, highlighting the spacious area and window panels.
6. Maintenance
Proper maintenance will extend the lifespan of your party tent.
- Cleaning: Clean the PVC tarpaulins with mild soap and water. Avoid harsh chemicals or abrasive cleaners, which can damage the material. Rinse thoroughly and allow to dry completely before storage.
- Frame Care: Inspect the galvanized steel frame periodically for any signs of rust or damage. Clean any dirt or debris from the frame.
- Storage: When not in use, disassemble the tent and store all components in a dry, cool place, away from direct sunlight and extreme temperatures. Ensure the tarpaulins are completely dry to prevent mold and mildew.
- Inspection: Regularly check all ropes, stakes, and frame connections for wear and tear. Replace any damaged parts immediately.
7. Troubleshooting
| Problem | Possible Cause | Solution |
|---|---|---|
| Tent unstable / swaying | Insufficient anchoring; loose frame connections; strong winds. | Ensure all stakes are firmly in the ground and guy ropes are taut. Check all bolted frame connections. Disassemble in strong winds. |
| Water leakage | Improperly installed roof/side panels; damage to tarpaulin; heavy rain exceeding tent's capacity. | Verify all tarpaulins are correctly positioned and secured. Inspect for tears or holes and repair if necessary. Ensure proper tension to prevent water pooling. |
| Difficulty assembling frame | Incorrect part orientation; missing tools; insufficient personnel. | Refer to the detailed assembly instructions and diagrams. Ensure parts are aligned correctly. Use the recommended number of people for assembly. |
| Zipper on entrance stuck or broken | Dirt in zipper; misalignment; excessive force. | Clean zipper teeth. Gently realign the zipper. Avoid forcing the zipper. If broken, contact customer support for replacement parts. |
8. Specifications
- Model: PRO Smart
- Dimensions (L x W x H): 600 x 300 x 200 cm (19.69 x 9.84 x 6.56 ft)
- Floor Area: 18 square meters
- Weight: 73.8 kg
- Frame Material: Galvanized Steel
- Tube Diameter: Approx. 38mm
- Connector Diameter: Approx. 42mm
- Cover Material: Polychlorure de vinyle (PVC) 700 N
- Color: Red-White
- Water Resistance Level: Waterproof
- UV Protection: True
- Recommended Use: Activities, Social Gatherings
- Assembly Required: Yes
- Country of Origin: Germany
9. Warranty Information
This product is subject to the standard return policy, which typically allows for returns or replacements within 30 days of purchase. For detailed warranty terms and conditions, please refer to the specific warranty documentation provided with your purchase or contact the seller directly. Keep your proof of purchase for any warranty claims.
10. Customer Support
If you have any questions, require assistance with assembly, or need to report missing or damaged parts, please contact TOOLPORT customer support. You can typically find contact information on the product packaging or the seller's website.
For online support, visit the TOOLPORT brand store: TOOLPORT Store