Introduction
This manual provides essential information for the safe and efficient installation, operation, and maintenance of your HP HSTNS-PL14 Power Supply. Please read this manual thoroughly before use to ensure proper handling and to prevent damage to the unit or connected equipment.
Safety Information
Adhering to these safety guidelines is crucial for preventing injury and equipment damage:
- Always disconnect power from the wall outlet before installing, removing, or servicing the power supply.
- Ensure proper grounding of your computer system.
- Do not open the power supply unit. There are no user-serviceable parts inside, and opening it may expose you to dangerous voltages.
- Operate the power supply within its specified voltage and current limits as indicated on the product label.
- Avoid exposing the power supply to moisture, liquids, or extreme temperatures.
- Ensure adequate ventilation around the power supply and within the computer case to prevent overheating.
Package Contents
The package typically includes:
- HP HSTNS-PL14 Power Supply Unit
- (Power cord and mounting screws are typically sold separately or included with the computer system.)
Product Overview
The HP HSTNS-PL14 is a robust 460-watt internal power supply designed to provide stable and reliable power to personal computer systems. It features an ATX form factor, making it compatible with a wide range of computer cases and motherboards. The unit is equipped with a cooling fan to maintain optimal operating temperatures.

Image: Top-down view of the HP HSTNS-PL14 Power Supply, showcasing its metallic casing and the blue product label with regulatory information.
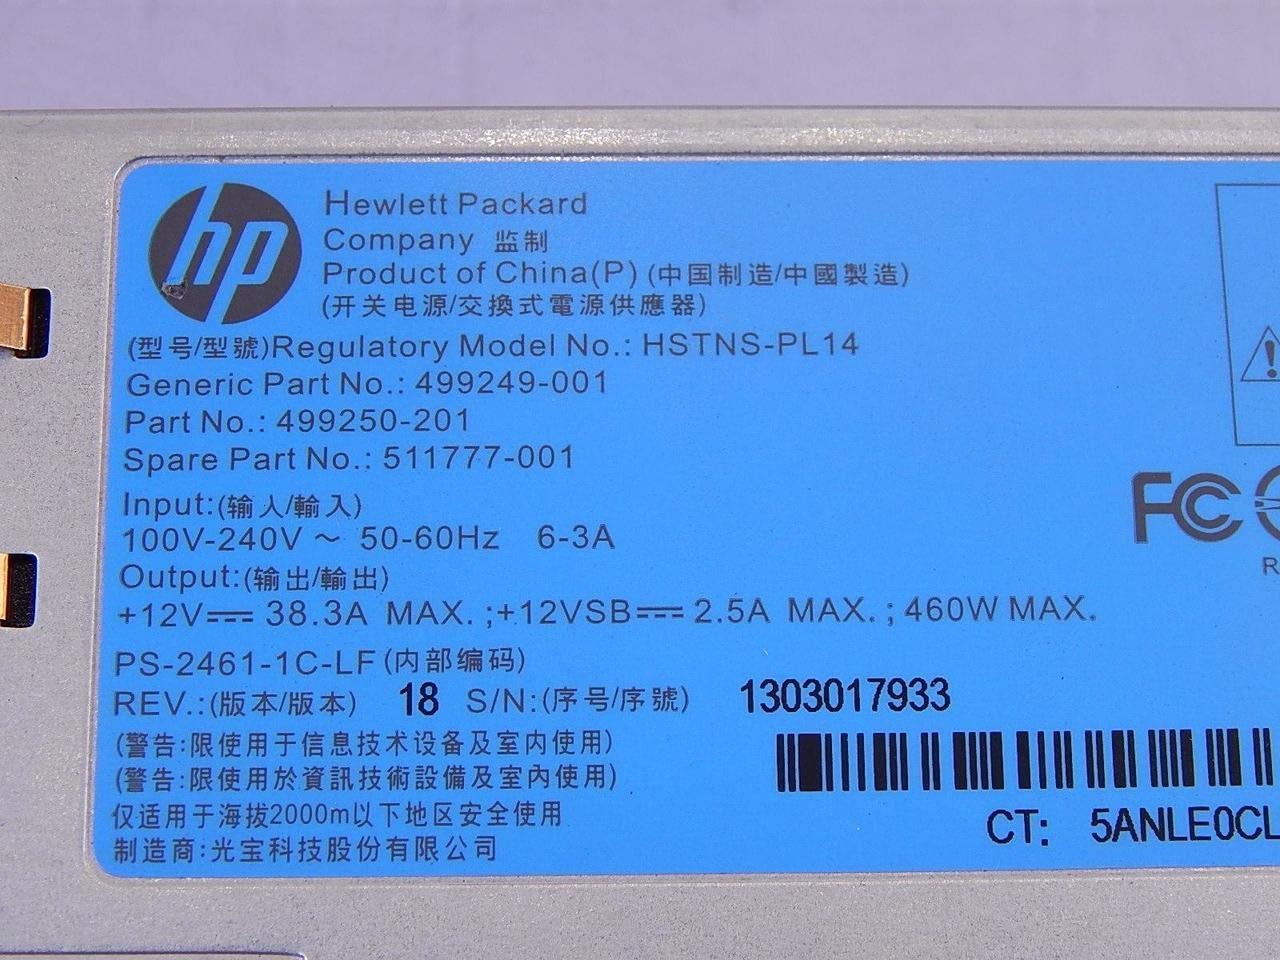
Image: Close-up of the product label on the HP HSTNS-PL14 Power Supply, detailing the model number HSTNS-PL14, part numbers 499249-001 and 499250-201, input voltage (100V-240V), and maximum output (460W).

Image: Rear view of the power supply, showing the integrated cooling fan (labeled 460W) and the AC power input connector.

Image: Front view of the power supply, displaying the various output connectors for motherboard, CPU, and peripheral devices.
Specifications
| Feature | Detail |
|---|---|
| Brand | HP |
| Model Name | HSTNS-PL14 |
| Part Numbers | 499249-001, 499250-201 |
| Output Wattage | 460 Watts |
| Form Factor | ATX |
| Input Voltage | 100V-240V |
| Input Frequency | 50-60Hz |
| Connector Type | ATX |
| Compatible Devices | Personal Computer |
| Cooling Method | Air |
| Item Weight | 3 Pounds |
| Manufacturer | HP |
Setup and Installation
Follow these steps to properly install your HP HSTNS-PL14 Power Supply:
- Preparation:
- Before beginning, ensure your computer system is completely powered off and disconnected from the main power outlet.
- Open your computer case according to its manufacturer's instructions.
- Removal of Old Power Supply (if applicable):
- Disconnect all power cables from the motherboard, graphics card, and other components.
- Unscrew the old power supply from the computer case.
- Carefully remove the old power supply from the case.
- Installation of HP HSTNS-PL14:
- Position the new HP HSTNS-PL14 power supply into the designated bay in your computer case.
- Secure the power supply with appropriate screws (typically 4 screws at the rear of the case).
- Connect the main ATX power connector to your motherboard.
- Connect any necessary CPU power connectors (e.g., 4-pin or 8-pin EPS12V).
- Connect power cables to your graphics card(s), storage drives (SATA/Molex), and other peripherals as required. Ensure all connections are firm and properly seated.
- Final Steps:
- Close your computer case.
- Reconnect the computer to the main power outlet.
- Power on your system to verify proper operation.
Operating Instructions
Once installed, the HP HSTNS-PL14 Power Supply operates automatically with your computer system, providing stable DC power to all connected components. No specific user interaction is required for its operation.
- Ensure adequate ventilation around your computer case to prevent overheating, which can affect power supply performance and longevity.
- Avoid overloading the power supply by connecting devices that collectively exceed its 460W capacity. Consult your system's total power requirements.
Maintenance
Regular maintenance helps ensure the longevity and optimal performance of your power supply:
- Cleaning: Periodically clean dust from the power supply's fan and vents using compressed air. Ensure the system is powered off and unplugged before cleaning. Dust buildup can impede cooling and lead to overheating.
- Inspection: Regularly check all power cables for any signs of wear, fraying, or damage. Ensure all connections to the motherboard and peripherals remain secure.
- Do not attempt to open or repair the power supply unit. Refer all servicing to qualified personnel.
Troubleshooting
If you encounter issues with your power supply, consider the following troubleshooting steps:
- System Fails to Power On:
- Check if the power supply is securely connected to the wall outlet and the computer's AC input.
- Verify all internal power connections (motherboard, CPU, GPU, drives) are firm and correctly seated.
- Ensure the power switch on the back of the power supply (if present) is in the 'ON' position.
- Intermittent Power Loss or System Instability:
- This could indicate an overloaded power supply. Review your system's total power requirements and compare them to the power supply's 460W capacity.
- Check for loose internal connections or damaged cables.
- Ensure adequate cooling within the computer case to prevent thermal shutdowns.
- Unusual Noises:
- A loud fan noise might indicate dust buildup. Clean the fan as described in the Maintenance section.
- If unusual electrical noises (e.g., buzzing, crackling) are heard, immediately power off and unplug the system and seek professional assistance. Do not attempt to operate the system.
Warranty and Support
For detailed warranty information, technical support, and service inquiries regarding your HP HSTNS-PL14 Power Supply, please refer to the official HP website or contact HP customer service directly. It is recommended to keep your purchase receipt as proof of purchase for warranty claims.