
Introduction
Thank you for choosing the CenterPoint LR416AORG2 4-16x40mm Rifle Scope. This scope features an illuminated, parallax-adjustable T.A.G. (Trajectory Aiming Guide) reticle and comes with Picatinny rings for mounting. This manual provides detailed instructions for proper setup, operation, maintenance, and troubleshooting to ensure optimal performance and longevity of your rifle scope.
The T.A.G. reticle is designed to simplify aiming by providing pre-calculated aiming points for various distances, eliminating the need for complex hold-over estimations. It is factory calibrated for popular bullet/load combinations and can accommodate distances up to 600 yards.
Safety Information
- Always ensure your firearm is unloaded and pointed in a safe direction before handling or installing the scope.
- Read and understand your firearm's manual before using this scope.
- Never look directly at the sun or any intense light source through the scope, as this can cause permanent eye damage.
- Handle the scope with care to prevent damage to the optical system.
Package Contents
Verify that all items are present in your package:
- CenterPoint TAG 4-16x40mm Rifle Scope
- Picatinny Rings
- Lens Caps
- Cleaning Cloth
- CR2032 Battery (for reticle illumination)

Image: The CenterPoint LR416AORG2 rifle scope shown with its included Picatinny mounting rings and protective lens caps.
Setup
1. Mounting the Scope
- Attach the Picatinny rings to your firearm's Picatinny rail, ensuring they are securely tightened.
- Place the scope into the rings. Do not overtighten the ring screws initially.
- Adjust the scope's position for proper eye relief. This is the distance between your eye and the eyepiece that provides a full, clear field of view.
- Ensure the reticle is level. Use a reticle leveling tool or a plumb line for accuracy.
- Once eye relief and reticle level are set, gradually tighten the ring screws evenly to secure the scope. Refer to your ring manufacturer's torque specifications.
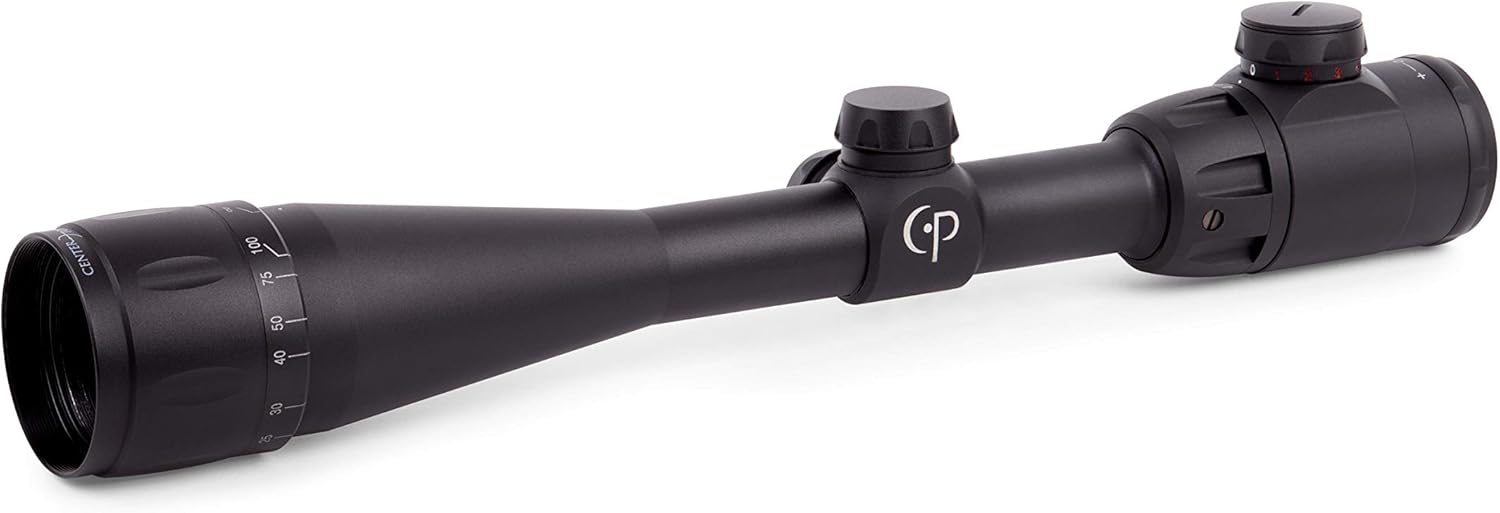
Image: An overhead view of the CenterPoint LR416AORG2 rifle scope, illustrating its overall form factor and turret placement.
2. Battery Installation (for Illuminated Reticle)
The scope requires one CR2032 battery for the illuminated reticle feature.
- Locate the illumination control knob, typically on the left side of the scope's main tube.
- Unscrew the battery cap.
- Insert the CR2032 battery with the positive (+) side facing outwards.
- Replace the battery cap and tighten it securely to ensure a waterproof seal.
3. Focusing the Eyepiece
To achieve a sharp reticle image:
- Point the scope at a plain, bright background (e.g., a clear sky).
- Look through the scope and quickly glance at the reticle.
- Rotate the eyepiece focus ring until the reticle appears crisp and sharp. Avoid staring too long, as your eye may compensate for blurriness.
Operating the Scope
1. Magnification Adjustment
The scope features a 4-16x magnification range. Rotate the magnification ring, located near the eyepiece, to adjust the power. The numbers on the ring indicate the current magnification setting.

Image: A side profile of the rifle scope, highlighting the magnification adjustment ring with numerical markings.
2. Parallax Adjustment
Parallax is the apparent movement of the reticle in relation to the target when you move your head. This scope features an adjustable parallax knob, typically located opposite the illumination knob.
- While looking through the scope, rotate the parallax adjustment knob until the target and reticle appear to be in the same focal plane.
- To check for parallax, move your head slightly up and down, or side to side. If the reticle appears to shift relative to the target, adjust the knob further until the shift is eliminated.
3. Reticle Illumination
The T.A.G. reticle can be illuminated in red or green for improved visibility in low-light conditions. Rotate the illumination control knob to turn the illumination on/off and select the desired brightness level and color.
4. Windage and Elevation Adjustment
The windage (horizontal) and elevation (vertical) turrets are used to zero your scope. These turrets typically have audible clicks, with each click representing a specific change in point of impact (e.g., 1/4 MOA).
- Elevation Turret: Located on top of the scope. Rotate it to adjust the vertical point of impact. Turning it clockwise typically moves the point of impact down, and counter-clockwise moves it up.
- Windage Turret: Located on the right side of the scope. Rotate it to adjust the horizontal point of impact. Turning it clockwise typically moves the point of impact right, and counter-clockwise moves it left.
- After zeroing, you can often reset the turrets to '0' without affecting the internal adjustments. Consult your scope's specific instructions for turret reset procedures.

Image: A detailed side view of the rifle scope, showing the windage and elevation adjustment turrets with their protective caps.
5. Using the T.A.G. Reticle
The T.A.G. (Trajectory Aiming Guide) reticle is designed for bullet drop compensation. It features multiple aiming points below the main crosshair, calibrated for various distances.
- Calibration: The reticle is factory calibrated for common bullet/load combinations. For precise use, it is recommended to verify and calibrate the aiming points with your specific ammunition at known distances.
- Distance Estimation: Once you have established the distance to your target, simply use the corresponding aiming point on the T.A.G. reticle for a precise shot.
- The T.A.G. reticle can accommodate distances up to 600 yards.
Maintenance
1. Cleaning the Lenses
Use only a soft, lint-free cloth (like the one provided) or a lens brush to remove dust and debris. For smudges or fingerprints, use a specialized lens cleaning solution and a clean lens cloth. Avoid using harsh chemicals or abrasive materials, which can damage the lens coatings.
2. General Care
- Keep the lens caps on when the scope is not in use to protect the lenses from dust and scratches.
- Store the scope in a cool, dry place, away from direct sunlight and extreme temperatures.
- Periodically check all mounting screws to ensure they remain tight.
Troubleshooting
- Blurred Image: Adjust the eyepiece focus and parallax. Ensure lenses are clean.
- Reticle Not Illuminating: Check if the CR2032 battery is correctly installed and not depleted. Replace if necessary.
- Inconsistent Point of Impact: Ensure the scope is securely mounted and all screws are tightened. Check for loose components on the firearm.
- Difficulty Zeroing: Confirm proper mounting. Ensure you are using consistent ammunition and shooting technique.
Specifications
| Feature | Specification |
|---|---|
| Model Name | LR416AORG2 |
| Magnification | 4-16x |
| Objective Lens Diameter | 40 mm |
| Reticle Type | TAG Series Illuminated Reticle |
| Illumination | Red/Green (CR2032 battery included) |
| Parallax Adjustment | Adjustable |
| Mounting Type | Picatinny Mount (Rings included) |
| Field of View | 12.8 Degrees |
| Item Weight | 839 Grams |
| Color | Black |
| Material | Blend |
Warranty Information
This CenterPoint LR416AORG2 Rifle Scope is covered by a LIMITED LIFETIME WARRANTY. For specific terms and conditions, please refer to the warranty card included with your product or visit the official CenterPoint website.
Support
For further assistance, technical support, or to inquire about replacement parts, please visit the official CenterPoint store or contact their customer service department.
Official CenterPoint Store: CenterPoint Store on Amazon