Introduction
This manual provides detailed instructions for the installation and operation of the PAC RP4.2-HY12 RadioPRO Radio Replacement Interface. This all-in-one interface is designed to facilitate the replacement of a factory radio in select Hyundai vehicles while retaining essential vehicle features, including pre-programmed steering wheel controls, amplifier retention, and navigation-based output signals.
Safety Information
- Disconnect the vehicle's battery before installation to prevent electrical shorts.
- Ensure all connections are secure and properly insulated to avoid damage to the interface or vehicle electronics.
- Consult a professional automotive technician if you are unsure about any installation steps.
- This device is intended for use in specific Hyundai vehicles as indicated by the manufacturer. Verify compatibility before installation.
Package Contents
Verify that all items are present before beginning installation.
- PAC RP4.2-HY12 RadioPRO Interface Module
- Wiring Harnesses (vehicle-specific)
- Installation Guide (this document)
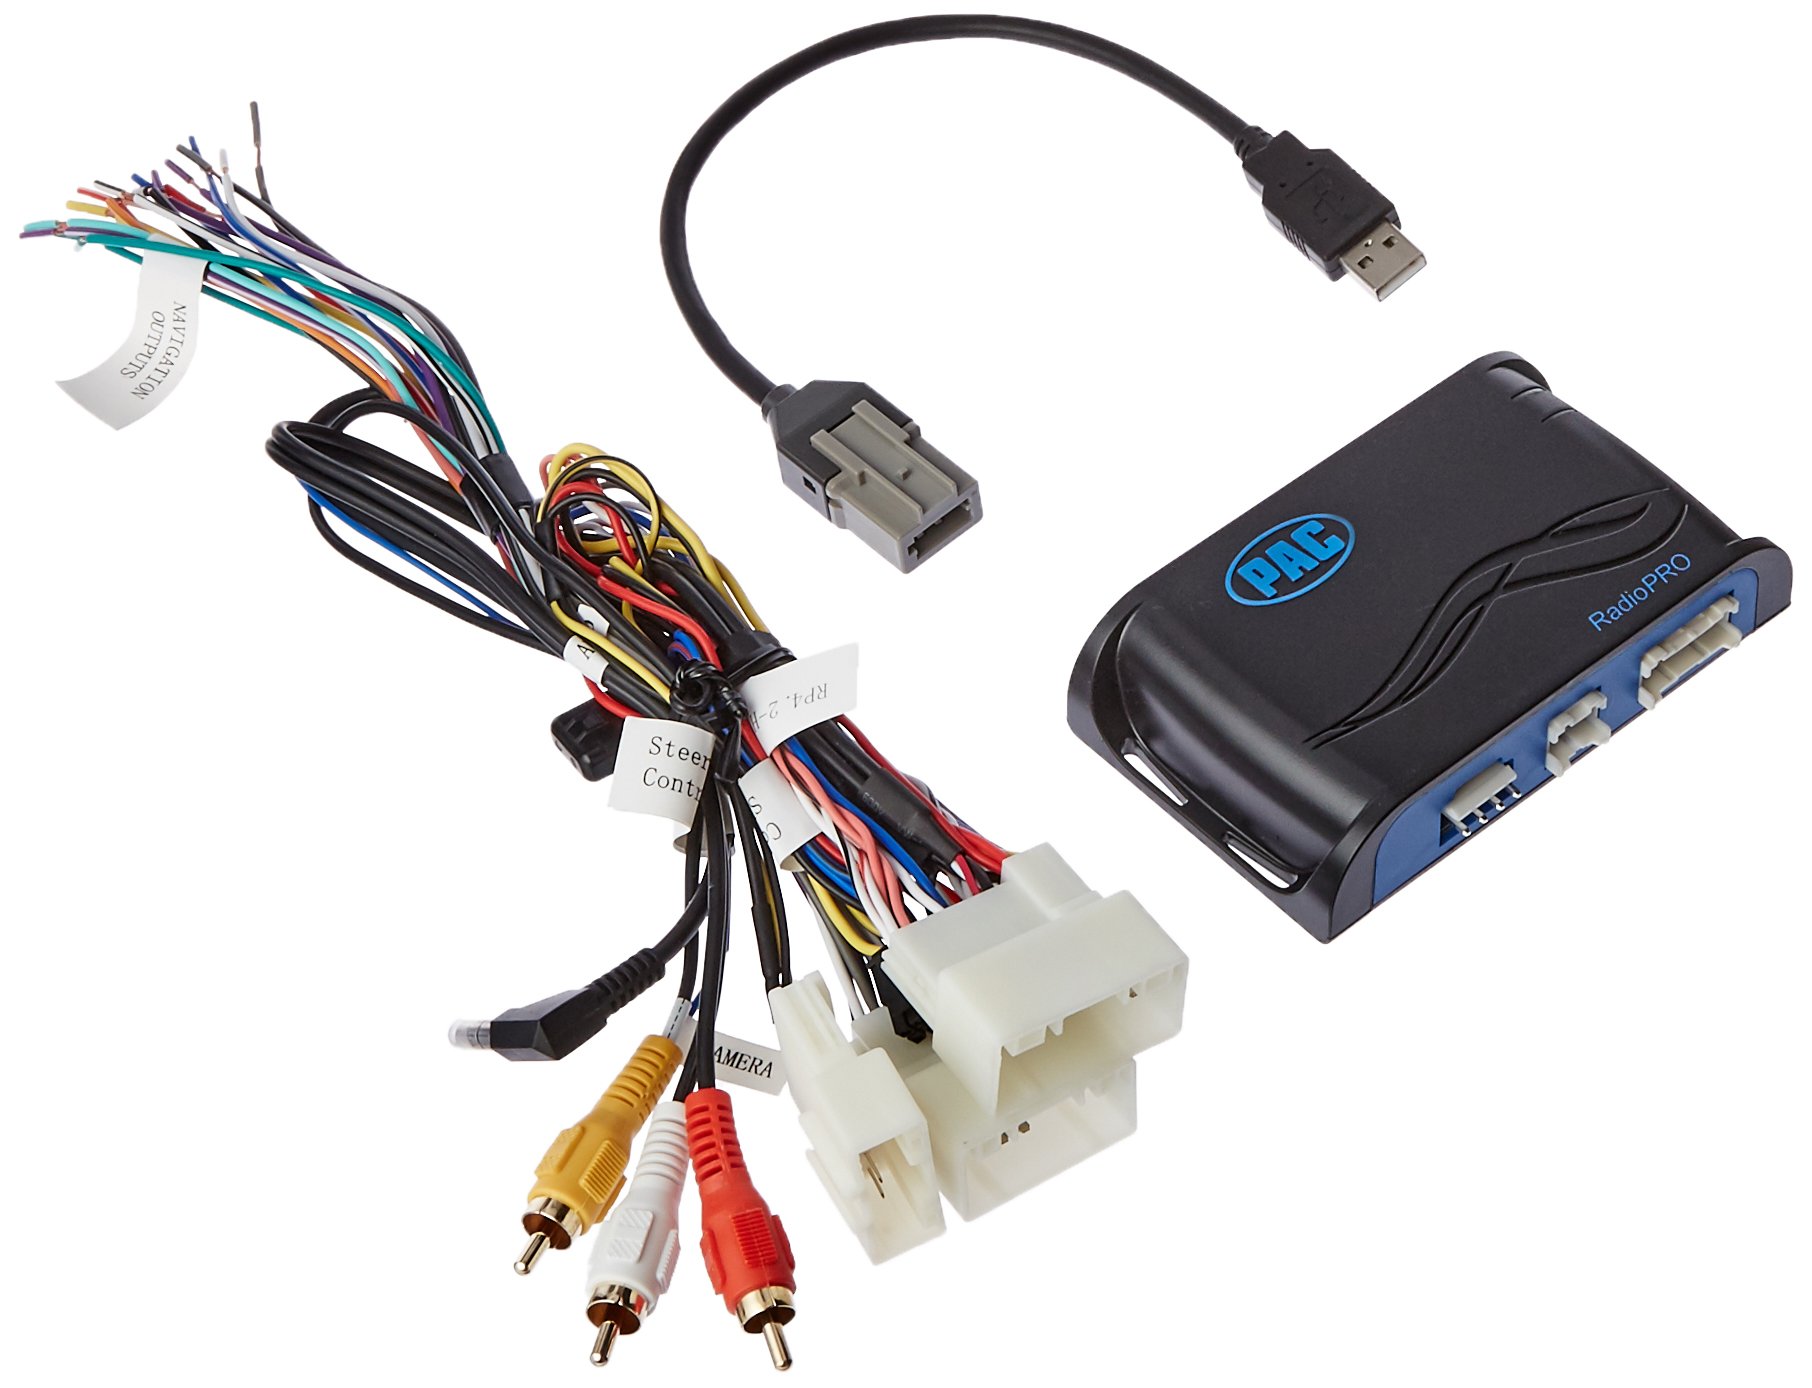
Image: The PAC RP4.2-HY12 RadioPRO interface module, typically a compact black box with various wiring connectors.
Setup and Installation
The PAC RP4.2-HY12 is designed for select Hyundai Veloster vehicles. Refer to the vehicle-specific wiring diagram for your exact model.
Pre-Installation Notes
- This interface does not retain Blue Link functionality. For Blue Link retention, the RP5.2-HY12 model is required.
- In vehicles equipped with auto climate controls, the fan mode, fan speed, auto status, and temperature display may not be visually confirmed on the new radio. The functions will still operate.
- The interface provides data-controlled accessory and navigation outputs.
- A 10A accessory output is provided.
General Installation Steps
- Disconnect Battery: Before starting, disconnect the negative terminal of the vehicle's battery.
- Remove Factory Radio: Carefully remove the factory radio from the dashboard.
- Connect Wiring Harnesses:
- Connect the vehicle-specific harness from the RP4.2-HY12 module to the factory wiring harness in the vehicle.
- Connect the aftermarket radio harness to the RP4.2-HY12 module's output harness. Ensure all wires are matched correctly (e.g., power, ground, speakers, accessory, illumination).
- Connect Steering Wheel Control (SWC) Wire: Connect the SWC output wire from the RP4.2-HY12 to the appropriate SWC input wire on your aftermarket radio. Refer to your aftermarket radio's manual for SWC input location.
- Connect Navigation Outputs (if applicable): Connect the navigation outputs (e.g., VSS, Reverse, Parking Brake) from the RP4.2-HY12 to the corresponding inputs on your aftermarket navigation radio.
- Mount the Module: Securely mount the RP4.2-HY12 module in a location that does not interfere with vehicle operation or reassembly of the dashboard.
- Reconnect Battery: Reconnect the negative terminal of the vehicle's battery.
- Test System: Turn on the vehicle and test all functions of the aftermarket radio, including audio, steering wheel controls, and navigation features.
Operation
The PAC RP4.2-HY12 interface is designed to seamlessly integrate your aftermarket radio with your vehicle's existing systems, primarily focusing on steering wheel control retention.
Steering Wheel Control (SWC)
The interface comes pre-programmed to retain the factory steering wheel controls. Once installed, the buttons on your steering wheel should operate the corresponding functions on your aftermarket radio (e.g., volume up/down, track up/down, mode).
- Volume Control: Use the volume buttons on your steering wheel to adjust the audio level.
- Track/Seek: Use the track or seek buttons to change radio stations or music tracks.
- Mode/Source: Use the mode or source button to switch between audio sources (e.g., AM/FM, CD, Bluetooth, USB).
Note: Specific button functions may vary slightly depending on the aftermarket radio model and vehicle configuration. Refer to your aftermarket radio's manual for custom programming options if available.
Troubleshooting
- No Power to Aftermarket Radio
- Check the vehicle's fuse box for blown fuses.
- Verify all power and ground connections from the RP4.2-HY12 harness to the aftermarket radio and vehicle.
- Ensure the vehicle's battery is fully charged and properly connected.
- Steering Wheel Controls Not Working
- Confirm the SWC wire from the RP4.2-HY12 is correctly connected to the aftermarket radio's SWC input.
- Check the aftermarket radio's settings to ensure SWC is enabled and configured for a PAC interface, if applicable.
- Some aftermarket radios require a specific programming sequence for SWC; consult your radio's manual.
- User Review Note: One user reported losing steering controls when using the audio jack provided with a similar kit. If experiencing issues, try disconnecting any auxiliary audio jacks if present and re-test SWC.
- No Audio Output
- Verify all speaker wire connections are secure and correctly matched.
- Ensure the aftermarket radio's amplifier turn-on wire is connected to the RP4.2-HY12's amplifier turn-on output (if applicable for factory amplifier retention).
- Check the aftermarket radio's volume and mute settings.
Specifications
| Feature | Detail |
|---|---|
| Model Number | RP4.2-HY12 |
| Compatibility | Select Hyundai Veloster Vehicles |
| Accessory Output | 10A |
| Blue Link Retention | Not retained (RP5.2-HY12 required) |
| Climate Control Display | Visual confirmation of fan mode, speed, auto status, and temperature may be lost. Functions remain operational. |
| Dimensions | 8.5 x 8.4 x 2 inches (Product) |
| Weight | 11 ounces (Item) |
Warranty and Support
For warranty information and technical support, please contact PAC customer service directly. Keep your purchase receipt as proof of purchase.
Online Resources: Visit the official PAC website for the latest product information, firmware updates, and additional support resources.
Contact Information: Refer to the PAC website or product packaging for current contact details.


