1. Introduction
This manual provides essential information for the installation, operation, maintenance, and troubleshooting of your GOOFIT Ignition Rebuild Kit. This kit is designed to replace key ignition components in compatible 4-stroke engines, ensuring reliable starting and optimal performance. Please read these instructions thoroughly before attempting any installation or repair.
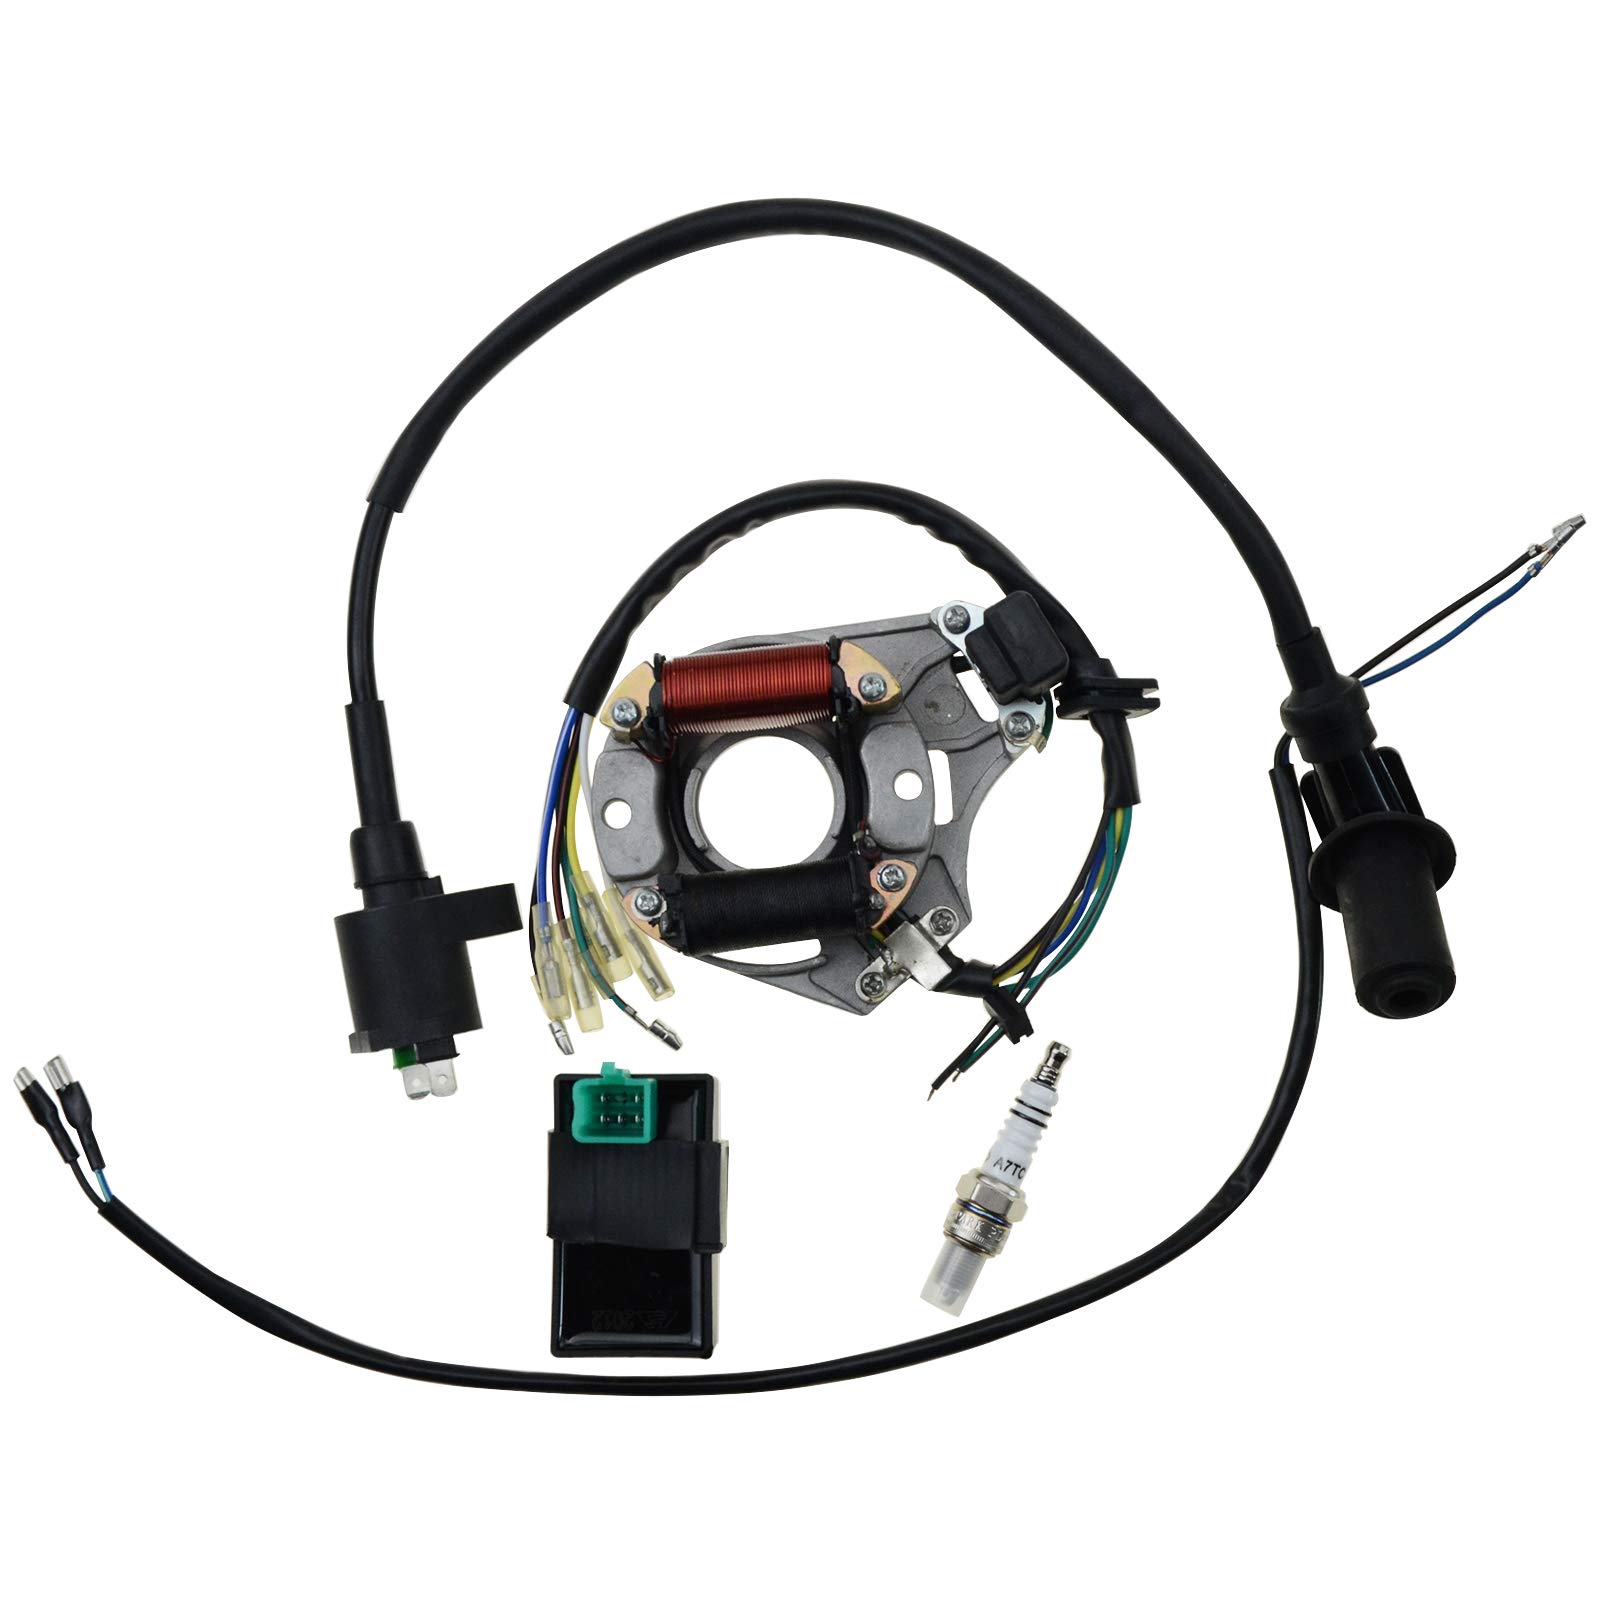
Figure 1: Overview of the GOOFIT Ignition Rebuild Kit components.
2. Compatibility
The GOOFIT Ignition Rebuild Kit (Model Group-2) is compatible with the following vehicle types and engine displacements:
- Engine Type: 4-stroke horizontal engines, 49cc to 125cc displacement.
- Vehicle Types: 50cc, 70cc, 90cc, 110cc, 125cc, 140cc Quad Bikes, ATVs, Buggies, and Go Karts.
- Specific Pit Bike Models: XRC RF 50, 70; SDG SSR 110; CT70; ST70; Z50; Z50R; Z50 SSR pit bikes.
- General: Most 50-125cc dirt bikes.
Important Note: This kit is not compatible with GY6 engines.

Figure 2: Visual representation of compatible ATV types with the ignition kit.
3. Safety Information
Always prioritize safety when working on any vehicle's electrical system. Failure to follow safety precautions can result in serious injury or damage to the vehicle.
- Disconnect Power: Always disconnect the vehicle's battery before beginning any work on the ignition system to prevent electrical shock or short circuits.
- Wear Protective Gear: Use appropriate personal protective equipment, including safety glasses and gloves.
- Ventilation: Ensure adequate ventilation if working with fuel or other volatile liquids.
- Professional Assistance: If you are unsure about any step of the installation process, consult a qualified mechanic or professional.
- Component Handling: Handle all components carefully. Ignition components can be delicate.
4. Kit Contents
The GOOFIT Ignition Rebuild Kit (Model Group-2) includes the following components:
- 7-Line Stator: This component generates electrical power for the ignition system and charging. It features seven wires for connection.

Figure 3: The 7-line stator.
- 5-Pin CDI (Capacitor Discharge Ignition) Unit: The CDI unit controls the ignition timing, ensuring the spark plug fires at the correct moment for engine combustion. This unit has a 5-pin connector.

Figure 4: The 5-pin CDI unit.
- Ignition Coil: The ignition coil transforms low voltage from the battery into the high voltage required to create a spark at the spark plug.

Figure 5: The ignition coil.
- A7TC Spark Plug: This spark plug is designed to ignite the air-fuel mixture in the engine's combustion chamber.

Figure 6: The A7TC spark plug.
- Two-Wire Wiring: This wiring harness facilitates the connection of specific ignition components.
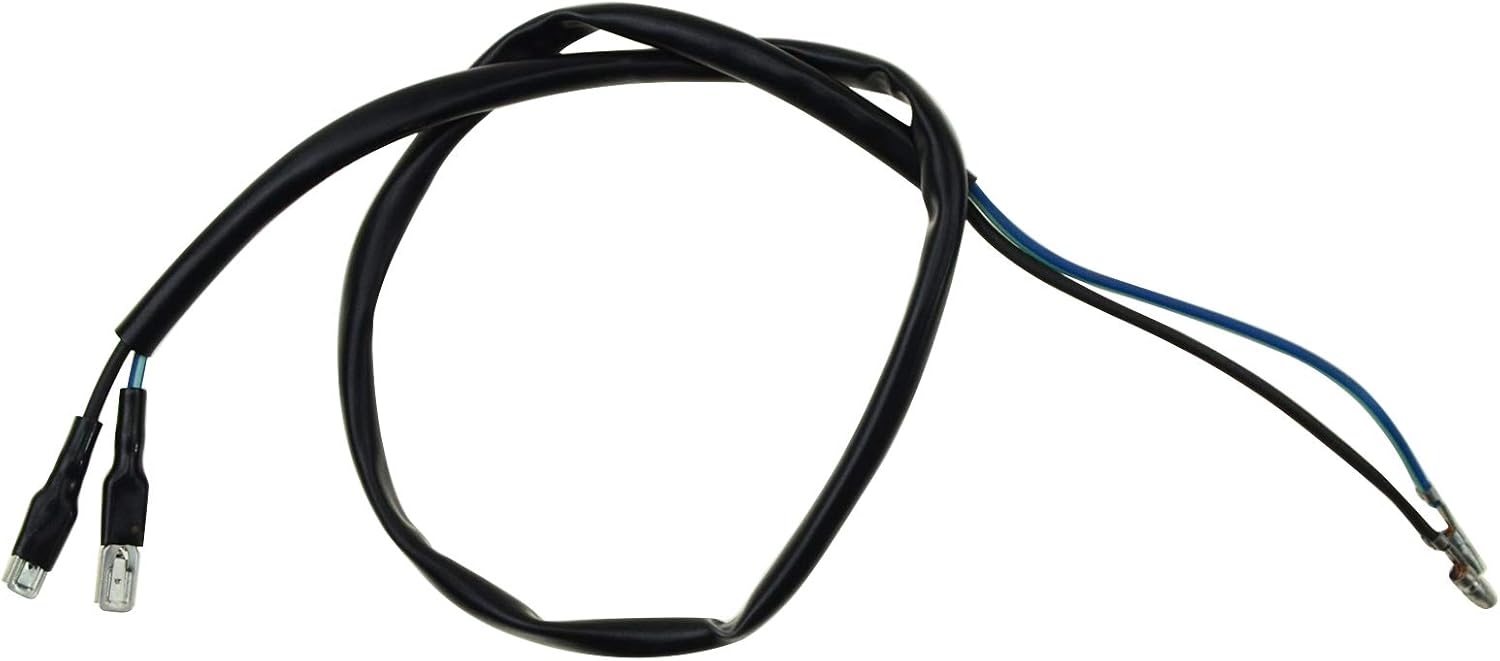
Figure 7: The two-wire wiring harness.
5. Setup and Installation
This section provides general guidance for installing the GOOFIT Ignition Rebuild Kit. Specific steps may vary depending on your vehicle's make and model. Always refer to your vehicle's service manual for detailed instructions.
General Installation Steps:
- Preparation: Ensure the vehicle is turned off and the battery is disconnected. Allow the engine to cool completely. Gather all necessary tools.
- Access Components: Locate the existing stator, CDI unit, ignition coil, and spark plug on your vehicle. You may need to remove fairings, covers, or other components to gain access.
- Remove Old Components: Carefully disconnect the wiring from each old component. Note the routing and connection points. Remove the old stator, CDI, ignition coil, and spark plug.
- Install New Stator: Mount the new 7-line stator in the same position as the old one. Ensure all mounting bolts are securely tightened. Connect the stator wires to the appropriate harness connections.
- Install New CDI Unit: Connect the new 5-pin CDI unit to its corresponding harness. Secure the CDI unit in its designated location.
- Install New Ignition Coil: Mount the new ignition coil and connect its wiring. Ensure the spark plug cap is securely attached to the spark plug wire.
- Install New Spark Plug: Thread the new A7TC spark plug into the cylinder head by hand to prevent cross-threading. Tighten it to the manufacturer's specified torque using a spark plug wrench. Connect the spark plug cap.
- Connect Two-Wire Wiring: Connect the provided two-wire wiring harness as required by your vehicle's specific ignition system configuration.
- Verify Connections: Double-check all electrical connections to ensure they are secure and correctly routed.
- Reassemble: Reinstall any removed fairings, covers, or other components.
- Reconnect Battery: Reconnect the vehicle's battery.
- Test: Start the engine and check for proper operation. Listen for any unusual noises and observe engine performance.

Figure 8: General illustration of ignition component installation.
6. Operating
Once the GOOFIT Ignition Rebuild Kit components are correctly installed, the vehicle's ignition system should function as intended. The kit's purpose is to provide the necessary electrical signals and spark for engine combustion. Proper operation is indicated by the engine starting reliably and running smoothly.
- Ensure all connections are secure before attempting to start the engine.
- If the engine does not start or runs poorly after installation, refer to the Troubleshooting section.
7. Maintenance
Regular inspection and maintenance of your ignition system components can help ensure longevity and reliable performance.
- Spark Plug Inspection: Periodically remove and inspect the spark plug for wear, fouling, or incorrect gap. Replace if necessary according to your vehicle's service schedule.
- Wiring and Connections: Check all wiring and connectors for signs of wear, corrosion, or looseness. Ensure all connections are clean and secure.
- Component Cleanliness: Keep the stator, CDI unit, and ignition coil free from excessive dirt, oil, or moisture.
- Visual Inspection: Regularly inspect all components for any physical damage, cracks, or signs of overheating.
8. Troubleshooting
If you experience issues after installing the GOOFIT Ignition Rebuild Kit, consider the following troubleshooting steps:
| Problem | Possible Cause | Solution |
|---|---|---|
| Engine does not start / No spark | Loose or incorrect wiring connections Faulty spark plug CDI unit not receiving power Stator issue | Check all connections for tightness and correct polarity. Ensure the spark plug cap is fully seated. Test spark plug for spark. Verify power supply to CDI. Inspect stator wiring. |
| Engine misfires or runs rough | Incorrect spark plug gap Fouled spark plug Intermittent wiring connection Ignition coil issue | Check and adjust spark plug gap. Clean or replace spark plug. Inspect wiring for damage or loose connections. Test ignition coil. |
| Engine dies unexpectedly | Loose electrical connection Overheating component Intermittent fault in CDI or coil | Inspect all wiring and connectors. Allow components to cool and retest. If problem persists, test individual components. |
If troubleshooting steps do not resolve the issue, it is recommended to seek assistance from a qualified mechanic.
9. Specifications
Key specifications for the GOOFIT Ignition Rebuild Kit (Model Group-2):
| Specification | Detail |
|---|---|
| Brand | GOOFIT |
| Model Number | Group-2 |
| Manufacturer Part Number | Group-2 |
| UPC / GTIN | 710373791930 |
| Vehicle Service Type | ATV |
| Automotive Fit Type | Universal Fit (for compatible engines) |
| Core Material (Stator) | Brass |
| Top Material Type (CDI) | Plastic |
| Spark Plug Thread Size | 7.6mm |
10. Warranty Information
For specific warranty details regarding your GOOFIT Ignition Rebuild Kit, please refer to the product packaging or the official GOOFIT website. Warranty terms typically cover manufacturing defects for a specified period from the date of purchase. Keep your proof of purchase for any warranty claims.
11. Support
If you require further assistance, have questions about installation, or need to report an issue, please contact GOOFIT customer support through their official channels. This may include their website, email, or customer service phone number, typically found on the product packaging or their official online store page.