1. Introduction
The Motorola RLN6554A Wireless Remote Speaker Microphone (RSM) provides convenient and secure communication for mission-critical users. Designed for use with Motorola APX series radios, this wireless accessory offers enhanced security, quick pairing, and fast Push-To-Talk (PTT) capabilities. Its robust design ensures reliable performance in demanding environments, allowing users to operate without the hindrance of wires.
Key features include large, recessed PTT and emergency buttons to prevent accidental activation, easy quick-touch pairing with voice prompts, and a user-removable battery (PMNN4461) for extended multi-shift usage. The RSM also features volume control, an audio jack for earpieces, a 360-degree rotatable clip, and a task light for low-light conditions.
2. What's in the Box
Verify that all items are present upon unpacking your Motorola RLN6554A Wireless Remote Speaker Microphone package:
- Motorola RLN6554A Wireless Remote Speaker Microphone
- Rechargeable Battery (PMNN4461)
- Dual Unit Charger (PMLN6714)
- Power Adapter for Charger
- Swivel Clip
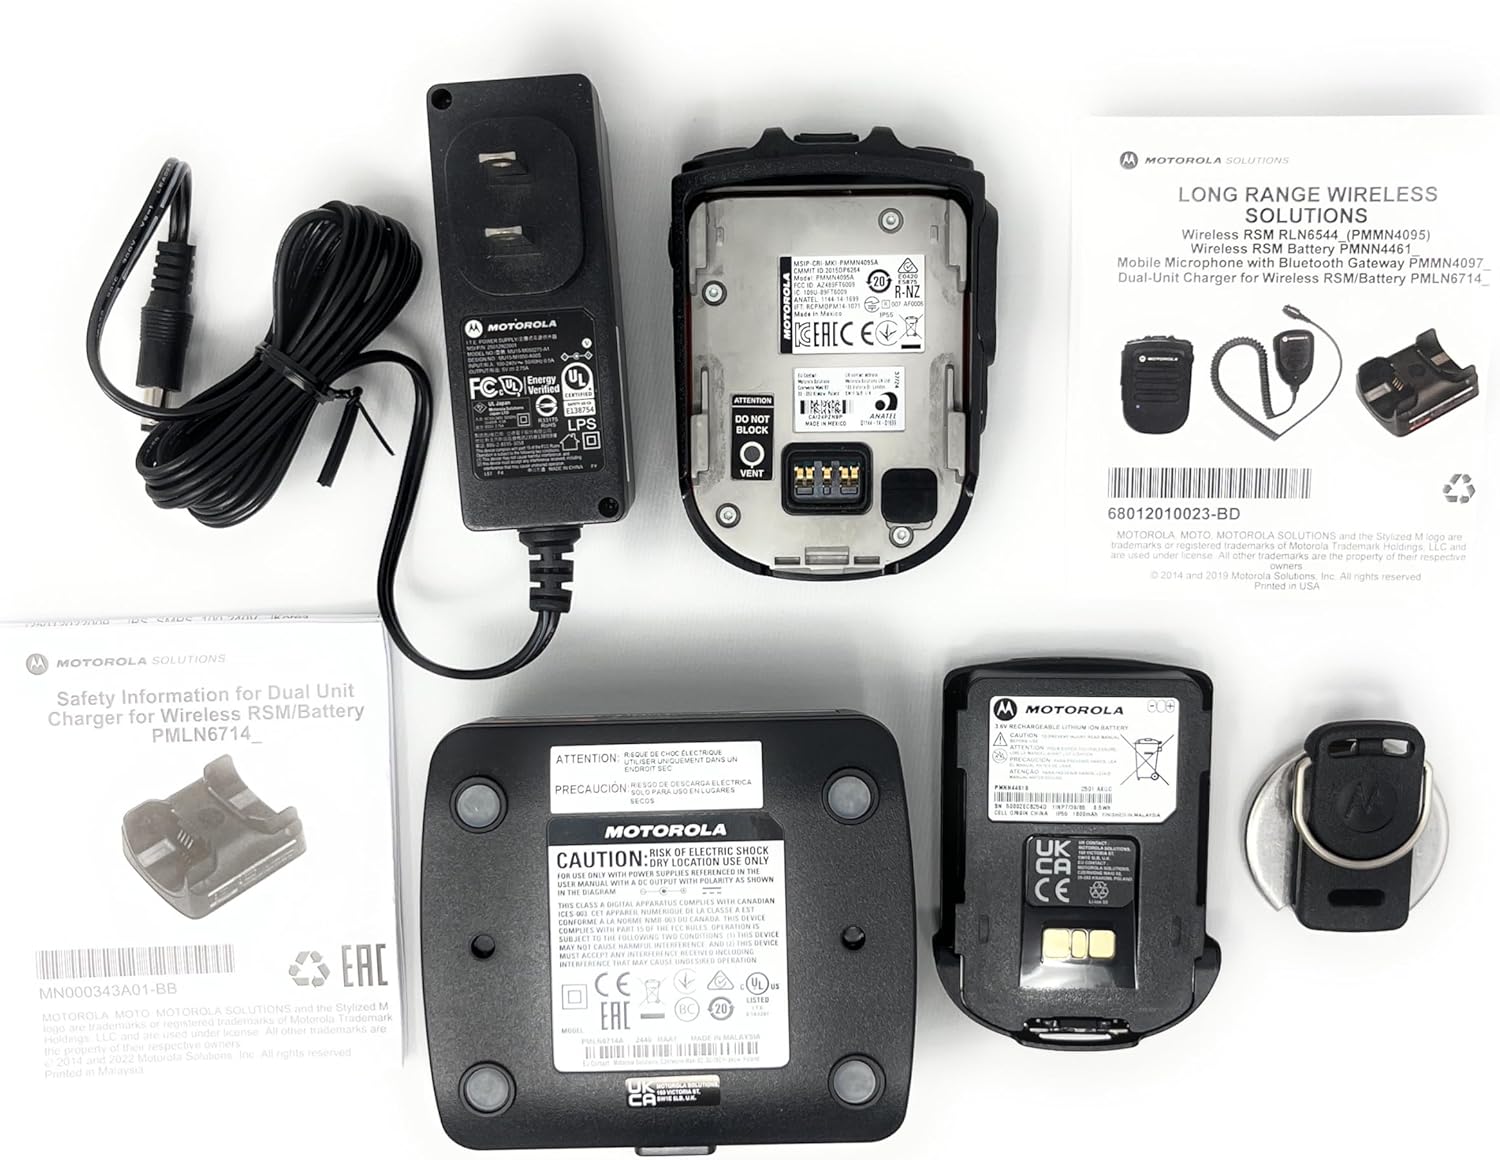
Image 1: Package contents of the RLN6554A Wireless Remote Speaker Microphone. This includes the RSM unit, a dual-unit charger, a power adapter, and a rechargeable battery.
3. Setup
3.1. Battery Installation
- Ensure the RSM is powered off.
- Locate the battery compartment on the back of the RSM.
- Align the battery (PMNN4461) with the compartment contacts.
- Gently push the battery into place until it clicks securely.
- Close the battery compartment cover, if applicable, ensuring it is latched.
3.2. Charging the Battery
Before first use, fully charge the battery. The dual unit charger (PMLN6714) is designed for this purpose.
- Connect the power adapter to the dual unit charger and plug it into a power outlet.
- Place the RSM with the installed battery into one of the charger pockets.
- Observe the charging indicator light on the charger. It typically glows red during charging and green when fully charged.
- A full charge may take several hours.

Image 2: Rear view of the RLN6554A RSM, illustrating the battery compartment and contacts for charging.
3.3. Pairing with Your Radio
The RLN6554A uses Bluetooth for wireless communication. Ensure your Motorola APX series radio has Bluetooth enabled before attempting to pair.
- Enable Bluetooth on Radio: Access your APX radio's menu and ensure Bluetooth is turned on. Refer to your radio's user manual for specific instructions.
- Power On RSM: Press and hold the power button on the RSM until it powers on.
- Initiate Pairing: The RSM supports quick-touch pairing. Bring the RSM close to your radio (typically within a few inches). The RSM will provide voice prompts confirming pairing actions.
- Confirm Pairing: Your radio may display a prompt to confirm the connection. Accept the pairing request. The RSM will indicate successful pairing, often with a voice prompt or LED indicator change.
- Test Connection: Perform a radio check to ensure audio transmission and reception are functioning correctly through the RSM.
4. Operating Instructions
4.1. Push-To-Talk (PTT) Button
- To transmit, press and hold the large, recessed PTT button located on the side of the RSM.
- Speak clearly into the microphone.
- Release the PTT button to listen.
4.2. Volume Control
The RSM features dedicated volume control buttons. Use these to adjust the speaker volume of the RSM independently of the radio's main volume.
- Press the Volume Up button to increase the audio output.
- Press the Volume Down button to decrease the audio output.
4.3. Emergency Button
The recessed emergency button is designed to prevent accidental activation. Consult your radio's programming and your organization's protocols for the specific function of this button.
- To activate the emergency function, press and hold the emergency button for the duration specified by your radio's programming.
4.4. Task Light
The integrated task light assists in reading documents or identifying objects in low-light conditions.
- Locate the task light button on the RSM.
- Press the button to turn the task light on or off.
4.5. Earpiece Connection
The RSM includes an audio jack for connecting compatible earpieces (e.g., RLN4941, AARLN4885) for private listening.
- Insert the earpiece's 3.5mm connector into the audio jack on the RSM.
- Audio will automatically route to the earpiece when connected.
5. Maintenance
5.1. Cleaning
- Wipe the exterior of the RSM with a soft, damp cloth.
- Do not use harsh chemicals, solvents, or abrasive cleaners.
- Ensure the RSM is completely dry before use or charging.
5.2. Battery Care
- Use only genuine Motorola PMNN4461 batteries and the provided dual unit charger.
- Avoid exposing the battery to extreme temperatures.
- If the RSM will not be used for an extended period, remove the battery and store it in a cool, dry place.
- Replace the battery when its operating time significantly decreases.
6. Troubleshooting
| Problem | Possible Cause | Solution |
|---|---|---|
| RSM does not power on. | Battery is depleted or not installed correctly. | Charge the battery. Ensure the battery is properly seated in the compartment. |
| Cannot pair RSM with radio. | Bluetooth is off on the radio; RSM is out of range; previous pairing conflict. | Ensure radio Bluetooth is enabled. Bring RSM closer to the radio. Try unpairing and re-pairing both devices. |
| No audio from RSM speaker. | Volume is too low; earpiece is connected; RSM is not paired. | Increase RSM volume. Disconnect earpiece if not needed. Verify RSM is paired with the radio. |
| Audio is distorted or intermittent. | Out of Bluetooth range; interference; low battery. | Move closer to the radio. Avoid sources of strong electromagnetic interference. Charge the battery. |
| Task light not working. | Low battery; malfunction. | Charge the battery. If the issue persists, contact support. |
7. Specifications
| Model Name | RLN6554A |
| Brand | Motorola |
| Connectivity Technology | Bluetooth |
| Microphone Form Factor | Handheld |
| Polar Pattern | Omnidirectional |
| Number of Channels | 1 |
| Power Source | Battery Powered |
| Battery Type | Lithium Ion (PMNN4461) |
| Material | Metal, Plastic |
| Item Weight | 1.3 Pounds (approximately 0.59 kg) |
| Package Dimensions | 9.65 x 8.35 x 3.19 inches |
| Signal-to-Noise Ratio | 80 dB |
| Special Feature | Clip, Task Light |
| Compatible Devices | Motorola APX 1000, 3000, 4000, 6000, 7000 Series Radios |
8. Compatibility
The Motorola RLN6554A Wireless Remote Speaker Microphone is designed for seamless integration with the following Motorola APX series radios:
- APX 1000 Series
- APX 3000 Series
- APX 4000 Series
- APX 6000 Series
- APX 7000 Series
It is also compatible with earpieces such as the RLN4941 and AARLN4885, which can be connected via the integrated audio jack.
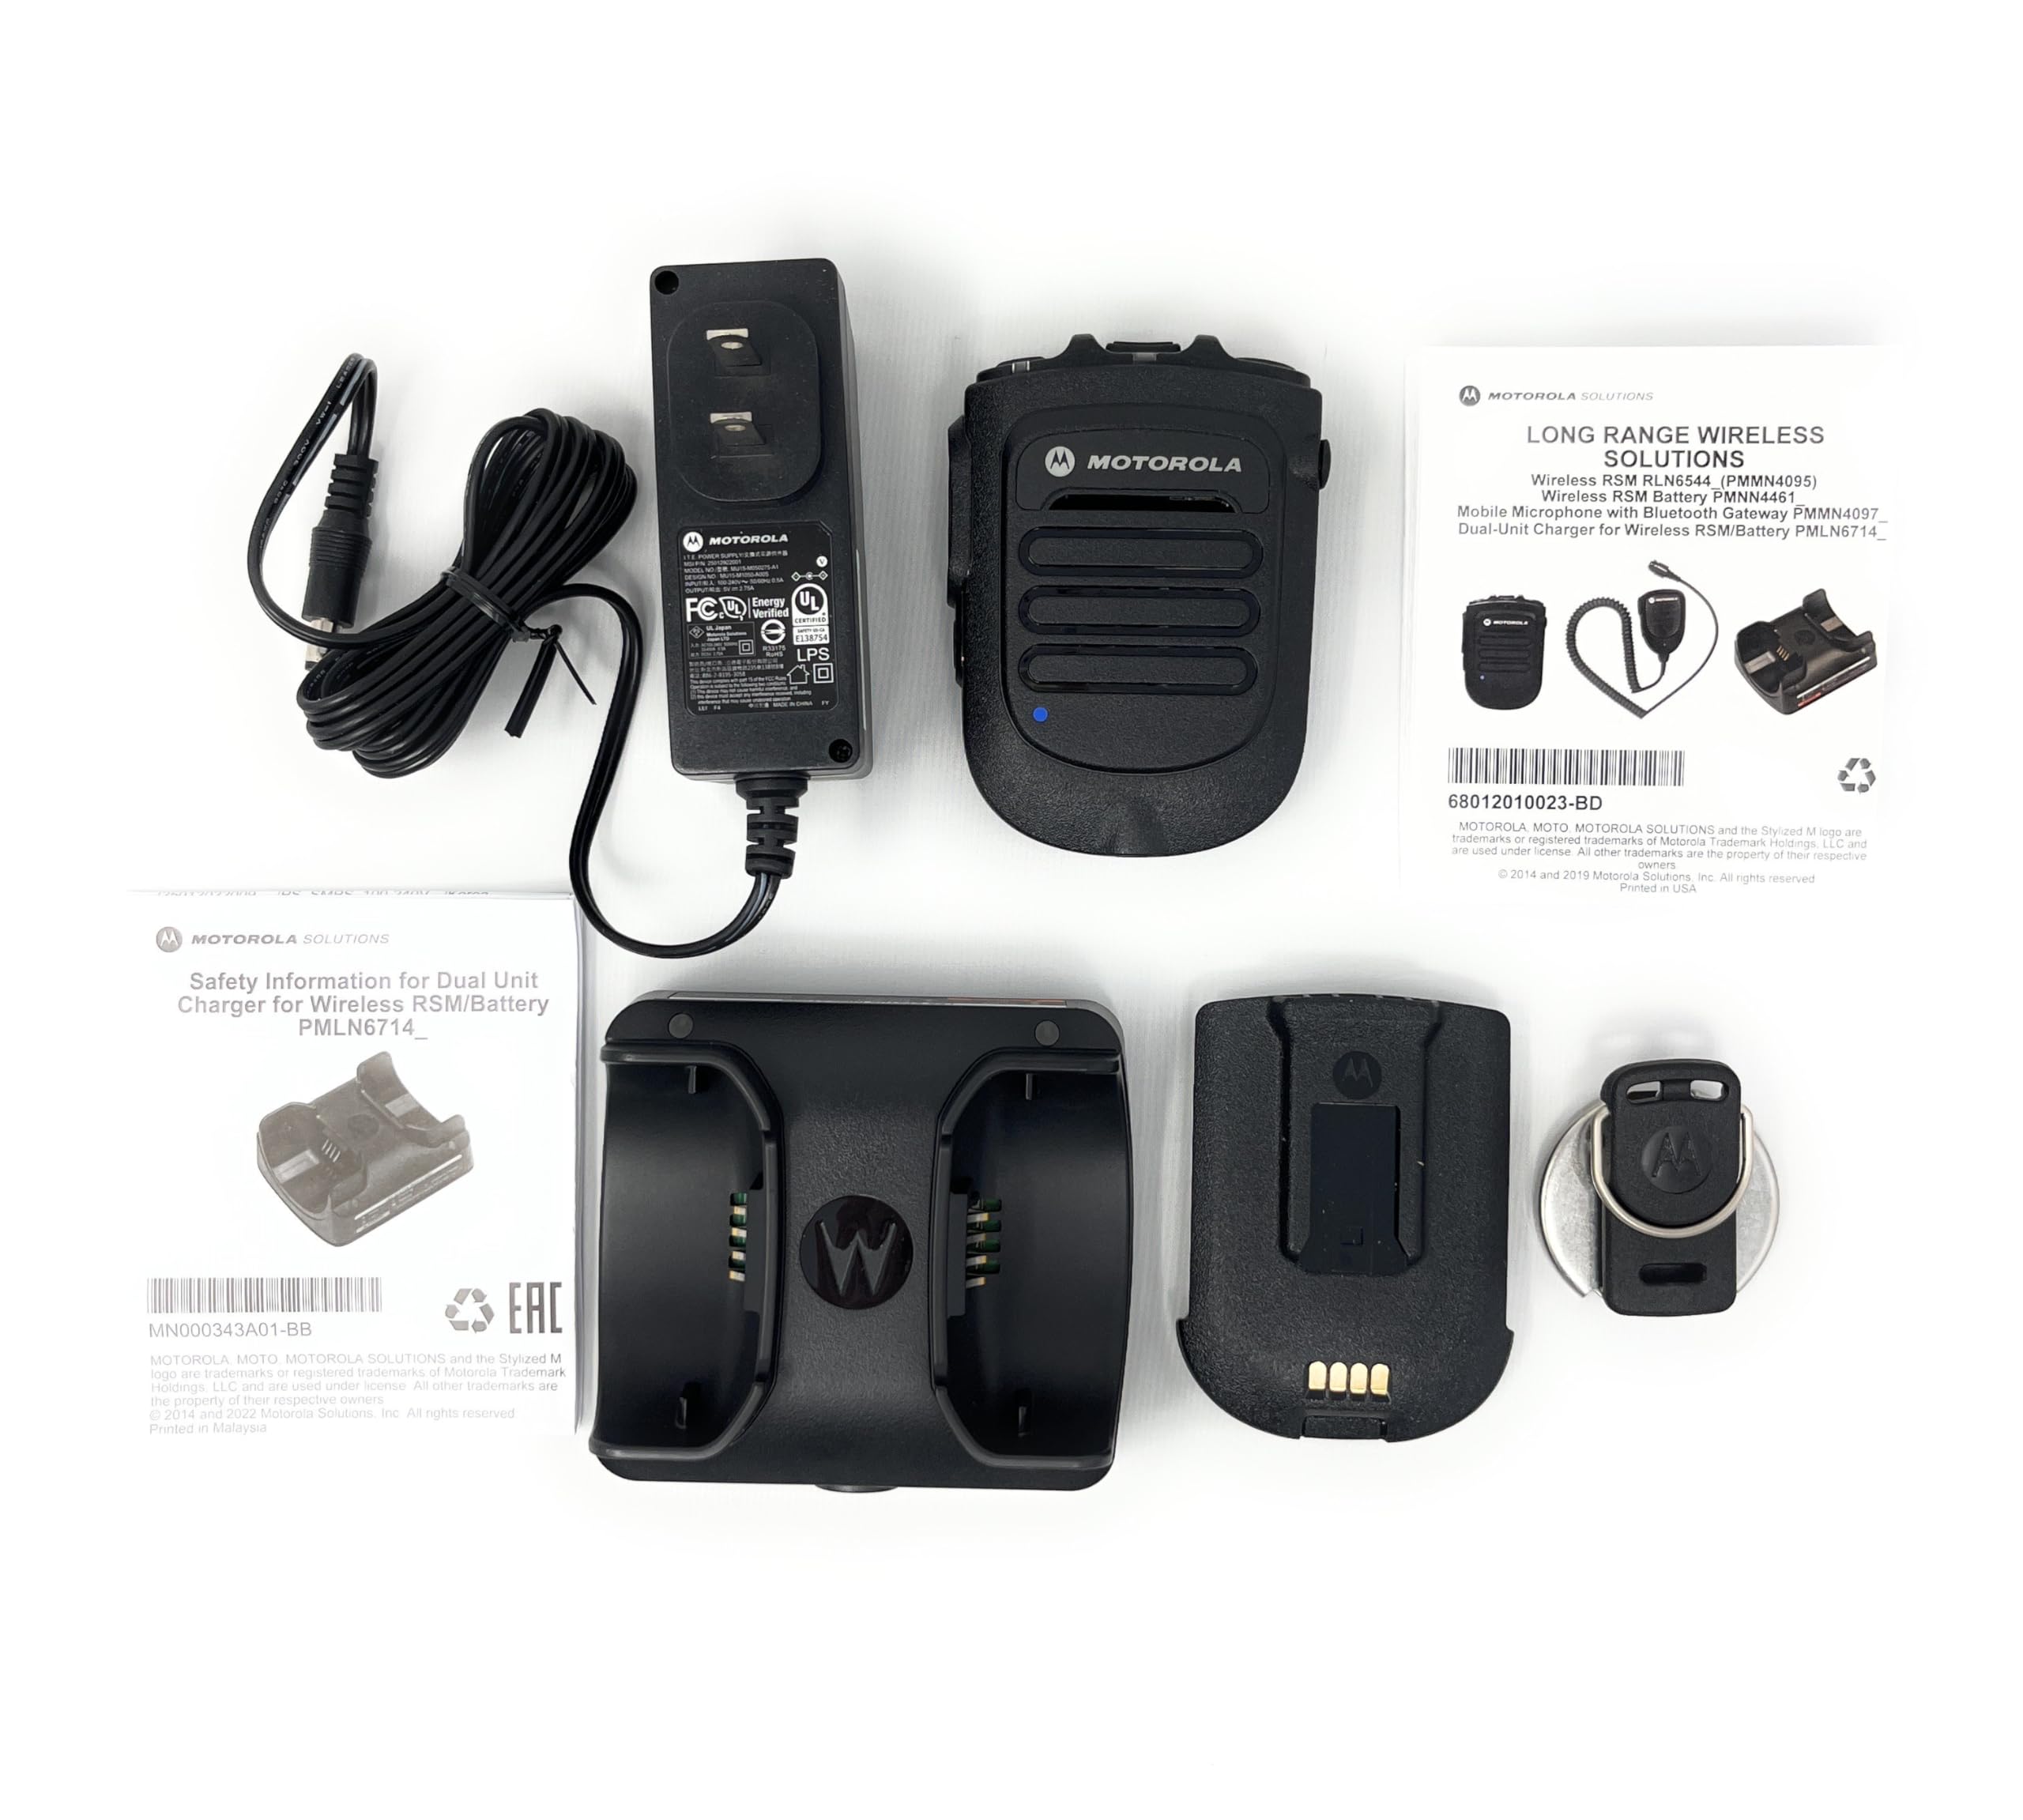
Image 3: Example of Motorola APX series radios, which are compatible with the RLN6554A Wireless Remote Speaker Microphone.
9. Warranty and Support
For warranty information and technical support, please refer to the official Motorola Solutions website or contact your authorized Motorola dealer. Keep your purchase receipt as proof of purchase for warranty claims.
Online resources and contact information can typically be found at the Motorola Solutions website.