
1. Introduction
This manual provides detailed instructions for the installation, operation, and maintenance of the HIFROM carburetor replacement for Honda ATC110 three-wheelers manufactured between 1979 and 1985. Please read all instructions carefully before proceeding with installation.
2. Safety Information
WARNING: Always prioritize safety when working with fuel systems and engine components. Failure to follow safety precautions can result in serious injury or damage.
- Ensure the engine is cool before beginning any work.
- Disconnect the spark plug wire to prevent accidental engine starting.
- Turn off the fuel supply valve and disconnect the fuel line.
- Work in a well-ventilated area to avoid inhaling fuel fumes.
- Keep open flames, sparks, and other ignition sources away from the work area.
- Wear appropriate personal protective equipment, including gloves and eye protection.
- Dispose of fuel and old parts according to local regulations.
3. Compatibility
This HIFROM carburetor is designed as a direct replacement for the following Honda ATC110 models:
- Honda ATC110 (1979)
- Honda ATC110 (1980)
- Honda ATC110 (1981)
- Honda ATC110 (1982)
- Honda ATC110 (1983)
- Honda ATC110 (1984)
- Honda ATC110 (1985)
It is compatible with 4-stroke engines. Please verify your machine's model and year before installation.
4. Specifications
| Model Number | ATV110 carb |
| Brand | HIFROM |
| Vehicle Service Type | ATV |
| Choke Type | Hand Choke |
| Air Filter Mount | 40mm |
| Bolt Hole Spacing | 48mm |
| Intake Diameter | 22mm |
| Flange Type | Bolt On |
| Item Weight | 1.15 pounds |
| Package Dimensions | 5.31 x 5.31 x 2.99 inches |
Refer to the image below for visual reference of the air filter mount dimension.

Figure 1: Carburetor with 40mm air filter mount measurement indicated.
5. Installation (Setup)
Follow these steps to replace your carburetor. It is recommended to consult a service manual for your specific Honda ATC110 model for detailed diagrams and torque specifications.
- Prepare the Vehicle: Ensure the engine is off and cool. Turn the fuel valve to the OFF position. Disconnect the spark plug wire.
- Access the Carburetor: Remove any covers, air filter housing, or other components obstructing access to the existing carburetor.
- Disconnect Fuel Line: Carefully disconnect the fuel line from the old carburetor. Be prepared for some fuel spillage and have a suitable container to catch it.
- Disconnect Cables: Disconnect the throttle cable and choke cable from the old carburetor. Note their routing for reinstallation.
- Remove Old Carburetor: Unbolt the old carburetor from the intake manifold. Ensure all gaskets are removed.
- Inspect and Prepare: Clean the intake manifold surface. Ensure new gaskets (if supplied) are correctly positioned.
- Install New Carburetor: Mount the new HIFROM carburetor onto the intake manifold, ensuring a snug fit. Tighten bolts evenly to prevent leaks.
- Reconnect Cables: Reconnect the throttle cable and choke cable. Note: Some users have reported that the plunger cap's neck might be shorter than the stock throttle cable. Adjustments or alternative cable routing may be necessary.
- Reinstall Metal Guard: If your original carburetor had a metal guard around the choke lever, it is recommended to transfer and install it on the new carburetor to prevent damage from starter recoil.
- Reconnect Fuel Line: Reconnect the fuel line securely.
- Reinstall Air Filter: Reinstall the air filter housing and air filter.
- Initial Adjustments: Before starting, ensure the throttle operates smoothly without sticking.

Figure 2: Top-down view of the HIFROM carburetor, showing fuel inlet and choke lever.
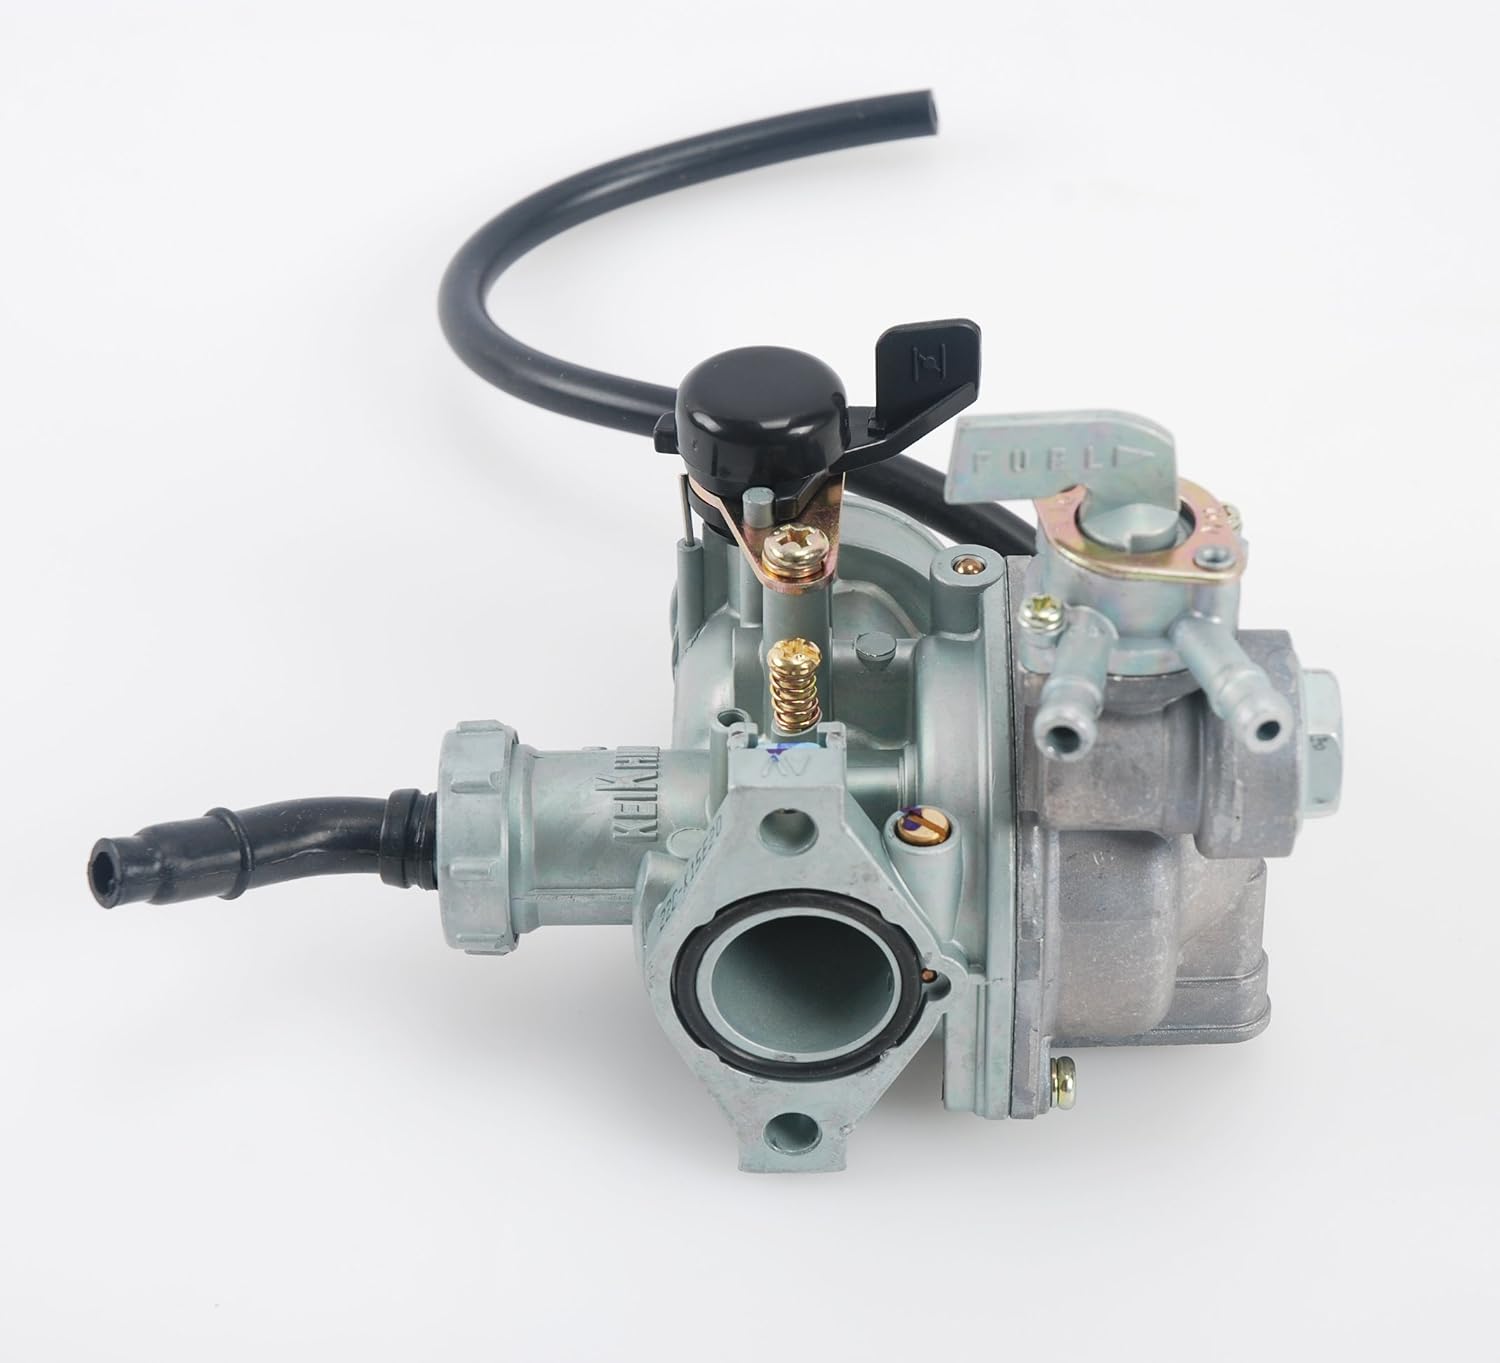
Figure 3: Front view of the HIFROM carburetor, showing the intake opening.
6. Operating
After installation, perform the following steps to start and operate your vehicle:
- Turn on Fuel: Open the fuel supply valve.
- Choke: Apply the choke as needed for cold starts.
- Start Engine: Reconnect the spark plug wire and start the engine.
- Warm-up: Allow the engine to warm up, gradually disengaging the choke.
- Idle Adjustment: Adjust the idle speed screw (if necessary) to achieve a stable idle.
- Throttle Response: Test throttle response to ensure smooth acceleration and deceleration.
7. Maintenance
Regular maintenance helps ensure optimal performance and longevity of your carburetor:
- Fuel Quality: Always use fresh, clean fuel. Stale or contaminated fuel can clog carburetor passages.
- Fuel Filter: Regularly check and replace the fuel filter to prevent debris from reaching the carburetor.
- Air Filter: Keep the air filter clean to ensure proper air-fuel mixture. A dirty air filter can cause rich running conditions.
- Periodic Cleaning: If performance issues arise, the carburetor may require cleaning. This typically involves disassembling, cleaning with carburetor cleaner, and reassembling with new gaskets if necessary.
8. Troubleshooting
If you encounter issues after installing the new carburetor, consider the following common problems and solutions:
| Problem | Possible Cause | Solution |
|---|---|---|
| Engine runs poorly or lacks power | Main jet size may be incorrect for Honda 110s. | The carburetor is supplied with a #78 main jet. For optimal performance on Honda 110s, a larger main jet may be required. Consult a service manual for recommended jetting. |
| Choke lever breaks easily | Damage from starter recoil. | Ensure the original metal guard from your old carburetor is installed over the new choke lever to provide protection. |
| Throttle cable does not fit properly | Plunger cap neck is too short for stock throttle cable. | Adjust throttle cable routing or consider a compatible throttle cable if necessary. |
| Fuel leaks | Improper gasket installation, loose connections, or damaged float. | Check all fuel line connections and ensure gaskets are properly seated and not damaged. Inspect the float and needle valve for proper operation. |
| Engine will not start | No fuel, no spark, or incorrect air-fuel mixture. | Verify fuel supply, check spark plug, ensure choke is set correctly, and inspect for vacuum leaks. |
9. Technical Support & Returns
For technical assistance or if you have questions regarding the product, professional technical support is available. If you are not satisfied with the product, you may return it to our USA warehouse. Please refer to your purchase documentation for specific return procedures and contact information.