Epson P600
Epson SureColor P600 Inkjet Printer User Manual
Model: P600 (C11CE21201)
Introduction
This manual provides detailed instructions for the setup, operation, maintenance, and troubleshooting of your Epson SureColor P600 Inkjet Printer. Designed for professional-quality photo and fine art printing, this printer offers advanced features and versatile media handling capabilities.

Figure 1: Front view of the Epson SureColor P600 Inkjet Printer.
Setup
Unpacking and Initial Setup
- Carefully remove the printer from its packaging. Retain all packing materials for future transport or storage.
- Remove all protective tapes and packing materials from the exterior and interior of the printer. Refer to the quick start guide for specific locations.
- Place the printer on a stable, flat surface with adequate space around it for operation and ventilation.
- Connect the power cable to the printer and then to a grounded electrical outlet.
- Install the nine UltraChrome HD ink cartridges into their respective slots. Ensure each cartridge clicks into place.
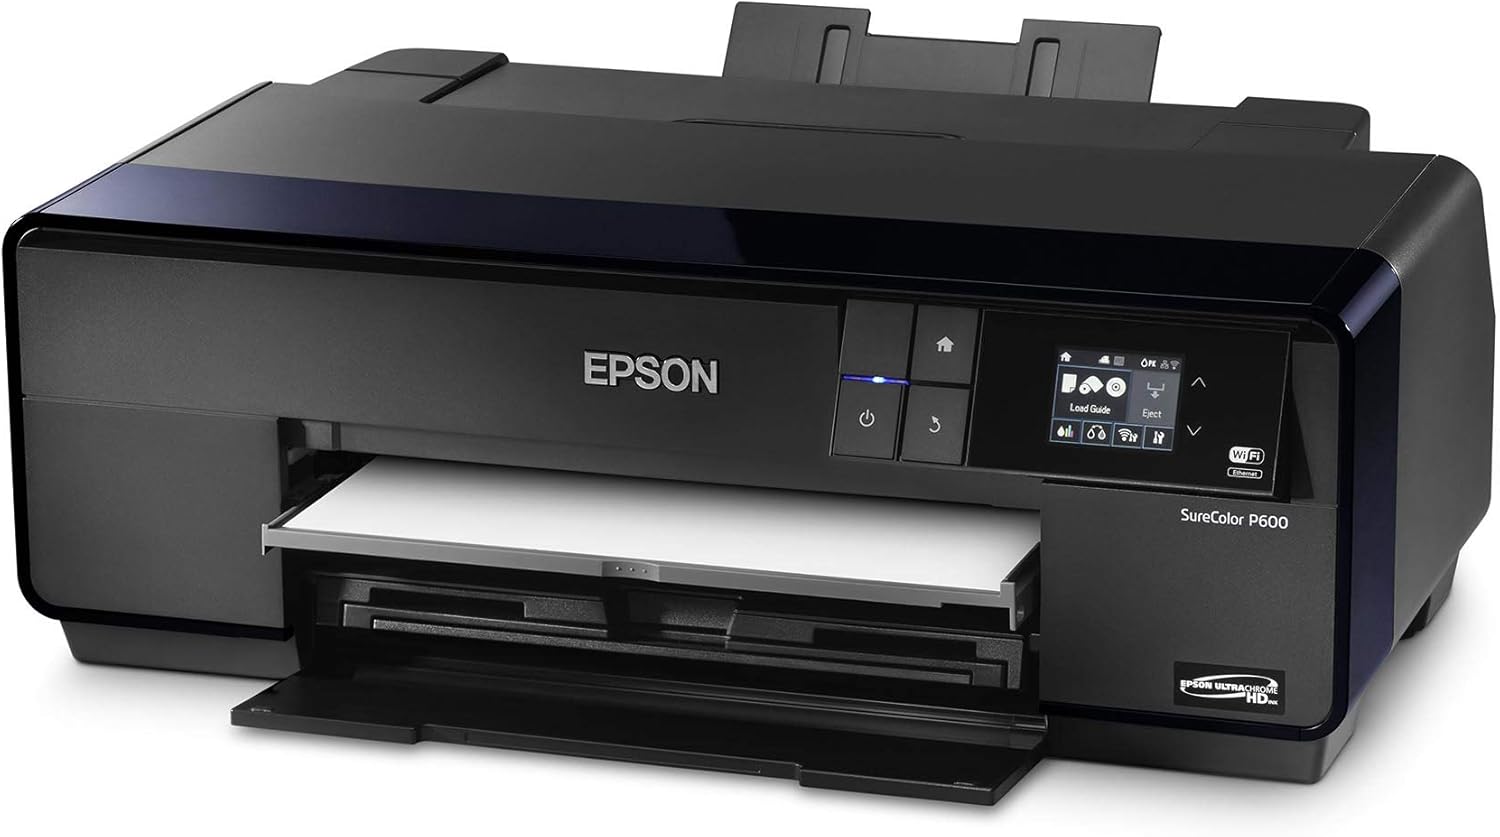
Figure 2: The front tray opened to access ink cartridge slots for installation.
Software and Connectivity
- Driver Installation: Insert the Printer Documentation CD-ROM into your computer or download the latest drivers and software from the official Epson support website. Follow the on-screen instructions for installation.
- Network Connection:
- Wi-Fi: Use the printer's 3.5-inch LCD control panel to navigate to the network settings. Select your Wi-Fi network and enter the password. The printer supports IEEE 802.11n.
- Ethernet: Connect an Ethernet cable from your printer to your network router or switch.
- USB: Connect a USB 2.0 cable directly from your printer to your computer.
- Mobile Device Printing: The printer supports Epson iPrint, Apple AirPrint, and Google Cloud Print for convenient printing from compatible mobile devices.
Operating the Printer
Loading Paper and Media
The SureColor P600 supports a wide range of media types and sizes. Ensure you load the correct media for your printing needs.
- Standard Input Tray: Load up to 120 sheets of plain paper or photo paper (up to 13" x 19") into the rear auto-sheet feeder. Adjust the paper guides to fit the media width.
- Manual Feed Slot: For thicker media like fine art paper or canvas, use the single-sheet manual feed slot.
- Roll Paper: Attach the optional roll paper holders and feed roll media through the designated path for panoramic prints.
- CD/DVD Tray: Use the included CD/DVD tray for direct printing onto compatible discs.

Figure 3: Paper loaded into the rear auto-sheet feeder.

Figure 4: Printer with paper loaded and output trays extended, ready for printing.
Printing Documents and Photos
To achieve optimal print quality, configure your print settings according to the media type and desired output.
- Open the document or image you wish to print on your computer or mobile device.
- Select the print option from your application.
- Choose the Epson SureColor P600 as your printer.
- Adjust print settings such as paper size, media type (e.g., Glossy Photo Paper, Fine Art Paper), print quality (up to 5760 x 1440 dpi), and duplex printing (automatic).
- Confirm settings and initiate the print job.

Figure 5: The Epson SureColor P600 in operation, producing a high-quality print.
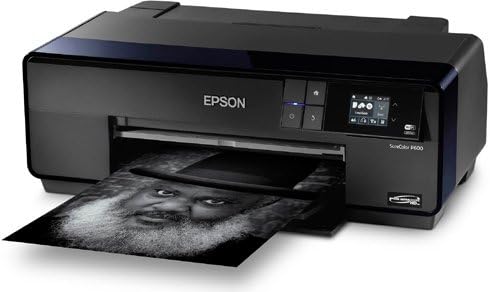
Figure 6: A black and white print being produced by the Epson SureColor P600, showcasing its versatility.

Figure 7: A selection of Epson Legacy Papers, demonstrating the printer's compatibility with diverse media types for professional results.
Official Product Video: Print Your Legacy
Video 1: "Print Your Legacy" - This video highlights the importance of creating physical prints to preserve photographic work and legacy. It showcases the quality and impact of prints made with Epson technology.
Maintenance
Ink Cartridge Replacement
The printer uses nine individual UltraChrome HD ink cartridges. Replace cartridges when prompted by the printer's LCD screen or software.
- Ensure the printer is powered on.
- Open the ink cartridge cover.
- Press the tab on the empty cartridge to release it, then pull it straight out.
- Unpack the new cartridge and shake it gently before inserting it firmly into the correct slot until it clicks.
- Close the ink cartridge cover. The printer will begin initializing the new ink.
Print Head Cleaning
If you notice banding, missing colors, or blurry prints, perform a print head cleaning. This can be done via the printer's control panel or through the printer driver software on your computer.
- From Printer: Navigate to Maintenance or Setup on the LCD panel, then select Head Cleaning.
- From Computer: Access printer properties/preferences, go to the Maintenance tab, and select Head Cleaning.
- Perform a Nozzle Check pattern print after cleaning to verify improvement. Repeat if necessary.
General Cleaning
Regularly clean the exterior of the printer with a soft, damp, lint-free cloth. Avoid using abrasive cleaners or solvents.
Troubleshooting
This section addresses common issues you might encounter with your Epson SureColor P600 printer.
| Problem | Possible Cause | Solution |
|---|---|---|
| Faded or Streaky Prints | Clogged print head nozzles, low ink levels, incorrect media type setting. | Perform a Nozzle Check and Head Cleaning. Replace low ink cartridges. Verify media type setting in print driver. |
| Paper Jams | Improper paper loading, too much paper loaded, foreign object in paper path. | Remove jammed paper carefully. Ensure paper is loaded correctly and not exceeding capacity. Check for obstructions. |
| Printer Not Responding | Loose cable connection, incorrect network settings, printer offline. | Check USB/Ethernet cable connections. Verify Wi-Fi connection. Ensure printer is online and selected as default. Restart printer and computer. |
| "Ink Cartridge Not Recognized" Error | Cartridge not installed correctly, faulty cartridge. | Remove and reinsert the cartridge firmly. If the error persists, try a new genuine Epson cartridge. |
Specifications
| Feature | Detail |
|---|---|
| Printing Technology | Advanced MicroPiezo AMC print head with ink-repelling coating technology |
| Ink Type | Epson UltraChrome HD pigment ink (9-color) |
| Maximum Print Resolution | 5760 x 1440 optimized dpi |
| Minimum Ink Droplet Size | 2.0 picoliters |
| Print Speed (Color) | Approx. 20 seconds for an 8" x 10" photo |
| Media Sizes Supported | Up to 13" x 19" (Super B/A3+), Roll Paper (13" wide) |
| Paper Capacity | Rear auto-sheet feeder: 120 sheets (plain paper), 30 sheets (photo paper) |
| Duplex Printing | Automatic (supports plain paper) |
| Connectivity | Hi-Speed USB 2.0, 100Base-T Ethernet, Wi-Fi (802.11n), Wi-Fi Direct |
| Display | 3.5-inch color LCD |
| Dimensions (W x D x H) | 24.2" x 32" x 16.7" (printing) / 24.2" x 14.5" x 9.8" (storage) |
| Weight | 33.5 lb (41.3 lbs shipping weight) |
| Power Consumption | Printing: Approx. 21 W; Sleep Mode: Less than 3.5 W |
| Operating System Support | Windows 8/7 (32-bit, 64-bit), Mac OS X 10.7.x, 10.8.x, 10.9.x |
Warranty and Support
Warranty Information
Epson provides a limited warranty for the SureColor P600 printer. Specific warranty terms and conditions are typically included with your product documentation at the time of purchase. Please refer to the warranty card or contact Epson support for details regarding coverage, duration, and service procedures.
Additional Resources
- Official User Guide (PDF): For a more detailed and comprehensive guide, you can download the official PDF user guide from the Epson support website or access it via this direct link: Epson SureColor P600 User Guide
- Epson Support Website: Visit the official Epson support website for FAQs, driver downloads, software updates, and contact information for technical assistance.