Product Overview
The Grodan Hydro Flow 45 Degree Dripper with Wingpeg Stop is an essential component for efficient and precise irrigation systems, particularly in hydroponic or soil-based growing environments. Designed to deliver a consistent and light emission of water, this dripper helps maintain optimal moisture levels for plant growth.
Its unique 45-degree angled design minimizes sharp bends in irrigation tubing, significantly reducing the risk of kinks and clogs, which are common issues in drip irrigation setups. The integrated wingpeg ensures stable placement within the growing medium or pot.
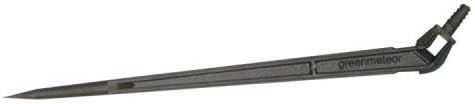
Image: A single Grodan Hydro Flow 45 Degree Dripper, dark gray in color, featuring a pointed stake end, a central body with "greenmeteor" embossed, and a 45-degree angled barb fitting for tubing connection at the top.
Setup and Installation
Proper installation of the Grodan Hydro Flow Dripper ensures optimal performance and longevity of your irrigation system.
Required Materials:
- Grodan Hydro Flow 45 Degree Drippers
- 3/16 inch ID (Inner Diameter) irrigation tubing
- Main irrigation line (e.g., 1/2 inch or 3/4 inch poly tubing)
- Hole punch tool for irrigation tubing (optional, but recommended)
- Growing medium or plant container
Installation Steps:
- Prepare Tubing: Cut the 3/16 inch ID irrigation tubing to the desired length, ensuring it reaches from your main irrigation line to the intended dripper location at each plant.
- Connect to Main Line: Using a hole punch tool, create a small hole in your main irrigation line at the desired point for each dripper. Insert one end of the 3/16 inch ID tubing into this hole. Ensure a snug fit to prevent leaks.
- Attach Dripper: Firmly push the barb end of the Grodan Hydro Flow Dripper into the other end of the 3/16 inch ID tubing. The 45-degree angle is designed to reduce kinks, so ensure the tubing follows this natural bend.
- Position Dripper: Insert the pointed stake end of the dripper into the growing medium near the base of the plant. The wingpeg helps stabilize the dripper and prevent it from shifting.
- Test System: Once all drippers are installed, turn on your irrigation system to check for proper water flow and any leaks. Adjust connections as necessary.
Operation
The Grodan Hydro Flow Dripper operates passively as part of your drip irrigation system. Its primary function is to deliver water directly to the root zone of your plants.
Water Flow:
- The dripper is designed for a light emission of water, suitable for regular top drip irrigation.
- The flow rate is determined by the water pressure in your main irrigation line and the specific design of the dripper.
- Monitor your plants and growing medium to ensure adequate hydration. Adjust irrigation duration or frequency based on plant needs and environmental conditions.
Optimizing Performance:
- Ensure the main irrigation line is free from debris that could enter the smaller tubing.
- Avoid excessive water pressure, which can lead to premature wear or dislodgement of drippers.
Maintenance
Regular maintenance helps ensure the longevity and efficiency of your Grodan Hydro Flow Drippers.
Routine Checks:
- Inspect for Clogs: Periodically check each dripper for consistent water output. If a dripper is not emitting water, it may be clogged.
- Check Tubing: Ensure the 3/16 inch ID tubing connected to the dripper is not kinked or pinched, which can restrict water flow. The 45-degree angle of the dripper is specifically designed to minimize this.
- Examine for Damage: Look for any physical damage to the dripper or tubing, such as cracks or breaks, which could lead to leaks.
Cleaning Clogged Drippers:
- Disconnect: Carefully disconnect the dripper from the 3/16 inch ID tubing.
- Flush: Attempt to flush the dripper by running water through it in reverse, if possible.
- Soak: For stubborn clogs, soak the dripper in a mild acid solution (e.g., vinegar) or a specialized irrigation system cleaner to dissolve mineral deposits or organic matter. Rinse thoroughly after soaking.
- Replace: If a dripper remains clogged or is damaged, it is best to replace it to maintain system efficiency.
System Filtration:
Using a proper filter in your main irrigation line is highly recommended to prevent sediment and debris from reaching and clogging the drippers.
Troubleshooting
| Problem | Possible Cause | Solution |
|---|---|---|
| No water flow from dripper | Clogged dripper; Kinked or pinched tubing; Insufficient water pressure; Main line blockage | Clean or replace dripper; Straighten tubing; Check water supply and pressure regulator; Inspect main line filter and flush. |
| Uneven water distribution | Varying pressure across system; Partially clogged drippers; Incorrect dripper placement | Ensure consistent pressure; Clean all drippers; Adjust dripper positions for even coverage. |
| Leaks at connections | Loose connection; Damaged tubing or dripper barb | Ensure tubing is fully seated on barb; Replace damaged components. |
Specifications
- Model Number: GL56708350X100
- Brand: Grodan
- UPC: 847127002735
- Tubing Compatibility: 3/16 inch ID irrigation tubing
- Angle: 45 Degree (to reduce tubing kinks)
- Product Dimensions: 1 x 1 x 1 inches (approximate, per individual dripper)
- Item Weight: 1.6 ounces (for the 100/Bag package)
- Application: Regular top drip irrigation
Warranty and Support
Grodan products are manufactured to high standards. For specific warranty information or technical support regarding your Hydro Flow Drippers, please refer to the official Grodan website or contact their customer service directly.
Grodan Official Website: www.grodan.com (Please note: This is a placeholder URL. Refer to product packaging or official brand documentation for the correct website.)
Always retain your proof of purchase for any warranty claims.


