Introduction
This instruction manual provides essential information for the safe and efficient operation, maintenance, and troubleshooting of your Generac 6821 1.5-inch Clean Water Pump. Please read this manual thoroughly before assembly, operation, or maintenance to ensure proper use and to prevent injury or damage.
The Generac 6821 is a robust, gas-powered clean water pump designed for various water transfer applications, featuring a 79cc engine and a comprehensive accessory kit for immediate use.
Safety Information
WARNING: Failure to follow these safety instructions could result in serious injury or death.
- Always read and understand the entire manual before operating the pump.
- Operate the pump in a well-ventilated area to avoid carbon monoxide poisoning. Never operate indoors.
- Keep children and pets away from the operating area.
- Do not operate the pump with damaged hoses, connections, or if any parts are missing or broken.
- Wear appropriate personal protective equipment (PPE), including eye protection and gloves.
- Ensure the pump is on a stable, level surface during operation.
- Do not refuel the engine while it is running or hot. Allow it to cool before adding fuel.
- Keep flammable materials away from the pump during operation.
Package Contents
Verify that all items are present before beginning assembly or operation:
- Generac 6821 1.5-inch Clean Water Pump
- 10-foot Suction Hose
- 25-foot Discharge Hose
- Strainer
- Engine Oil
- Oil Funnel
- Handle Kit (and potentially wheel kit, depending on specific model variant)
- Owner's Manual (this document)
Setup
1. Unpacking and Inspection
Carefully remove all components from the packaging. Inspect for any shipping damage. If any parts are damaged or missing, do not operate the pump and contact customer support.
2. Handle Installation
Attach the carrying handle to the pump frame using the provided hardware. Ensure it is securely fastened for safe transport.
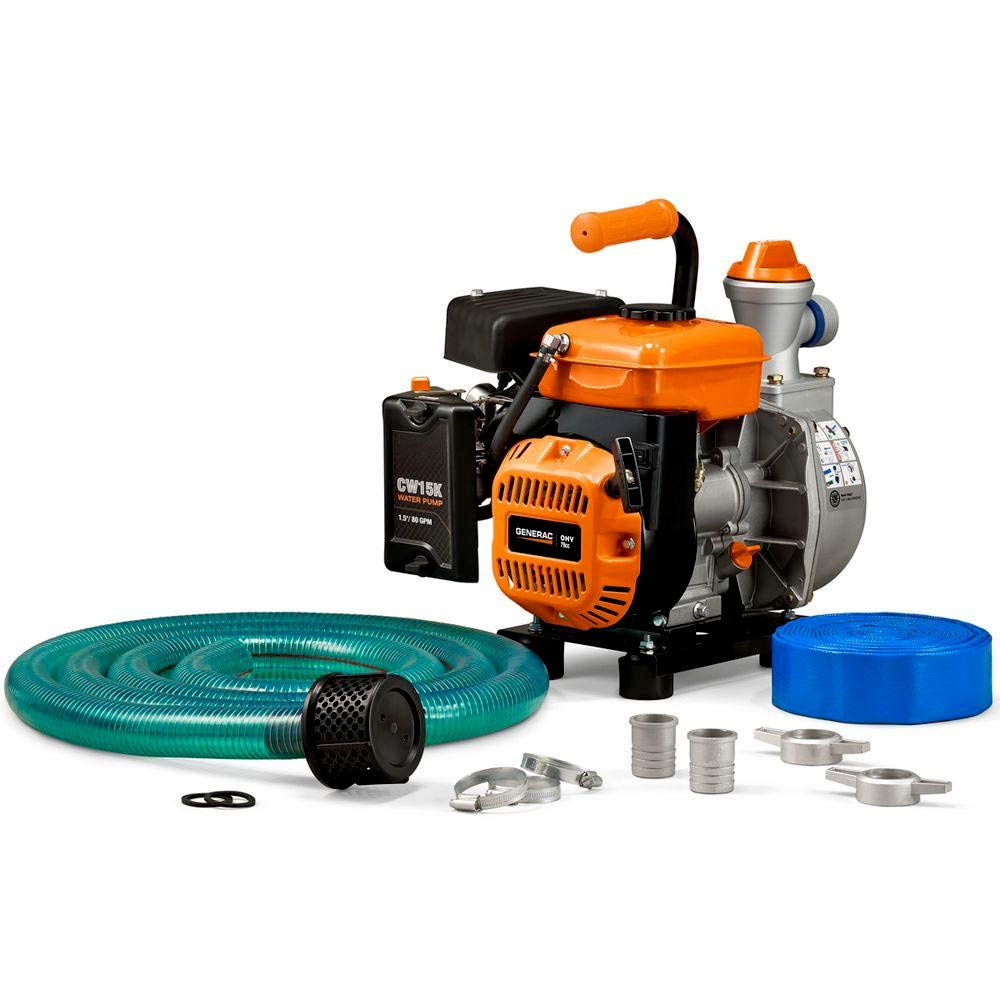
Image: The Generac 6821 Clean Water Pump shown with its orange handle securely attached to the top of the engine frame, ready for transport.
3. Add Engine Oil
The engine is shipped without oil. Before starting, add the supplied engine oil using the oil funnel. Locate the oil fill cap/dipstick, remove it, and slowly pour oil until it reaches the upper mark on the dipstick. Do not overfill.
4. Add Fuel
Fill the fuel tank with fresh, unleaded gasoline (minimum 87 octane). Do not use E85 fuel. Ensure the fuel cap is securely tightened after filling.

Image: A top-down view of the Generac 6821 pump, highlighting the orange fuel cap on the engine and the black pull-start handle.
5. Connect Hoses
Connect the suction hose to the pump's inlet port (often color-coded, e.g., blue for inlet). Attach the strainer to the end of the suction hose. Connect the discharge hose to the pump's outlet port (often color-coded, e.g., green for outlet). Ensure all connections are tight to prevent air leaks, which can affect priming and pump performance.

Image: A side view of the Generac 6821 pump, clearly showing the green-colored discharge port where the outlet hose connects.

Image: A front view of the Generac 6821 pump, highlighting the blue-colored suction port where the inlet hose connects.
6. Priming the Pump
The Generac 6821 features a custom funnel design for quick and easy priming. Remove the prime cap located on top of the pump housing. Fill the pump housing with clean water until it overflows. Replace the prime cap securely. The pump must be primed before each use to ensure it can draw water effectively.

Image: A close-up view of the orange cap labeled 'Prime' on the top of the pump housing, indicating the fill point for priming the pump.
Operating Instructions
1. Starting the Engine
- Ensure the pump is properly primed and all hoses are connected.
- Place the suction hose with the strainer into the water source.
- Turn the fuel valve to the 'ON' position.
- Move the choke lever to the 'CHOKE' position (if the engine is cold).
- Turn the engine switch to the 'ON' position.
- Pull the recoil starter handle firmly and smoothly until the engine starts.
- Once the engine starts, gradually move the choke lever to the 'RUN' position.
2. During Operation
Monitor the pump for consistent water flow and listen for any unusual noises. Ensure the suction hose remains submerged in water to prevent the pump from running dry, which can cause damage.
3. Stopping the Engine
- Turn the engine switch to the 'OFF' position.
- Turn the fuel valve to the 'OFF' position.
- Allow the engine to cool before handling or storing.
Maintenance
Regular maintenance ensures optimal performance and extends the life of your pump.
Engine Oil
Check the engine oil level before each use. Change the oil after the first 5 hours of operation, and then every 50 hours or annually, whichever comes first.
Air Filter
Inspect the air filter regularly and clean or replace it as needed, especially when operating in dusty conditions.
Spark Plug
Inspect the spark plug annually or every 100 hours. Clean or replace if necessary, ensuring the correct gap.
Pump Housing and Impeller
Periodically inspect the pump housing and impeller for debris or wear. Clean out any blockages to maintain efficient flow.
Storage
For long-term storage, drain the fuel tank and carburetor. Remove the spark plug and pour a small amount of engine oil into the cylinder, then pull the recoil starter a few times to distribute the oil. Clean the exterior of the pump and store it in a dry, protected area.
Troubleshooting
| Problem | Possible Cause | Solution |
|---|---|---|
| Engine will not start | No fuel, old fuel, low oil, choke position incorrect, engine switch off, fouled spark plug | Add fresh fuel, check oil level, adjust choke, turn engine switch ON, clean/replace spark plug |
| Pump not moving water | Not primed, air leak in suction hose, clogged strainer, suction hose not submerged | Prime pump, check hose connections, clean strainer, ensure suction hose is fully submerged |
| Reduced water flow | Partial blockage in hoses or impeller, air leak, worn impeller | Inspect and clear blockages, check hose connections, contact service for impeller inspection |
| Engine runs rough | Stale fuel, dirty air filter, incorrect spark plug gap | Drain and replace fuel, clean/replace air filter, adjust/replace spark plug |
Specifications
- Brand: Generac
- Model Number: 6821
- Power Source: Gas Powered
- Engine: Generac 79cc
- Product Dimensions (L x W x H): 17.2" x 12.1" x 16.5"
- Item Weight: 44 Pounds
- Maximum Flow Rate: 80 Gallons Per Minute
- Maximum Lifting Height: 26 Feet
- Material: Stainless Steel (pump components)
- UPC: 696471068214

Image: The Generac 6821 Clean Water Pump with its key dimensions (length, width, height) clearly indicated in inches.
Warranty
This Generac 6821 Clean Water Pump is covered by a 1-year manufacturer's warranty from the date of purchase. Please retain your proof of purchase for warranty claims. The warranty covers defects in materials and workmanship under normal use. It does not cover damage due to misuse, neglect, unauthorized modifications, or normal wear and tear.
Support
For technical assistance, parts, or warranty inquiries, please contact Generac customer support. Refer to the official Generac website or your purchase documentation for the most current contact information.
Online Resources: www.generac.com


