1. Safety Information
Always prioritize safety when operating the Goplus Air Texture Gun. This involves careful handling of pressurized containers, awareness of chemical exposure from materials, and understanding mechanical risks associated with spray equipment.
- Wear appropriate personal protective equipment (PPE) including safety glasses, gloves, and a respirator, especially in enclosed spaces.
- Ensure adequate ventilation in the work area to prevent inhalation of fumes and dust.
- Never point the spray gun at yourself or others.
- Always disconnect the air supply before cleaning, performing maintenance, or changing nozzles.
- Keep the work area clean and free of obstructions.
- Read and understand the safety data sheets (SDS) for all materials being sprayed.
- Do not exceed the maximum recommended air pressure for the gun.
2. Product Overview
The Goplus 1.45 Gallon Air Texture Gun is designed for applying various textures to surfaces such as walls and ceilings. It features a durable construction, a large capacity hopper for continuous operation, and adjustable settings for precise control over the spray pattern and material flow.
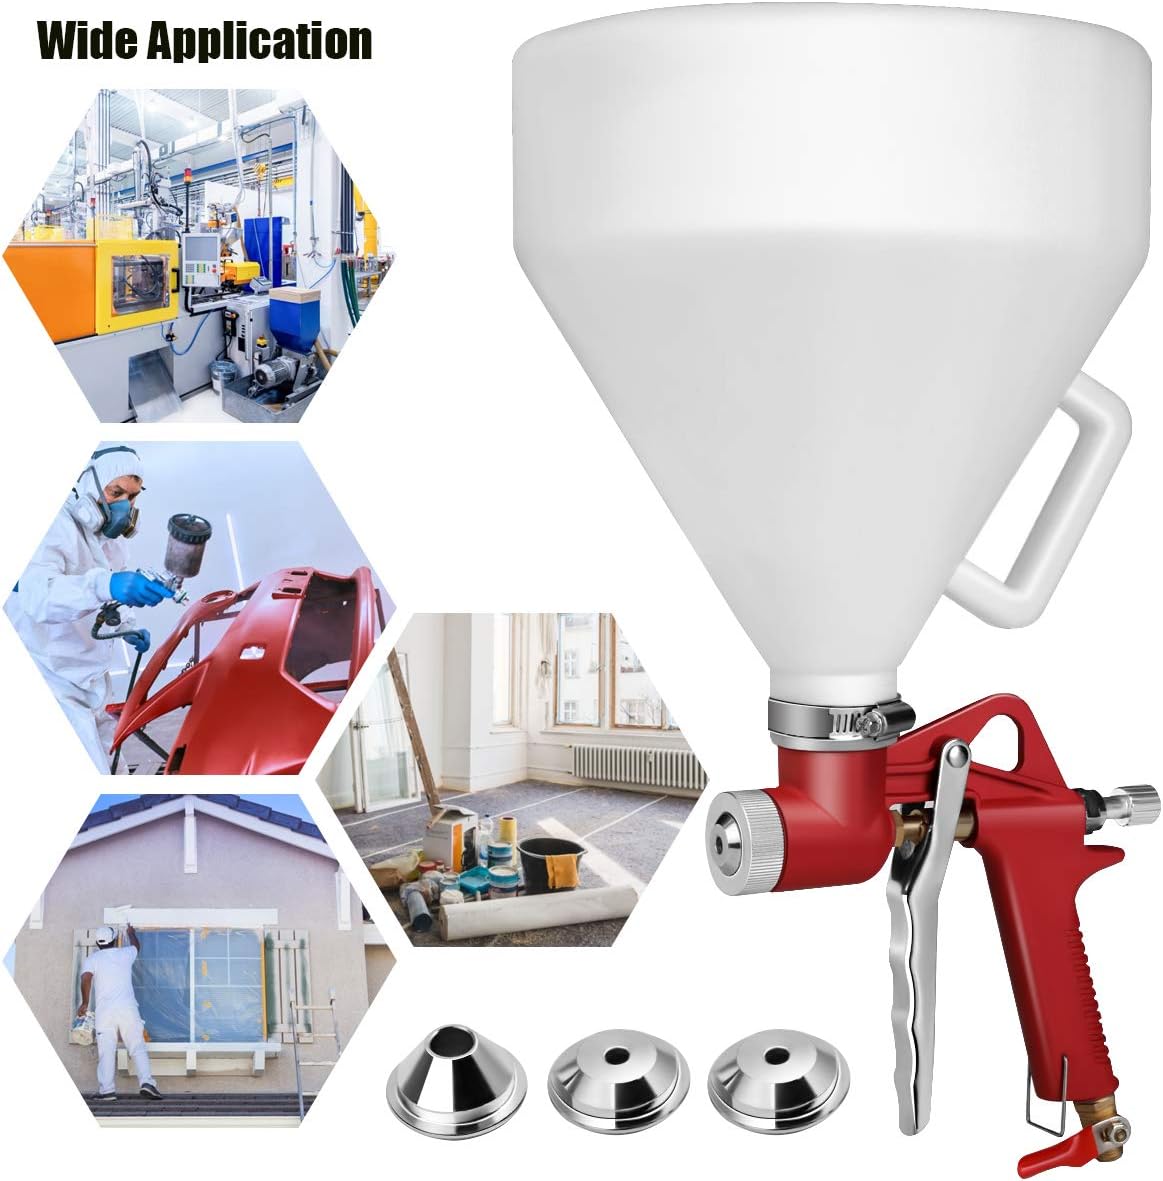
Figure 2.1: The Goplus Air Texture Gun with its 1.45-gallon hopper and three interchangeable nozzles (4mm, 6mm, 8mm). The image also illustrates its wide application range, including industrial settings, automotive painting, and home renovation projects like wall and ceiling texturing.
Key Features:
- 1.45 Gallon Hopper: Provides ample capacity for extended spraying without frequent refills.
- Three Interchangeable Nozzles: Includes 4mm, 6mm, and 8mm nozzles to achieve various texture patterns (e.g., orange peel, knockdown, stucco, popcorn).
- Adjustable Flow Control: An easy-pull swing trigger and flow control knob allow for precise adjustment of material output and air pressure.
- Ergonomic Design: Lightweight (approximately 3.5 lbs) with a comfortable, non-slip handle for reduced fatigue during prolonged use.
- Durable Construction: Made from aluminum and plastic for longevity.

Figure 2.2: A user demonstrating the Goplus texture spray gun in action, applying texture to a wall. This highlights the product's primary function for home improvement and DIY projects.
3. Setup
Proper setup is essential for optimal performance and safety. Follow these steps before operating the texture gun:
- Unpack Components: Carefully remove all parts from the packaging. Verify that the hopper spray gun, 4mm nozzle, 6mm nozzle, and 8mm nozzle are present.
- Attach Nozzle: Select the desired nozzle (4mm for fine textures like orange peel, 6mm for medium, 8mm for coarse textures like knockdown or stucco). Screw the chosen nozzle onto the gun's outlet securely.
- Connect Air Compressor: Attach an air hose from your air compressor to the enclosed air inlet on the texture gun. Ensure a secure connection to prevent air leaks. A quick-disconnect fitting (not included) is recommended for convenience.
- Prepare Material: Mix your texturing material (e.g., drywall mud, stucco mix) to the appropriate consistency. For drywall mud, a pancake batter consistency is often recommended, requiring more water than typically used for patching. Important: Practice on a scrap piece of drywall to determine the ideal material consistency and air pressure for your desired texture.
- Fill Hopper: Pour the prepared texturing material into the 1.45-gallon hopper. Do not overfill.

Figure 3.1: A visual guide illustrating the setup process: inserting the hopper, choosing a nozzle, and preparing for spraying. This image demonstrates the ease of assembly and readiness for operation.
4. Operation
Operating the Goplus Air Texture Gun requires practice to achieve desired results. Always wear appropriate PPE.
- Set Air Pressure: Connect the air compressor and set the pressure. A recommended range is 50-70 PSI, but adjust as needed for your material consistency and desired texture.
- Test Spray: Before applying to your final surface, perform a test spray on a scrap piece of material (e.g., cardboard, spare drywall). This allows you to adjust air pressure, material consistency, and nozzle choice.
- Begin Spraying: Hold the gun approximately 12-24 inches from the surface, depending on the desired texture and nozzle size. Pull the trigger to begin spraying.
- Caution: When first pulling the trigger, a small glob of material may be expelled. Avoid pointing the gun directly at your work surface at the very start.
- Maintain a consistent distance and speed for an even application.
- Adjust the flow control knob on the gun to fine-tune the material output.
- Achieving Texture:
- For Orange Peel texture, use the smallest nozzle (4mm) and a finer spray.
- For Knockdown texture, apply the material with the 6mm or 8mm nozzle, then allow it to partially dry before lightly flattening the peaks with a knockdown knife.
- For Popcorn Ceiling texture, use the largest nozzle (8mm) and a thicker material consistency.
- Refilling: When the hopper is low, disconnect the air supply before refilling with prepared material.
- Breaks: If taking a break, ensure the gun is clean or submerged in water to prevent material from drying and clogging.

Figure 4.1: The texture gun in operation, demonstrating an even spray pattern. This image emphasizes the controlled application of material to achieve a smooth finish and minimize waste.


Figure 4.2: Examples of common textures achievable with the gun: Orange Peel (left), Knockdown (center), and Popcorn (right). These images provide a visual reference for desired outcomes.
5. Maintenance
Thorough cleaning after each use is critical to prevent clogging and ensure the longevity of your texture gun.
- Disconnect Air Supply: Always disconnect the air hose from the gun before cleaning.
- Empty Hopper: Remove any remaining material from the hopper.
- Rinse Hopper: Fill the hopper with warm water (or appropriate cleaning solution for your material) and spray it through the gun until the water runs clear. Repeat as necessary.
- Clean Nozzles: Remove the nozzle and clean it thoroughly with a brush and water. Ensure all material residue is removed from the nozzle opening.
- Clean Gun Body: Use a brush and water to clean the interior and exterior of the gun body, paying close attention to the material path and air inlet.
- Disassemble (if necessary): For stubborn clogs or deep cleaning, carefully disassemble the gun according to the manufacturer's instructions (if provided in a separate detailed manual). Clean individual components and reassemble.
- Dry and Store: Allow all components to dry completely before reassembling and storing the gun in a clean, dry place.
Regular maintenance will ensure your Goplus Air Texture Gun remains in optimal working condition for many projects.
6. Troubleshooting
Refer to the table below for common issues and their solutions:
| Problem | Possible Cause | Solution |
|---|---|---|
| No spray or weak spray |
|
|
| Uneven spray pattern |
|
|
| Material drips or globs |
|
|
| Air leaks from connections |
|
|
7. Specifications
Detailed specifications for the Goplus 1.45 Gallon Air Texture Gun:
| Feature | Detail |
|---|---|
| Model Number | GO-EP19619-SU |
| Brand | Goplus |
| Tank Volume | 1.45 Gallons |
| Color | White (Hopper), Red (Gun Body) |
| Material | Aluminum, Plastic |
| Recommended Uses | Painting, Furniture, Drywall Texturing (Orange Peel, Stucco Mud, Knockdown, Popcorn Ceiling) |
| Included Components | Hopper Spray Gun, 4mm Nozzle, 6mm Nozzle, 8mm Nozzle |
| Overall Size (L x W x H) | Approximately 25" x 20" x 20" |
| Net Weight | 3.5 lbs |
| Feeding Mode | Gravity Feeding |
| Recommended Pressure | 4-6 CFM / 50-70 PSIG |
| Air Inlet | 1/4" Male Inlet |
| Nozzle Sizes | 4mm (medium viscosity), 6mm (medium viscosity), 8mm (high viscosity) |

Figure 7.1: An image displaying the Goplus Air Texture Gun alongside its key specifications, including dimensions, weight, material, and nozzle sizes, providing a quick reference for users.
8. Warranty and Support
For warranty information, technical support, or to inquire about replacement parts, please contact Goplus customer service directly. Refer to the product packaging or the official Goplus website for the most current contact details.
It is recommended to retain your purchase receipt as proof of purchase for any warranty claims.