1. Introduction
This manual provides essential information for the proper installation, operation, maintenance, and troubleshooting of the Lennox 24L18 Expansion Valve. This component is designed for use in HVAC systems to regulate the flow of refrigerant into the evaporator, ensuring optimal system performance and efficiency. Please read this manual thoroughly before attempting any procedures.
2. Safety Information
WARNING: Improper installation, adjustment, alteration, service, or maintenance can cause property damage, injury, or death. Read all instructions thoroughly before proceeding. This device operates with refrigerants under high pressure and involves electrical connections. Only qualified HVAC technicians should install, service, or remove this component.
- Always disconnect power to the HVAC system before working on any components.
- Wear appropriate personal protective equipment (PPE), including safety glasses and gloves.
- Handle refrigerants with care and in accordance with local regulations.
- Ensure proper ventilation when working with refrigerants.
- Do not attempt to repair a damaged valve; replace it with an authorized Lennox part.
3. Product Overview
The Lennox 24L18 is a thermostatic expansion valve (TXV) designed to precisely control the superheat of refrigerant vapor leaving the evaporator. This control is crucial for maximizing the efficiency of the refrigeration cycle and protecting the compressor from liquid slugging. The valve features a sweat inlet connection type and has two ports for refrigerant flow.
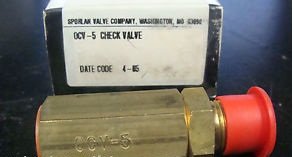
Figure 1: A close-up view of the Lennox 24L18 Expansion Valve, showing its compact design and connection points.
4. Setup and Installation
Installation of the Lennox 24L18 Expansion Valve requires specialized tools and knowledge of HVAC systems. It is strongly recommended that installation be performed by a certified HVAC technician.
4.1 Pre-Installation Checks
- Verify that the 24L18 valve is the correct replacement part for the specific HVAC system.
- Inspect the valve for any signs of shipping damage.
- Ensure all necessary tools and materials are available, including brazing equipment, nitrogen, vacuum pump, and refrigerant gauges.
4.2 Installation Steps (General)
- Isolate the refrigerant circuit and recover existing refrigerant according to environmental regulations.
- Carefully remove the old expansion valve.
- Clean and deburr the pipe ends where the new valve will be connected.
- Braze the new Lennox 24L18 valve into position, ensuring a proper nitrogen purge to prevent oxidation. Protect the valve body from excessive heat during brazing.
- Install the sensing bulb securely to the suction line, typically at the 4 or 8 o'clock position, and insulate it properly.
- Perform a thorough leak test using nitrogen.
- Evacuate the system to a deep vacuum to remove non-condensable gases and moisture.
- Recharge the system with the correct type and amount of refrigerant.
- Verify proper superheat and subcooling settings according to the system manufacturer's specifications.
5. Operating Principles
The Lennox 24L18 Expansion Valve is an automatic control device. Once properly installed and the HVAC system is operational, the valve continuously adjusts the refrigerant flow based on the superheat detected by its sensing bulb. There are no user-adjustable controls on this specific valve model. Its operation is integral to the overall refrigeration cycle, maintaining optimal evaporator performance without direct user intervention.
6. Maintenance
The Lennox 24L18 Expansion Valve itself is a sealed component and generally requires no direct maintenance. However, its proper function relies on the overall health of the HVAC system. Regular system maintenance by a qualified technician is essential.
- Annual System Check: Have a qualified technician inspect the entire HVAC system annually. This includes checking refrigerant levels, system pressures, and verifying proper superheat and subcooling.
- Leak Detection: Periodically check for refrigerant leaks around the valve connections.
- Sensing Bulb Integrity: Ensure the sensing bulb remains securely attached and properly insulated on the suction line. Damage or displacement can lead to incorrect valve operation.
- Filter Drier Replacement: A clogged filter drier upstream of the TXV can restrict flow and cause valve malfunction. Replace filter driers as part of routine maintenance or when indicated by system performance.
7. Troubleshooting
Malfunctions of an expansion valve often manifest as issues with the overall HVAC system's cooling or heating performance. Troubleshooting should always be performed by a qualified HVAC technician.
7.1 Common Symptoms and Potential Causes
- Low Suction Pressure / High Superheat: May indicate a restricted or underfeeding expansion valve. Possible causes include a clogged valve, low refrigerant charge, or a detached/improperly insulated sensing bulb.
- High Suction Pressure / Low Superheat (or Flooding): May indicate an overfeeding or stuck-open expansion valve. Possible causes include a damaged valve, oversized valve, or a sensing bulb that has lost its charge.
- System Hunting (Fluctuating Pressures/Temperatures): The valve may be rapidly opening and closing. This can be caused by an improperly sized valve, incorrect superheat setting, or issues with the sensing bulb's contact or insulation.
- Noisy Operation: Hissing or whistling sounds from the valve can indicate a restriction or improper refrigerant flow.
If any of these symptoms are observed, contact a professional HVAC technician for diagnosis and repair. Attempting to repair or replace the valve without proper training and tools can lead to further damage or injury.
8. Specifications
| Attribute | Value |
|---|---|
| Manufacturer | Lennox |
| Part Number | 24L18 |
| Item Model Number | 24L18 |
| Item Weight | 1.19 pounds |
| Inlet Connection Type | Sweat |
| Number of Ports | 2 |
9. Warranty Information
Warranty coverage for the Lennox 24L18 Expansion Valve is provided by Lennox Corporation. Specific warranty terms and conditions may vary based on the purchase date, installation, and region. Please refer to the original product packaging, your purchase receipt, or contact Lennox customer support directly for detailed warranty information.
10. Support
For technical assistance, service, or to locate a qualified Lennox HVAC technician, please visit the official Lennox website or contact their customer support. Do not attempt to perform repairs or modifications beyond the scope of this manual, as this may void your warranty and could lead to system damage or personal injury.
Lennox Corporation is not responsible for damages resulting from improper installation or unauthorized service.


