Introduction
Welcome to the instruction manual for your Pioneer TS-WH500A Compact Active Subwoofer. This document provides essential information for the safe and effective use of your new audio system component. The TS-WH500A utilizes Horizontal Vertical Transforming (HVT) technology to deliver powerful, wide-range bass from a compact, shallow design.
HVT technology transforms the horizontal movement of a voice coil into vertical movement of a woofer diaphragm. This unique mechanism positions the magnet and voice coil of the dual motor structure horizontally, allowing for vertically moving dual speaker diaphragms. The combined effective surface area is equivalent to a conventional 8-inch subwoofer, firing bipolarly to increase output and cancel destructive vibrations. This innovation results in a subwoofer system with significantly reduced physical depth, while maintaining greater excursion and linearity for superior bass reproduction and natural sound quality.
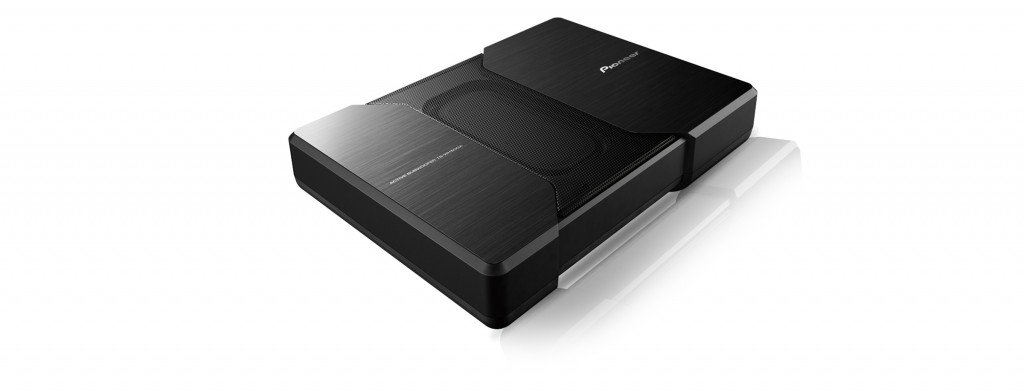
Image: The Pioneer TS-WH500A Compact Active Subwoofer, showcasing its sleek, low-profile design suitable for discreet installation in vehicles.
Important Safety Instructions
- Read all instructions carefully before installation and use.
- Keep this manual for future reference.
- Do not expose the unit to moisture or water.
- Ensure proper ventilation to prevent overheating.
- Disconnect the vehicle's negative battery terminal before installation to prevent electrical shorts.
- Consult a qualified technician if you are unsure about any installation steps.
Package Contents
- (1) HVT Active Subwoofer Enclosure
- (1) Wiring harness
- (1) Signal Input Wire Harness
- (1) 10A ATO fuse (installed on power wire)
- (1) 0.5A glass fuse (installed in the remote turn-on wire fuse holder)
Key Product Features
- Built-in 150 W Max (50 W RMS) MOSFET amplifier
- 7-1/8" x 3-7/8" Rectangular HVT (Horizontal Vertical Transforming) Dual Motor Bipolar Subwoofer (8-1/4" woofer effective surface area)
- High compliance rubber surround
- Compact enclosure for installation flexibility (13.4" W x 9.8" D x 2.4" H)
Setup and Installation
The Pioneer TS-WH500A is designed for flexible installation due to its compact size. Common installation locations include under seats or in small trunk spaces.
Wiring Connections
- Power Connection: Connect the power wire (with the 10A ATO fuse) directly to the vehicle's positive battery terminal. Ensure a secure connection.
- Ground Connection: Connect the ground wire to a clean, unpainted metal surface of the vehicle chassis.
- Remote Turn-On: Connect the remote turn-on wire (with the 0.5A glass fuse) to the remote output of your car stereo or an ignition-switched 12V source.
- Signal Input: Use the provided Signal Input Wire Harness. If your head unit has RCA pre-outs, connect RCA cables (not included) to the female RCA plugs on the harness. If using speaker-level inputs, tap into the rear speaker outputs of your aftermarket radio deck.
Mounting
Securely mount the subwoofer enclosure using appropriate hardware (not included) to prevent movement during vehicle operation. Ensure the mounting location allows for adequate air circulation around the unit.
Operating Instructions
Initial Power-On and Adjustment
- After completing all connections, reconnect the vehicle's negative battery terminal.
- Turn on your car stereo. The subwoofer should power on automatically via the remote turn-on signal.
- Gain Control: Locate the gain control on the subwoofer or its wired remote (if applicable). Start with the gain set to minimum.
- Crossover Frequency: Adjust the low-pass filter (LPF) to blend the subwoofer's output with your main speakers. A common starting point is 80-100 Hz.
- Phase Switch: Experiment with the phase switch (0° or 180°) to find the setting that provides the most cohesive bass response with your main speakers.
- Gradually increase the gain until the bass output is balanced with the rest of your audio system, avoiding distortion.
Maintenance
Care and Cleaning
- Regularly inspect all wiring connections for tightness and corrosion.
- Clean the exterior of the subwoofer with a soft, dry cloth. Do not use abrasive cleaners or solvents.
- Ensure no objects obstruct the subwoofer's diaphragm or ventilation areas.
Troubleshooting
Common Issues and Solutions
| Problem | Possible Cause | Solution |
|---|---|---|
| No Sound | No power; incorrect wiring; blown fuse; no signal input. | Check power, ground, and remote turn-on connections. Verify fuses. Ensure signal cables are properly connected. |
| Distorted Sound | Gain set too high; incorrect crossover; damaged speaker. | Reduce gain. Adjust crossover frequency. Inspect speaker for physical damage. |
| Weak Bass | Gain too low; phase incorrect; LPF too high/low. | Increase gain. Adjust phase switch. Optimize LPF setting. |
Technical Specifications
- Model: TS-WH500A
- Speaker Type: Active Subwoofer
- Woofer Diameter: 7-1/8" x 3-7/8" Rectangular HVT (8-1/4" effective surface area)
- Maximum Output Power: 150 Watts
- RMS Power: 50 Watts
- Impedance: 4 Ohm
- Material: Aluminum
- Product Dimensions (W x D x H): 13.4" x 9.8" x 2.4"
- Item Weight: 9.69 Pounds
- Connectivity Technology: RCA (Wired)
- Power Source: Corded Electric (Vehicle 12V)
Warranty and Support
Warranty Information
This Pioneer product is covered by a 1-year warranty from the date of purchase. Please retain your proof of purchase for warranty claims. The warranty covers defects in materials and workmanship under normal use. It does not cover damage caused by improper installation, accident, misuse, abuse, neglect, or unauthorized modification.
Customer Support
For technical assistance, troubleshooting beyond this manual, or warranty service, please contact Pioneer customer support. Refer to the official Pioneer website for the most current contact information and support resources.
You can visit the official Pioneer store for more information: Pioneer Official Store