1. Introduction
Thank you for choosing the CRL Nylon Pocket Door Guide 1550MM. These guides are designed to enhance the functionality of your pocket doors by preventing unwanted swinging during opening and closing. This manual provides essential information for proper installation, operation, and maintenance to ensure optimal performance and longevity of your product.
2. Safety Information
- Always wear appropriate personal protective equipment (PPE), such as safety glasses, during installation.
- Ensure the work area is well-lit and clear of obstructions.
- Use the correct tools for the job to avoid injury or damage to the product.
- Keep small parts, such as screws, out of reach of children.
- If you are unsure about any step of the installation process, consult a qualified professional.
3. Package Contents
Verify that all components are present before beginning installation:
- Two (2) CRL Nylon Pocket Door Guides
- Mounting Screws (quantity as supplied)
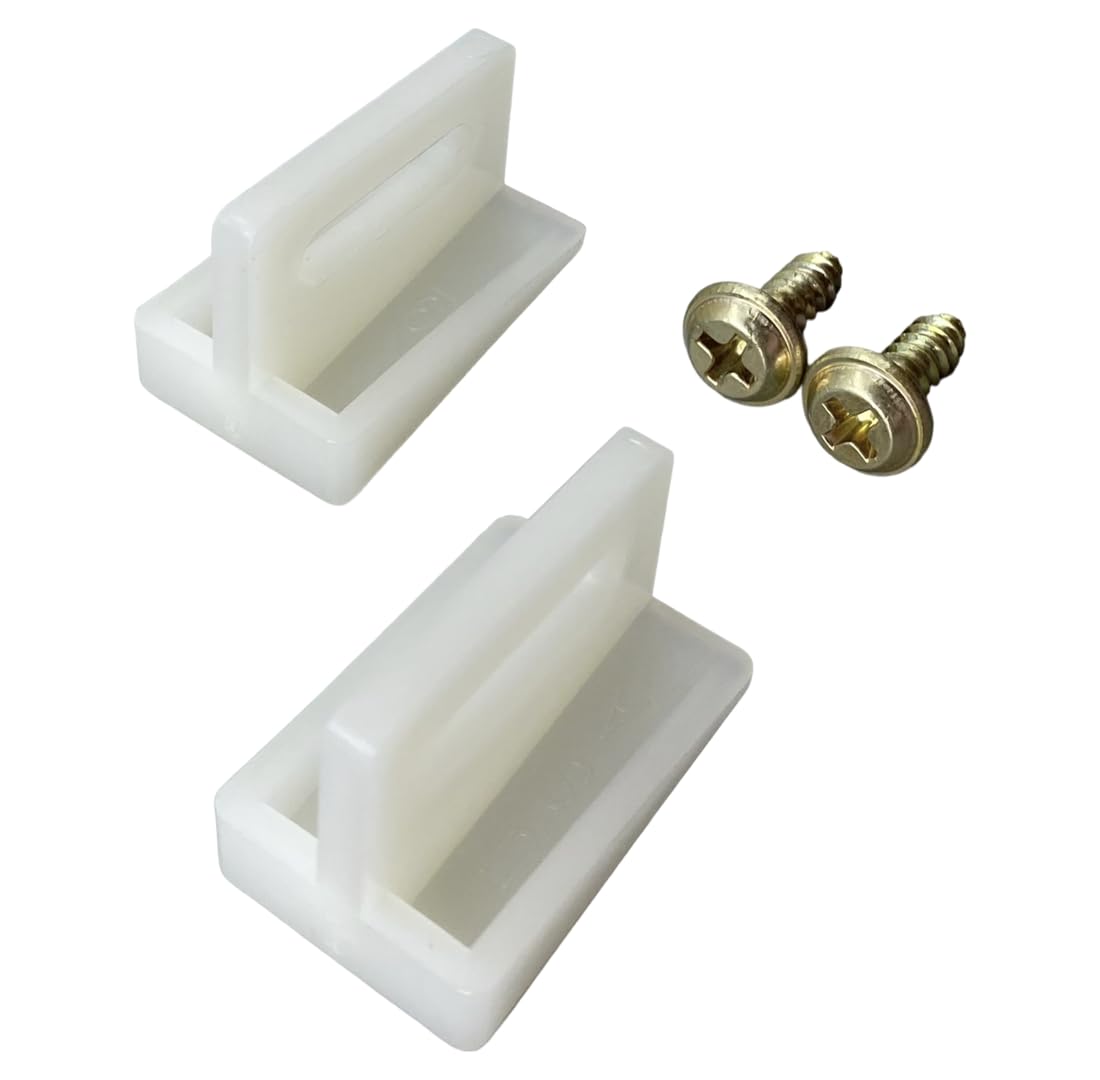
Image 3.1: Contents of the CRL Nylon Pocket Door Guide package, showing two guides and two screws.
4. Setup and Installation
The CRL Nylon Pocket Door Guides are designed for straightforward installation. They attach to the door opening near the floor to guide the pocket door and prevent it from swinging.
Tools Required:
- Pencil
- Measuring Tape
- Drill with appropriate drill bit for pilot holes (if necessary)
- Screwdriver (Phillips head recommended)
Installation Steps:
- Determine Placement: With the pocket door fully closed, identify the ideal location on the floor of the door opening where the guide will prevent the door from swinging. The guide should be positioned so that the door slides smoothly within its channel without excessive friction. Typically, this is centered with the door's thickness.
- Mark Mounting Points: Place one guide in the desired position. Using a pencil, mark the locations for the mounting screws through the pre-drilled holes on the guide's base.
- Drill Pilot Holes (Optional but Recommended): Depending on the floor material, it may be beneficial to drill small pilot holes at the marked points. Ensure the drill bit is slightly smaller than the screw diameter to allow the screws to grip firmly.
- Secure the Guide: Align the guide with the pilot holes (if drilled) and use the provided mounting screws to firmly attach the guide to the floor. Do not overtighten the screws.
- Repeat for Second Guide (if applicable): If your installation requires two guides for wider doors or specific configurations, repeat steps 1-4 for the second guide, ensuring symmetrical placement for balanced door operation.

Image 4.1: Bottom view of the guides, showing the screw holes for mounting to the floor.

Image 4.2: A single guide with a screw, illustrating the mounting method.
5. Operating Instructions
Once installed, the CRL Nylon Pocket Door Guides function automatically. As the pocket door is opened or closed, its bottom edge will pass through the channel of the guide. The nylon material provides a smooth, low-friction surface, allowing the door to slide freely while preventing lateral movement or swinging. This ensures the door remains aligned within its track and operates quietly.
6. Maintenance
The CRL Nylon Pocket Door Guides require minimal maintenance to ensure continued smooth operation:
- Cleaning: Periodically wipe the guides with a damp cloth to remove any dust or debris that may accumulate. Avoid using harsh abrasive cleaners.
- Check Screws: Every few months, inspect the mounting screws to ensure they remain tight. Retighten if necessary to prevent the guide from becoming loose.
- Inspect for Wear: While nylon is durable, check the guides for any signs of excessive wear or damage. If a guide is significantly worn or broken, it should be replaced to maintain proper door function.
7. Troubleshooting
| Problem | Possible Cause | Solution |
|---|---|---|
| Door still swings or wobbles | Guides are loose or improperly positioned. | Ensure guides are securely fastened and correctly aligned with the door's path. Adjust position if needed. |
| Door binds or scrapes against guide | Guide is too tight or misaligned. | Check guide alignment. Ensure there is a small clearance for the door to slide freely without binding. |
| Guide appears worn or damaged | Normal wear and tear or impact. | Replace the worn or damaged guide with a new CRL Nylon Pocket Door Guide 1550MM. |
8. Specifications
- Manufacturer: CR Laurence
- Part Number: 1550MM
- Item Weight: 0.317 ounces
- Product Dimensions: 1.25 x 0.75 x 1 inches (approximate)
- Material: Nylon
- Mounting Type: Door Mount (floor)
- Included Components: 2 guides, mounting screws
9. Warranty Information
This product is covered by the standard manufacturer's warranty against defects in materials and workmanship. For specific warranty terms and conditions, please refer to the documentation provided at the time of purchase or contact CR Laurence customer support.
10. Support and Contact
If you have any questions, require assistance with installation, or need to report a problem, please contact CR Laurence customer support:
- Website: www.crlaurence.com
- Phone: Refer to the CR Laurence website for regional contact numbers.