1. Product Overview
The Mediasonic ProBox HND1-SU3 is a single-bay docking station designed for 2.5-inch and 3.5-inch SATA I, II, and III hard disk drives. It offers high-speed data transfer via USB 3.0, supporting UASP for enhanced performance on compatible Windows and Mac OSX systems. This docking station also features SMART Power Sync for efficient power management.

Image: Front view of the Mediasonic HND1-SU3 docking station, showing the drive slot and LED indicator.
Key Features:
- Supports all 2.5" & 3.5" SATA I / II / III hard disk drives up to 10TB capacity.
- Features SATA 3 (6.0Gbps) hard drive speed and UASP (USB Attached SCSI Protocol) for faster transfer rates.
- Maximum transfer rate up to 5.0 Gbps via USB 3.0.
- Backward compatible with USB 2.0 (up to 480Mbps transfer rate).
- Compatible with Mac USB 3, Hot-Swappable, Plug and Play functionality for PC / Mac platforms.
- Equipped with LED Light Status indicators and an On / Off Power Switch.
- Supports SMART (Self-Monitoring, Analysis and Reporting Technology) and Power Sync.
2. Setup Guide
Follow these steps to set up your Mediasonic HND1-SU3 docking station.
Package Contents:
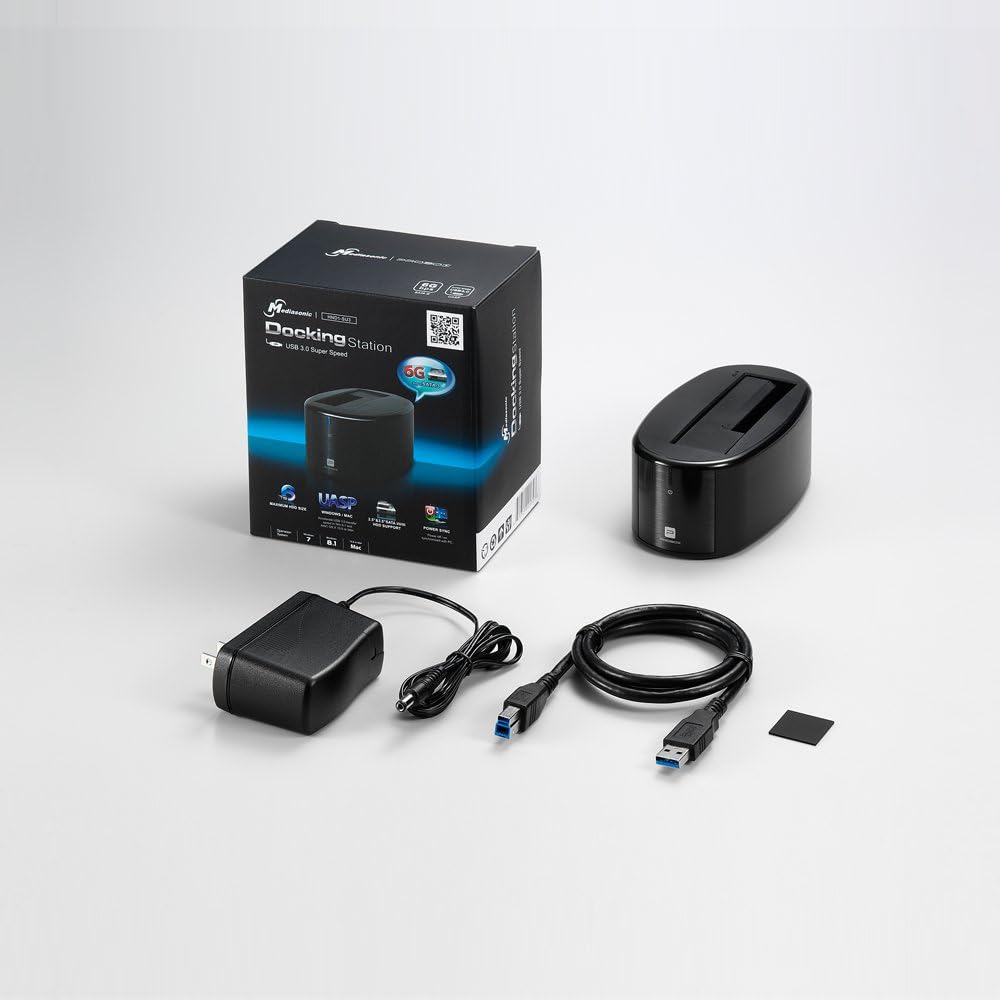
Image: The package contents include the docking station, power adapter, USB 3.0 cable, and a small accessory.
- Mediasonic HND1-SU3 Docking Station
- USB 3.0 Cable
- Power Adapter
- User Manual (this document)
Connection Steps:
- Connect Power: Plug the provided power adapter into the DC/IN port on the back of the docking station, then plug the other end into a wall outlet.
- Connect to Computer: Connect one end of the USB 3.0 cable to the USB port on the back of the docking station, and the other end to an available USB 3.0 port on your computer.
- Insert Hard Drive: Gently slide your 2.5-inch or 3.5-inch SATA hard drive into the top slot of the docking station until it is firmly seated. Ensure the SATA connectors align correctly.
- Power On: Press the power button located on the back or front of the docking station. The LED indicator will illuminate, indicating the device is powered on.
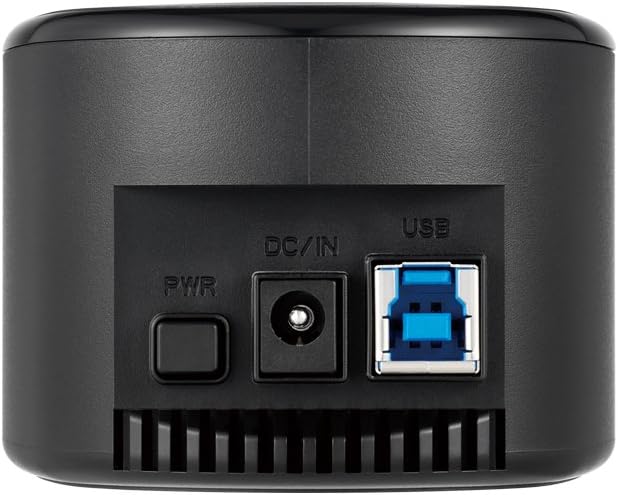
Image: Rear view of the docking station showing the PWR button, DC/IN port, and USB 3.0 port.
3. Operating Instructions
Once set up, the Mediasonic HND1-SU3 is designed for simple plug-and-play operation.
Inserting and Removing Drives:
- Inserting: Align the SATA connectors of your hard drive with the slot and gently push down until the drive is fully seated. Do not force the drive.
- Removing: Before removing a drive, ensure all data transfer is complete. For Windows, use the "Safely Remove Hardware and Eject Media" icon in the system tray. For Mac, drag the drive icon to the Trash or use "Eject" from the Finder. Once safely ejected, gently pull the hard drive straight up from the slot.
Drive Recognition and Usage:
- Upon successful connection and power-on, your operating system should automatically detect the hard drive.
- If the drive is new or unformatted, it may appear as "Unallocated Space" in Disk Management (Windows) or Disk Utility (Mac). You will need to initialize and format the drive before use.
- The LED indicator on the front of the docking station will typically show blue for power and may blink during data activity.
- The UASP feature enhances USB 3.0 performance, allowing for faster data transfer speeds, especially with SSDs. Ensure your operating system and USB 3.0 controller support UASP for optimal performance.
- SMART Power Sync allows the docking station to synchronize its power state with your computer, potentially saving energy.
4. Maintenance
Proper maintenance ensures the longevity and reliable operation of your docking station.
- Cleaning: Use a soft, dry cloth to wipe the exterior of the docking station. Do not use liquid cleaners or aerosols. Ensure no dust or debris accumulates in the drive slot.
- Storage: When not in use, store the docking station in a cool, dry place away from direct sunlight and extreme temperatures.
- Handling: Avoid dropping or subjecting the docking station to strong impacts, as this can damage internal components.
- Ventilation: Ensure the docking station has adequate ventilation during operation to prevent overheating, especially during prolonged data transfers.
5. Troubleshooting
If you encounter issues with your docking station, refer to the following common problems and solutions.
Common Issues and Solutions:
- Drive Not Detected:
- Ensure the power adapter is securely connected and the docking station is powered on.
- Verify the USB cable is firmly connected to both the docking station and your computer. Try a different USB port on your computer.
- Confirm the hard drive is properly seated in the docking station slot.
- Check Disk Management (Windows) or Disk Utility (Mac) to see if the drive is detected but unformatted or unallocated.
- Test with a different hard drive to rule out a drive issue.
- Slow Transfer Speeds:
- Ensure you are connected to a USB 3.0 port on your computer. USB 2.0 ports will result in significantly slower speeds.
- Verify your operating system and USB controller support UASP for optimal performance.
- Check the health of your hard drive. A failing drive can cause slow performance.
- Avoid transferring many small files simultaneously, as this can be slower than transferring large files.
- Docking Station Disconnects Randomly:
- Ensure the power connection is stable and not loose.
- Try a different USB cable or USB port on your computer.
- Check for updated USB drivers for your computer's motherboard.
- Ensure the docking station is not overheating. Provide adequate ventilation.
6. Specifications
| Feature | Detail |
|---|---|
| Model Number | HND1-SU3 |
| Supported Drive Types | 2.5" / 3.5" SATA I / II / III HDD/SSD |
| Max Capacity | Up to 10TB |
| Interface | USB 3.0 (backward compatible with USB 2.0) |
| Data Transfer Rate (USB 3.0) | Up to 5.0 Gbps |
| Data Transfer Rate (USB 2.0) | Up to 480 Mbps |
| UASP Support | Yes |
| SMART Power Sync | Yes |
| Hot-Swappable | Yes |
| Plug and Play | Yes |
| Compatible OS | Windows 7 / 8 / 8.1 / 10, Mac OSX 10.8 or later |
| Dimensions (LxWxH) | 5.71 x 2.26 x 3.03 inches |
| Item Weight | 7.7 ounces |
| Material | ABS Plastic |
| Power Source | AC Adapter |
7. Warranty and Support
For detailed warranty information and technical support, please visit the official Mediasonic website or contact their customer service.
You can often find FAQs, driver downloads, and contact information on the manufacturer's support page.
Online Resources: Visit the Mediasonic Store on Amazon or search for "Mediasonic HND1-SU3 support" online.